
1 — Cutting, Interfacing and Pre-Pressing


First of all you will need to trace off the pattern in the size you would like to make. If you would like to make a short sleeved Bloom Shirt or Dress you will need to transfer the short sleeve markings to your size. Simply extend the 'short sleeve cut length indication line' out to meet the seam edge of your size. Then, transfer the turn back angle and notch point, and the seam allowance angle and notch point to the seam edge of your size.
Trace around your pattern pieces on to your main fabric and cut them out. Keep the pieces that need to be interfaced to one side, we will cut these out in the next step.
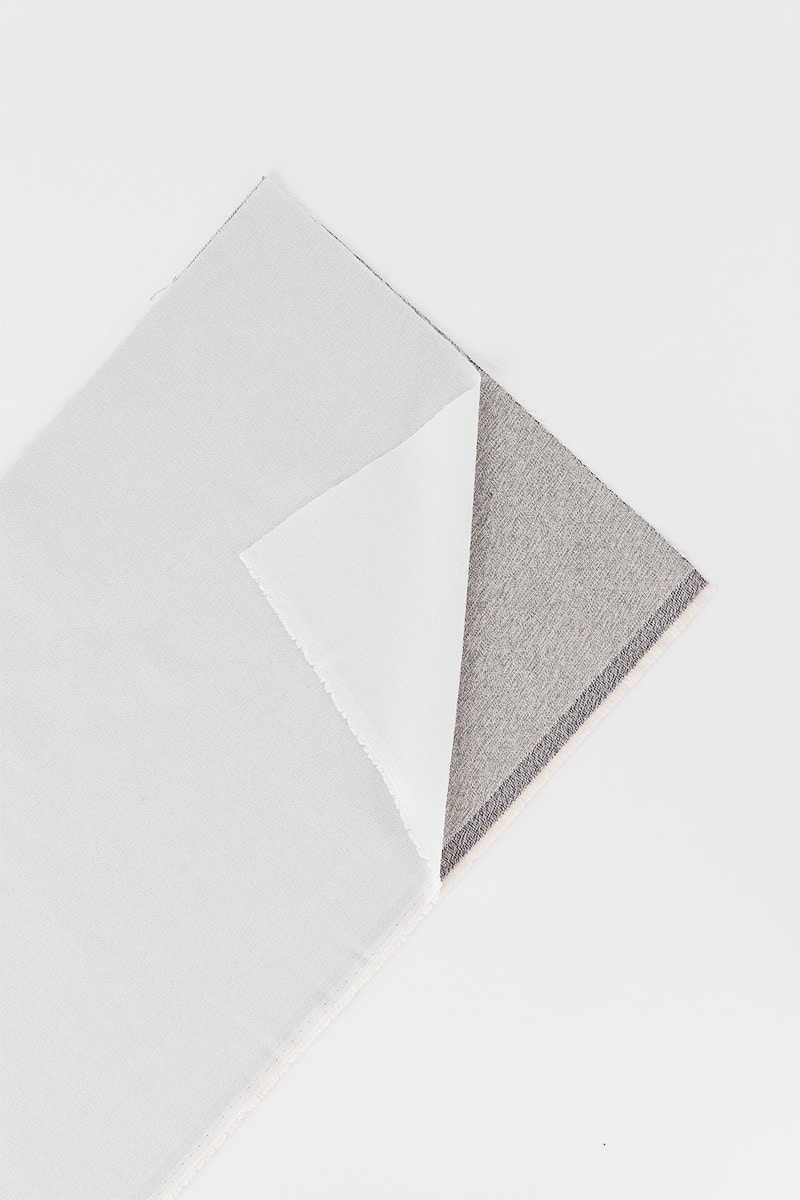
To ensure accuracy, and to save time, we recommend block fusing your upper collar piece (if sewing the pointed or half penny collar option) and one collar stand before you begin sewing. Block fusing is when you apply fusible interfacing to a section fabric before cutting out the pattern pieces. Doing it this way mean your pieces won’t stretch out of shape, which can happen if you piece fuse after. It also saves a bit of time as you only need to cut out once!
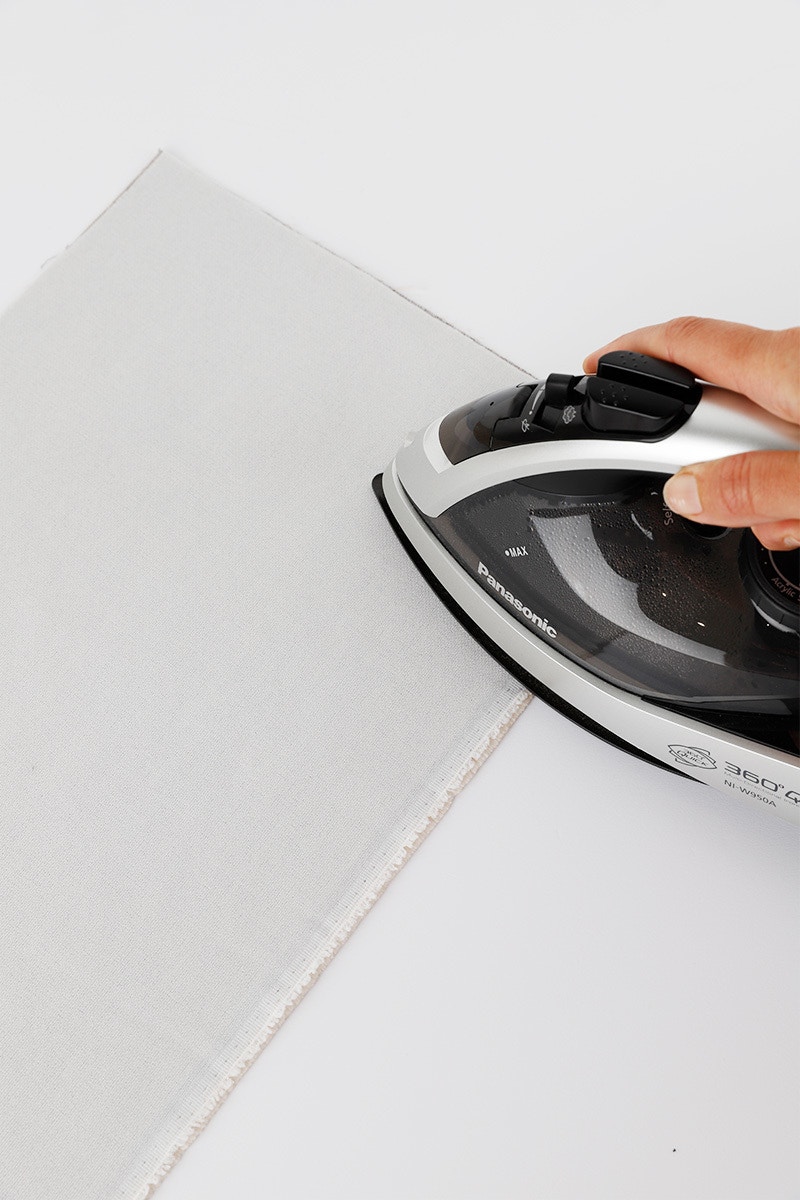
Once you have block fused your main fabric, trace around the upper collar and collar stand pieces and cut them out.
If you choose to piece fuse keep your pattern pieces close by for reference and make sure they don't stretch out of shape.


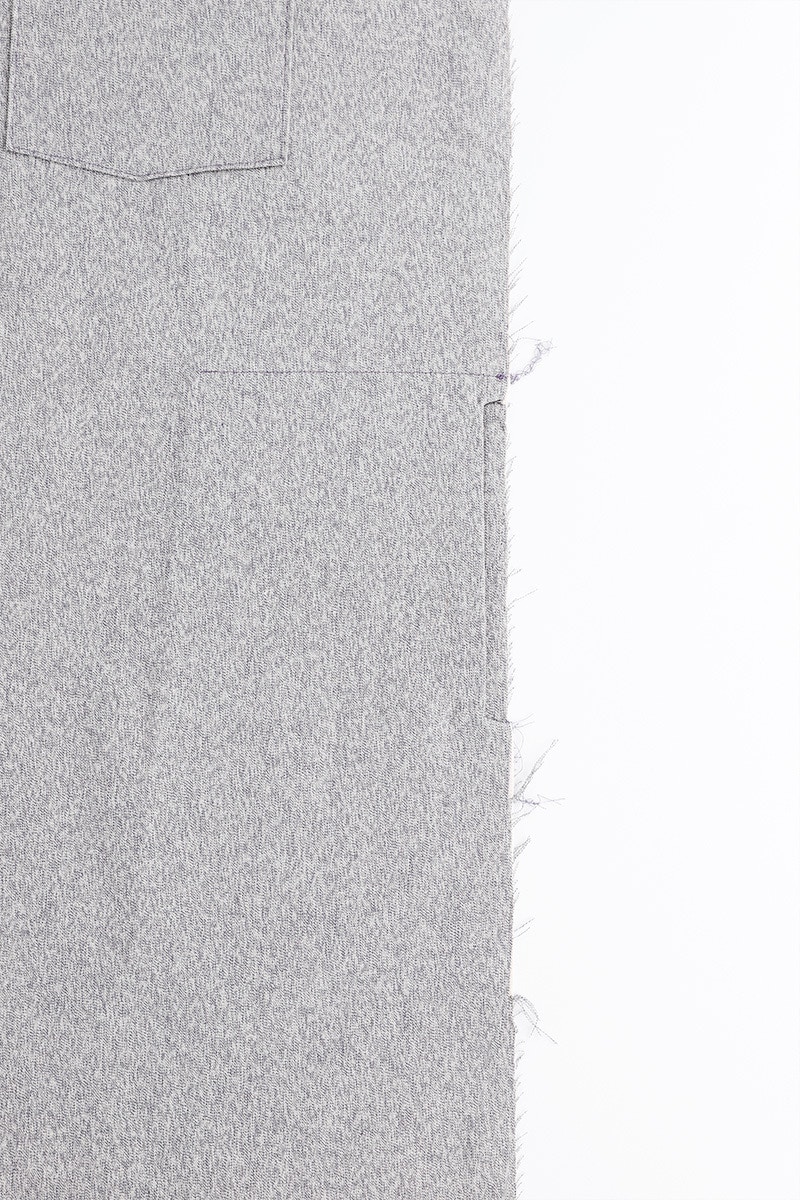
The cuffs and centre front plackets (if you choose to apply interfacing here), will need to be piece fused as only part of the pattern piece is interfaced. Apply the interfacing to one half of each cuff piece, and to the centre fronts of the front panels.

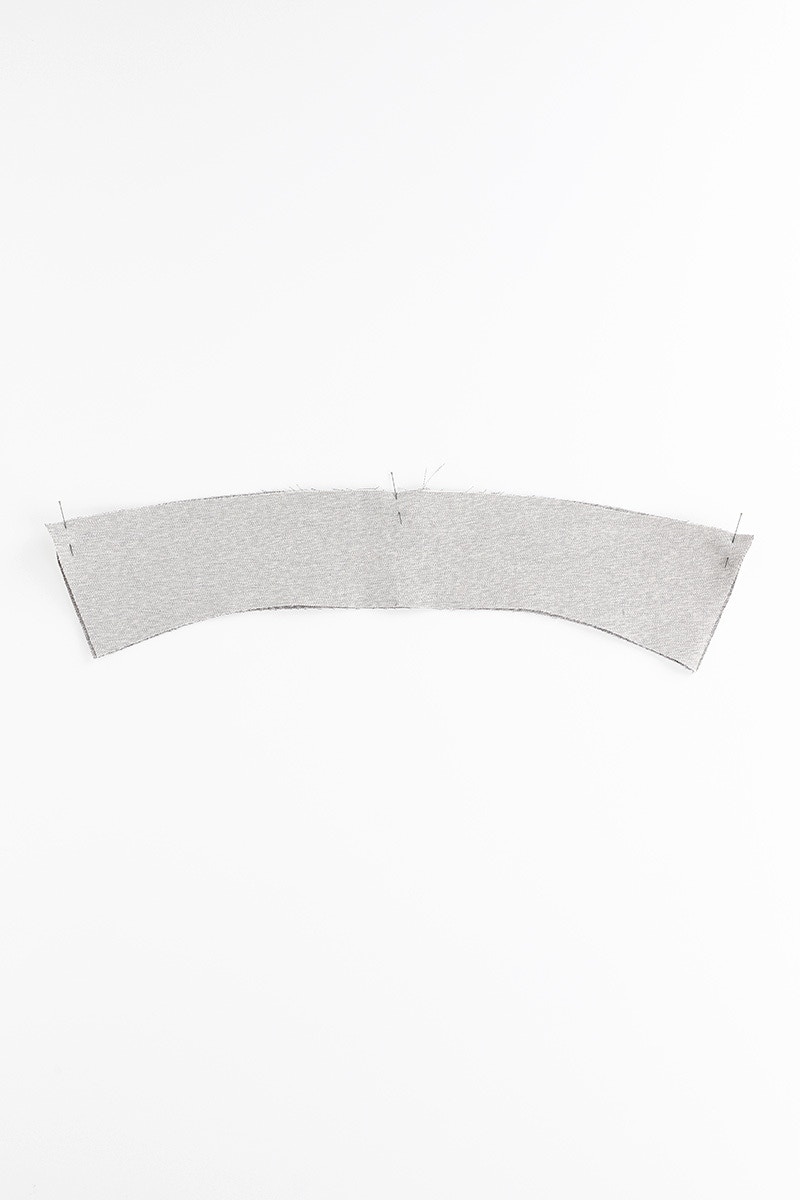
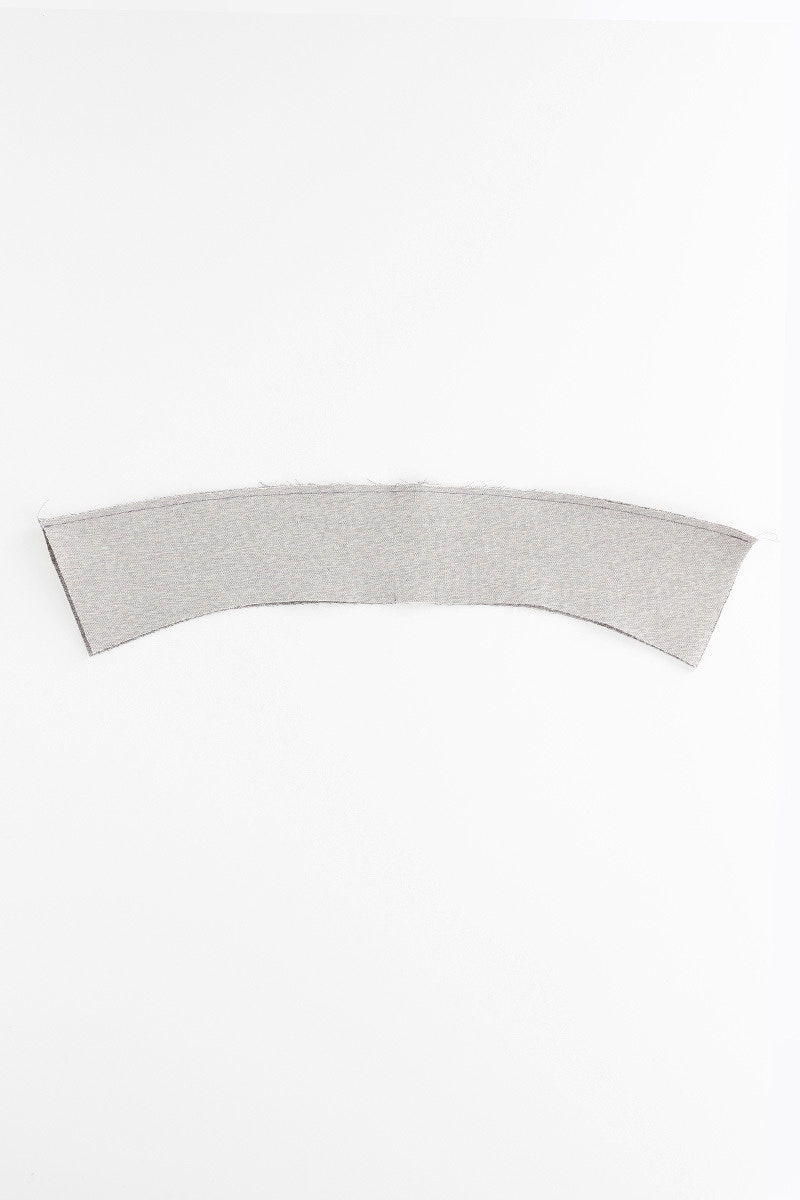
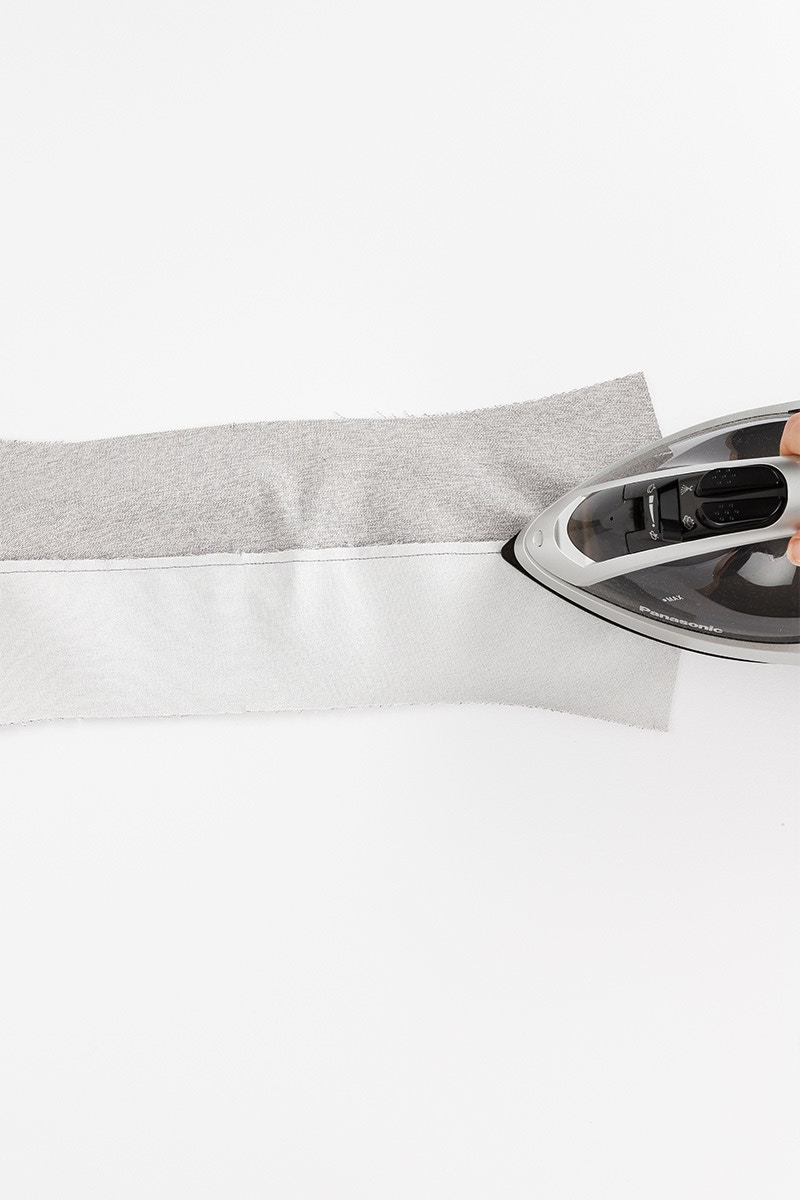
Cuffs — Fold up the 1cm seam allowance along the long, interfaced edge of each cuff. Then fold the cuff in half at the notches with the wrong sides together.
Sleeve Plackets — Fold the vertical edges of each sleeve placket under 6mm to the wrong side and press. Then fold down 1cm at the top/short edge to the wrong side and press.

Fronts — On your front pieces, fold the long centre front edge to the wrong side 3cm, as indicated by the notches and press. Then fold under another 3cm and press. The finished front placket will measure 3cm.

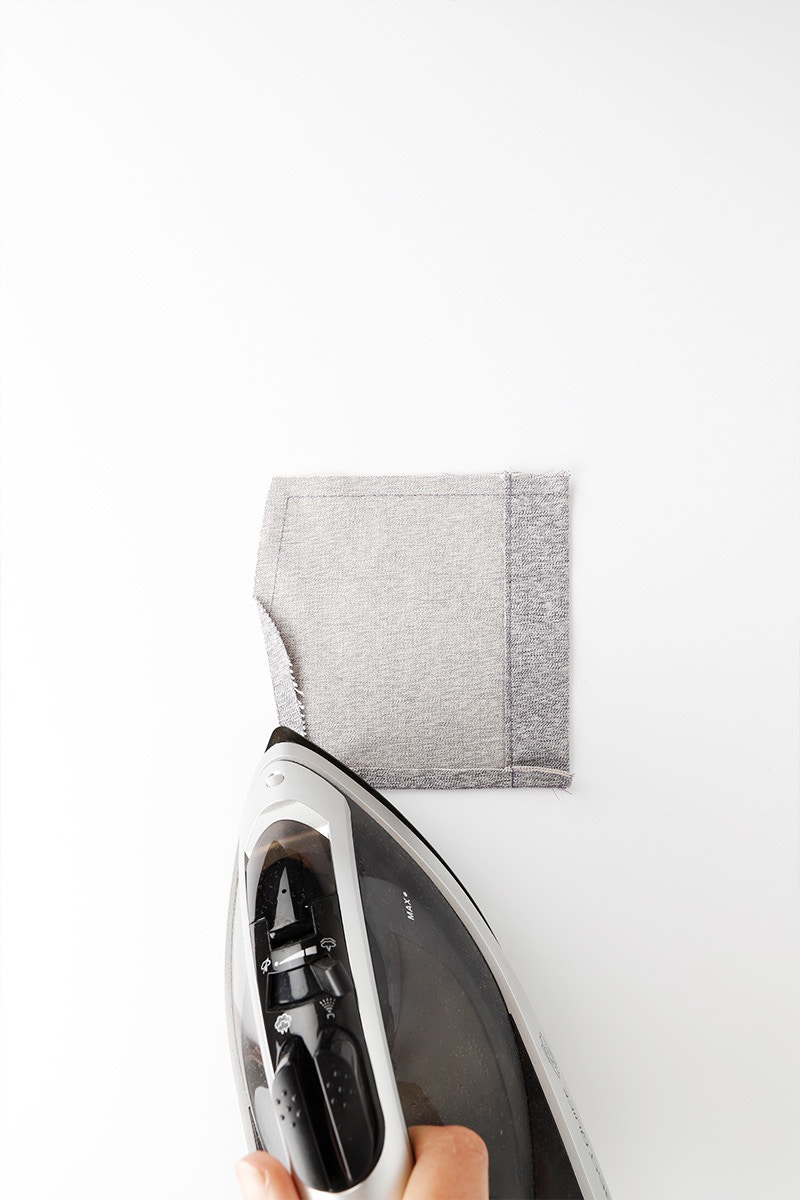
Patch Pocket — Fold the top of the patch pocket piece 3cm, then 3cm again to the wrong side as indicated by the notches and press. The finished fold will measure 3cm.
Side Pocket — If you are sewing the Dress, fold the side pockets in half, right sides together, as indicated by the notches.


Dress Hem — If you are sewing the Dress view you will need to press the hem on your two front pieces, and your back piece. Fold the 1cm seam allowance to the wrong side and press. Next fold the hem up a further 8cm as indicated by the notches and press. The finished hem will measure 8cm. Just the front hem is shown here but the process is the same for the back.
Sleeve Hem — If you have chosen to sew a short sleeved Shirt or Dress you can pre-press the sleeve hems at this point too. Fold up the 1cm seam allowance to the wrong side and press. Then fold back another 3cm for the hem. The finished hem will measure 3cm.
2 — Front Panels and Pockets

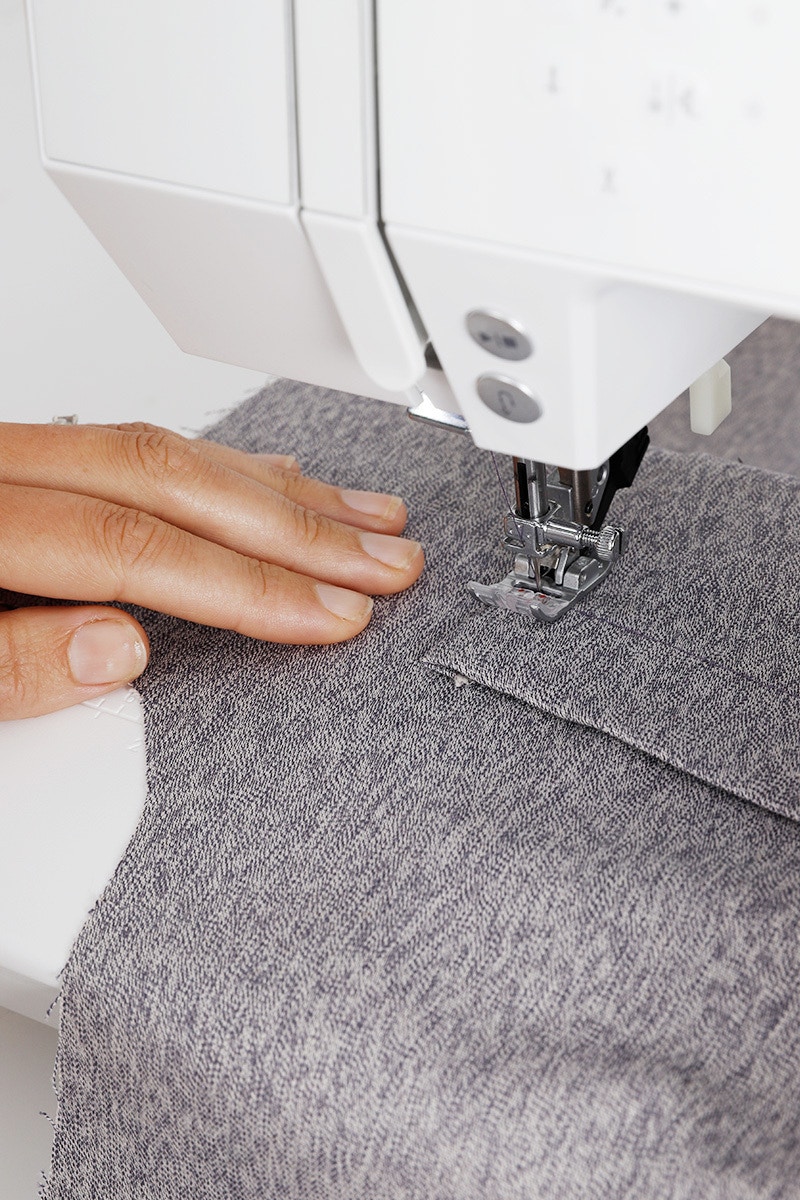
Fold the top of the patch pocket twice towards the wrong side, as youpressed at the beginning. Edge stitch the pocket hemin place and press.
Next, stitch around the remaining three raw edges of your pocket at 1cm. Then fold and press the edges back using the stitching line to help guide you.
Now, pin the pocket to the left front as indicated by the markings on the pattern and edge stitch into place.
When attaching our patch pocket, we started 6mm from the pocket edge at the pocket hem stitch line. Then we sewed out to 10mm from the edge at the pocket opening. Next, we stitched across the top of the pocket for 10mm before pivoting and edge stitching around the sides and bottom edges. When we got the to pocket opening at the other side, we stitched along 10mm again, then down to meet the hem stitch line again, 6mm from the edge. Remember to keep your needle down when pivoting at the corners.

After you've attached your pocket, give it a gentle press.

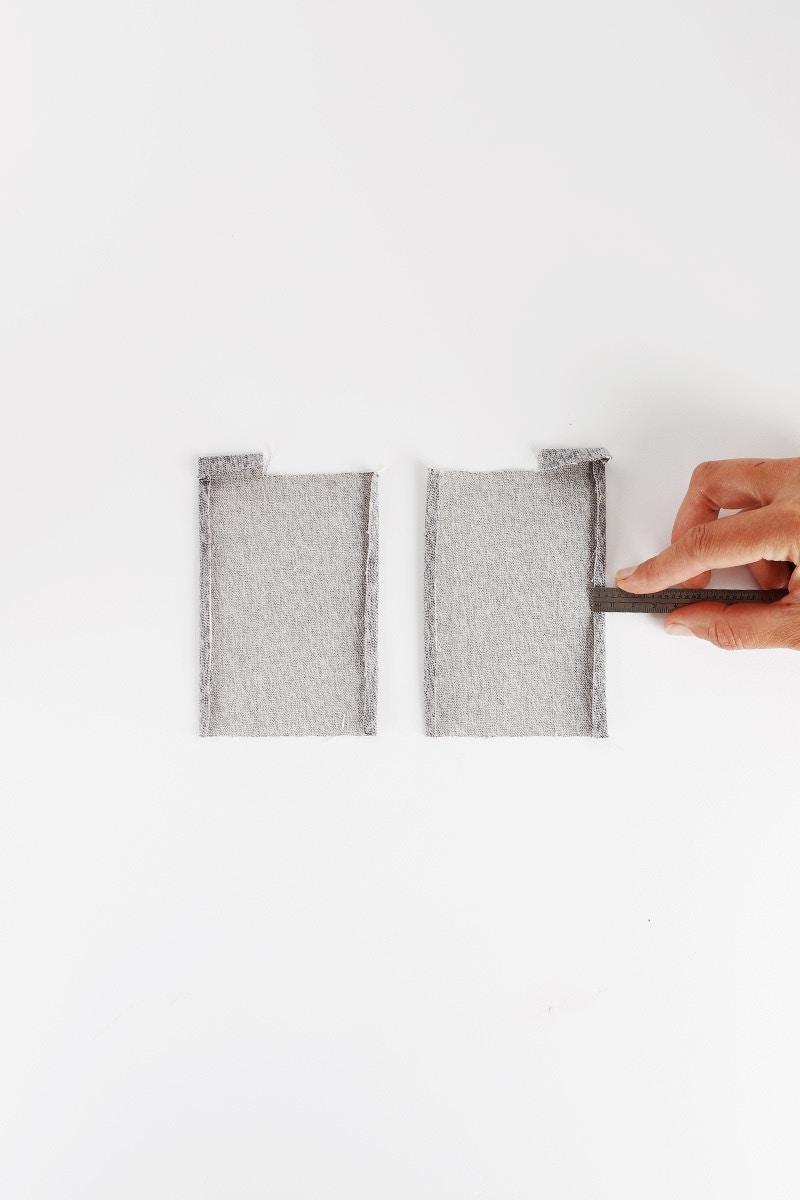
Using your tailors chalk or fabric marker, mark the sewing line on the wrong side of your pocket pieces with a ruler, using the pattern piece as your guide.
Matching the notches, pin your pocket piece to your front piece with right sides together.
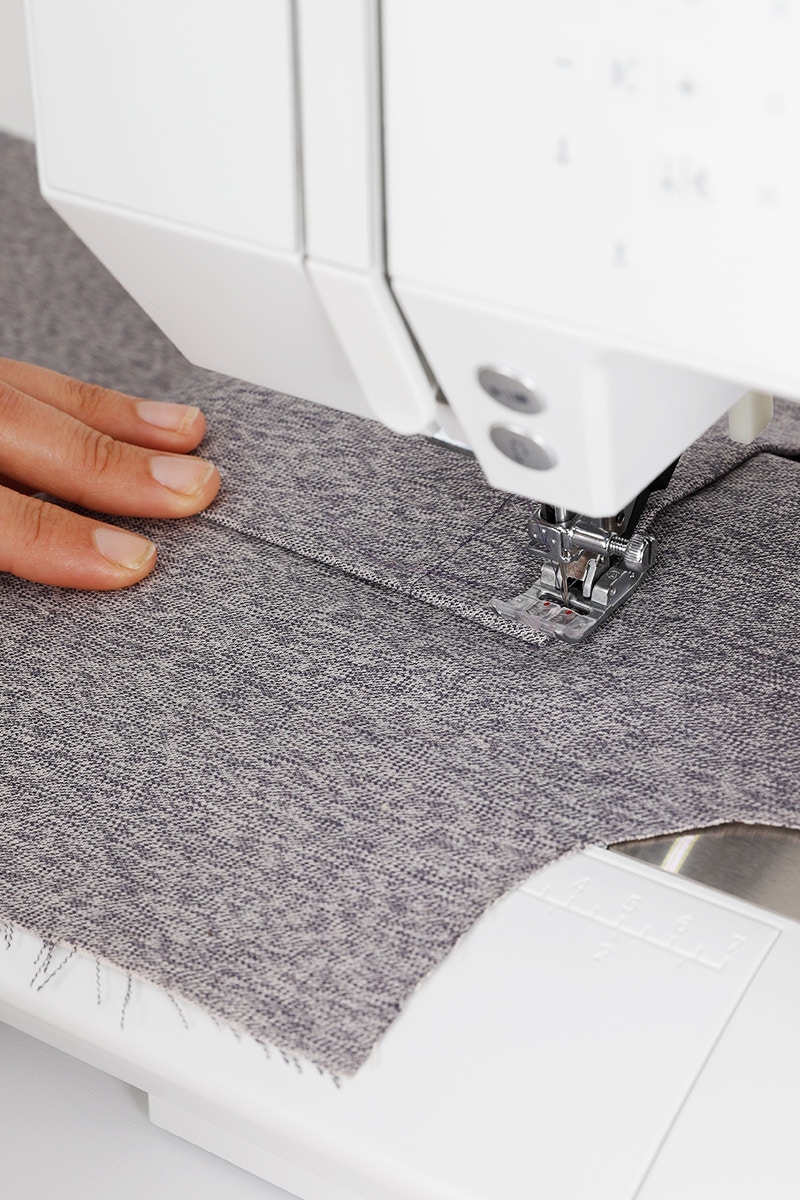
Starting at one end sew in 1cm from the edge, following the line you have drawn. Pivot 90 degrees, making sure to keep your needle down. Sew the long edge of the side pocket opening 1cm from the edge, finishing at the next notch. Pivot 90 degrees again, and sew 1cm to the edge of your pieces.
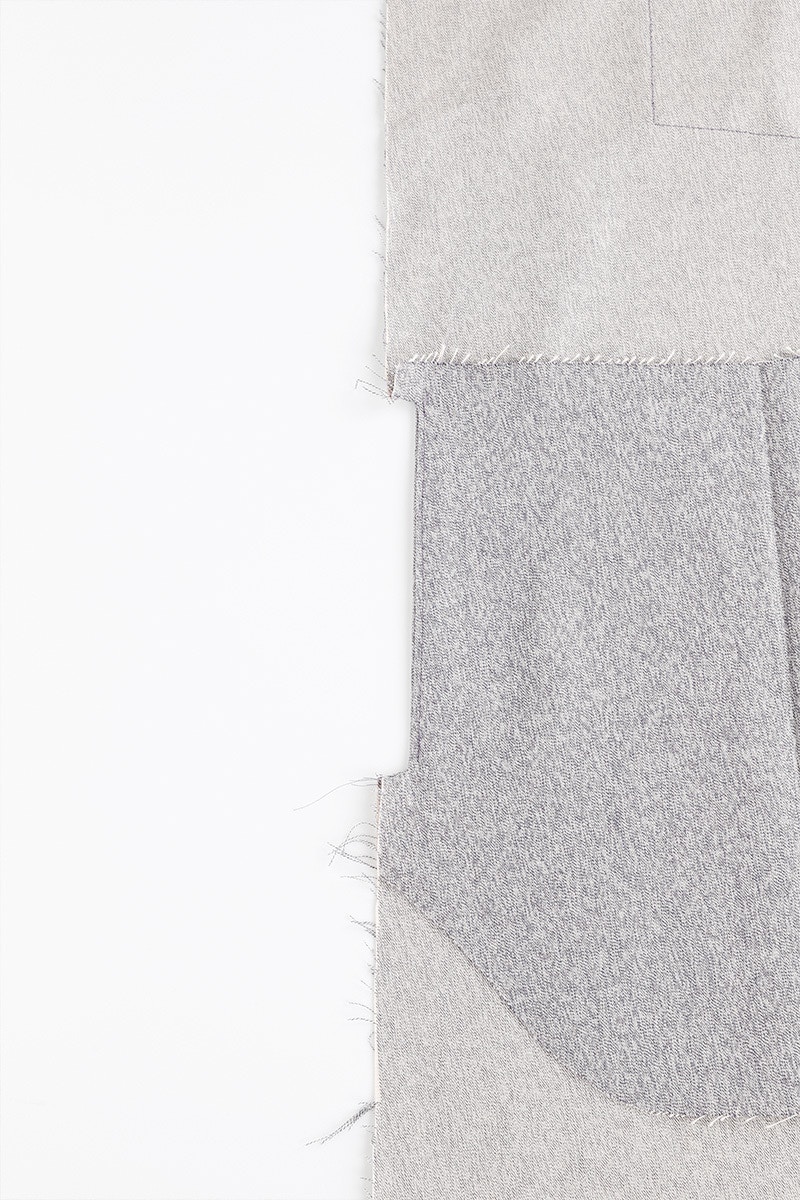
Now that you have boxed out your pocket opening it is time to mitre into the upper and lower corners of the box. Using a sharp pair of scissors, clip in at a 45 degree angle into each corner. Be extra careful not to snip through your stitching line!
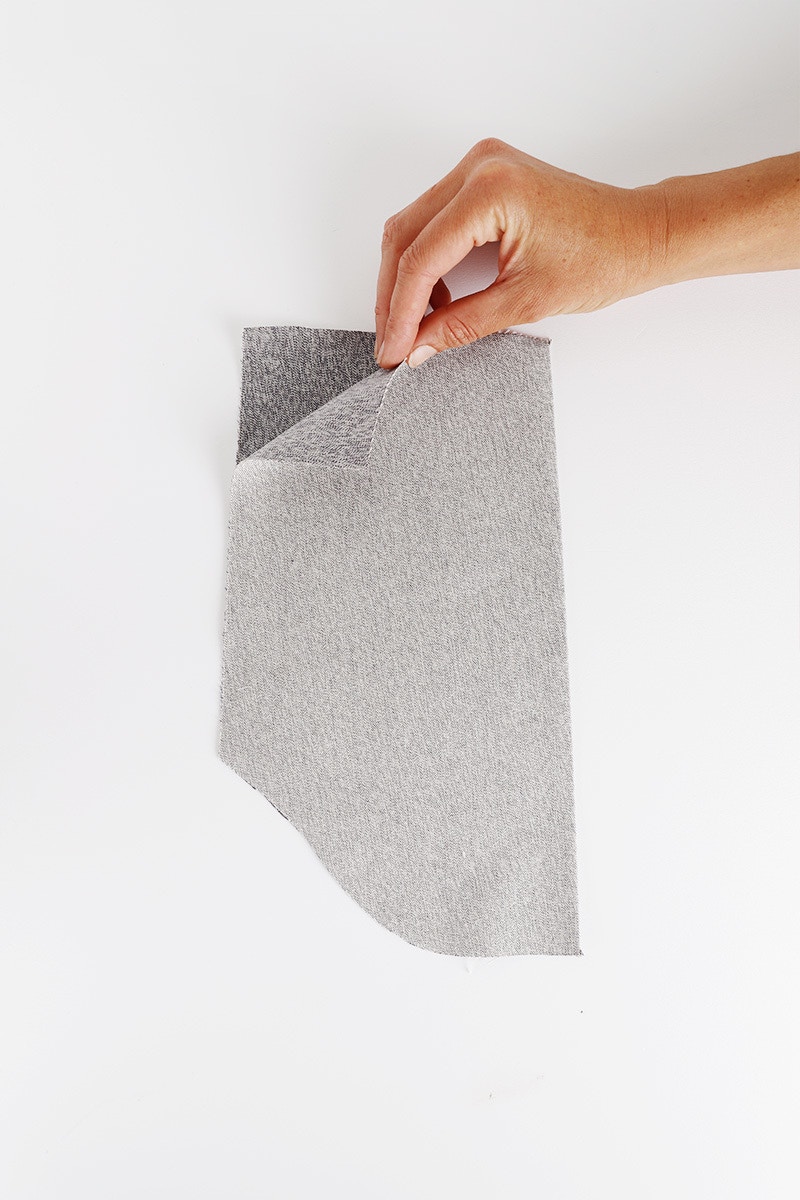
Next, fold the pocket over so the wrong sides are together and press along the edge of the pocket opening ensuring that the corners are well turned out. Under stitch the pocket opening on the pocket bag, from corner to corner.

Now fold the pocket bag in half, right sides together, so that the notches match the pocket opening. Sew the pocket bag closed across the straight top edge and around the lower curved edge with a 1cm seam allowance and back tacking at the beginning and end of each seam. You can neaten the seams with an overlocker/serger or using a zig zag stitch on your sewing machine.
Next you will secure your pocket bag to the front piece. Pin your pocket bag, from the right side, to the front ensuring that it is sitting flat. Mark your top stitching line on the right side of the front with tailors chalk or a fabric marker and a ruler. Use your pattern piece as a guide. This line should run parallel to the top edge of the pocket bag, 5mm down, and run go from the side seam edge, stopping 5mm before the edge of the pocket bag. Top stitch along this line back tacking at the beginning and end.
Sew a pocket for each side.

Fold back and press the centre front plackets as indicated by the notches. This forms the button and buttonhole bands and each one will be 3cm wide. Baste them in place at the neck edge.
3 — Collars and Collar Stand
To sew the pointed collar, take your upper and under collar pieces and pin together along the top edge. Sew this edge with a 6mm seam.
Now, press the seam you have just sewn towards the under collar. Then, from the right side, sew a line of under stitching on the under collar.
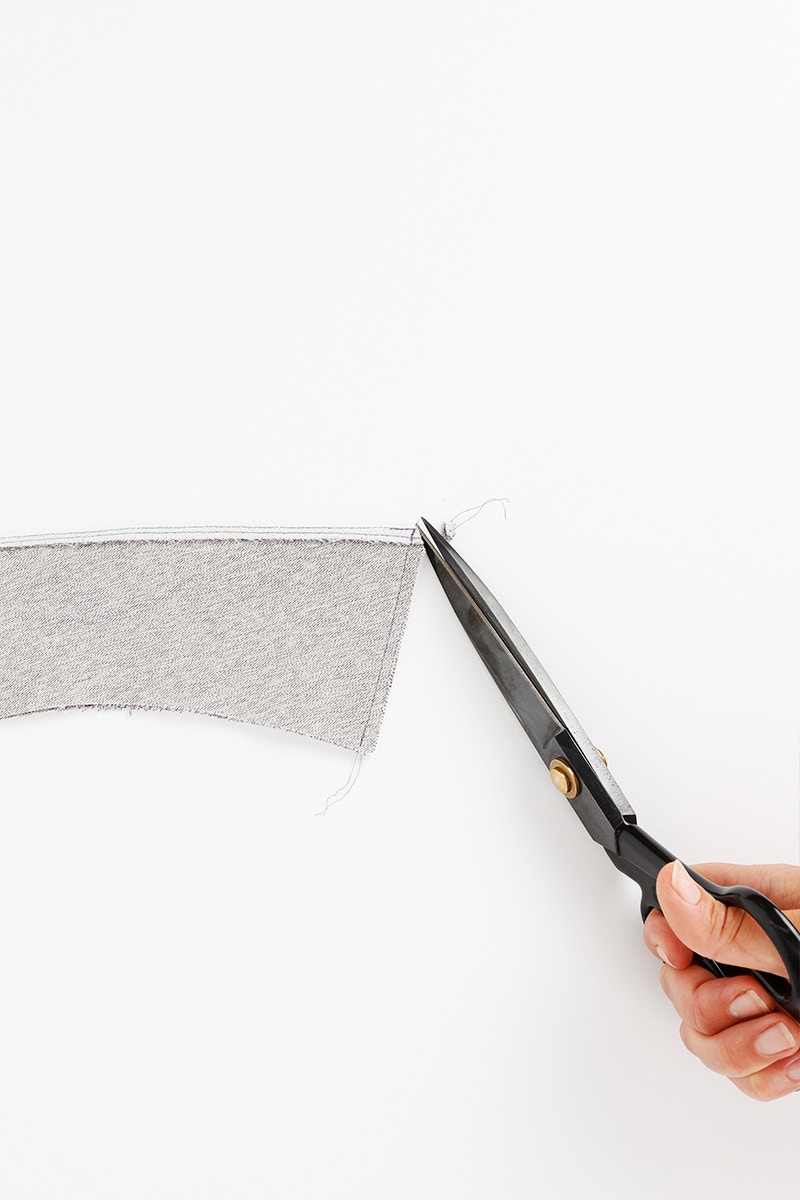
Fold your collar in half with the right sides together and sew the short ends of your collar closed with a 6mm seam. Trim the excess fabric at the corners with a sharp pair of scissors. This helps to reduce bulk at corners. Then turn your collar right side out with the help of a point turner. You could also use a chop stick or knitting needle if you don't have a point turner.

Your collar will look like this on the underside. Give it a press and move on to sewing your collar stand.
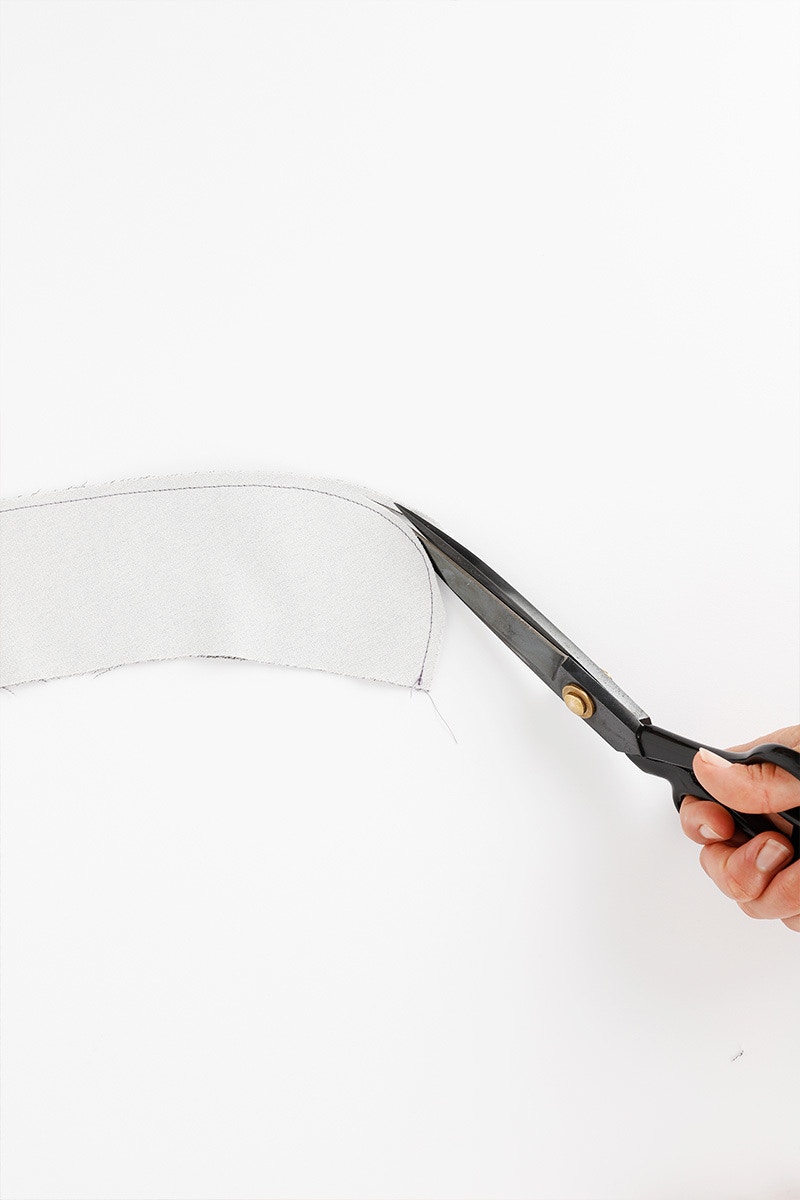
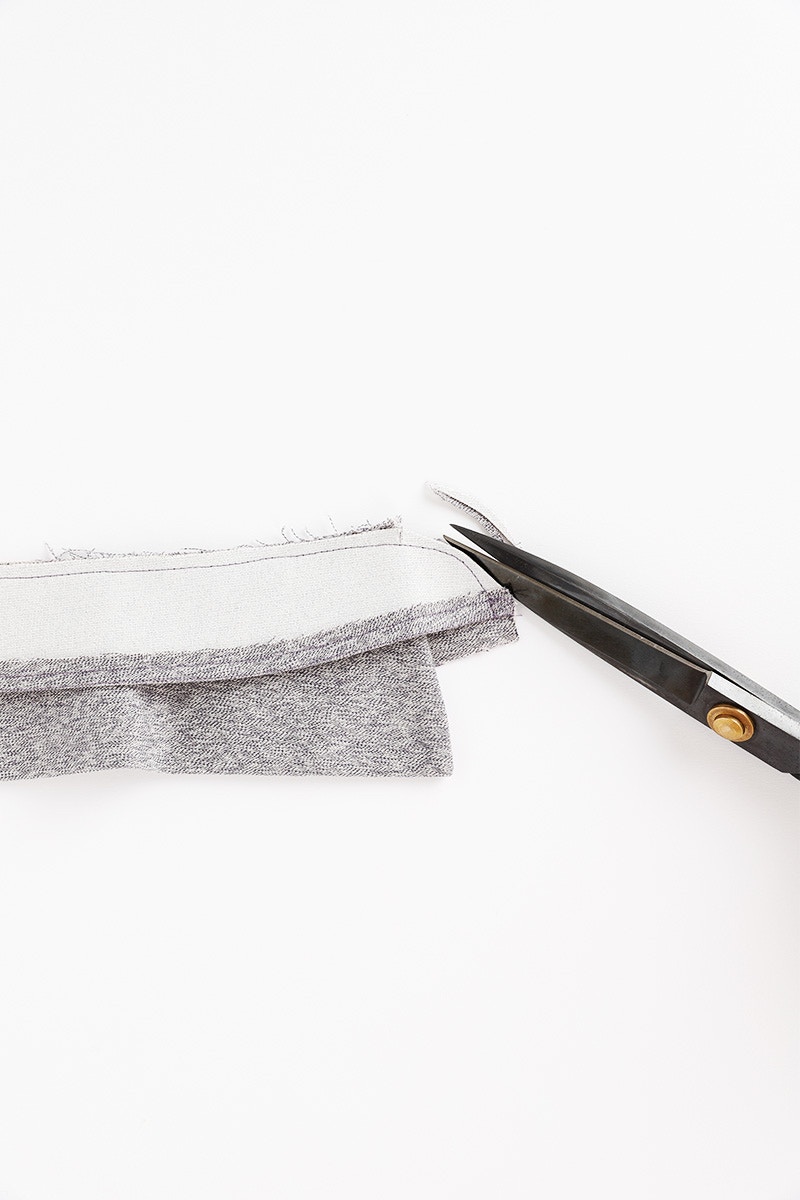
To sew the half penny collar, take your upper and under collar pieces and pin them together along the long curved edge, matching the notches as you go. Sew this seam at 6mm.
Then, with a sharp pair of scissors, trim back the seam allowance at the curves. Be careful not to trim too close the stitching or the seam may fray.
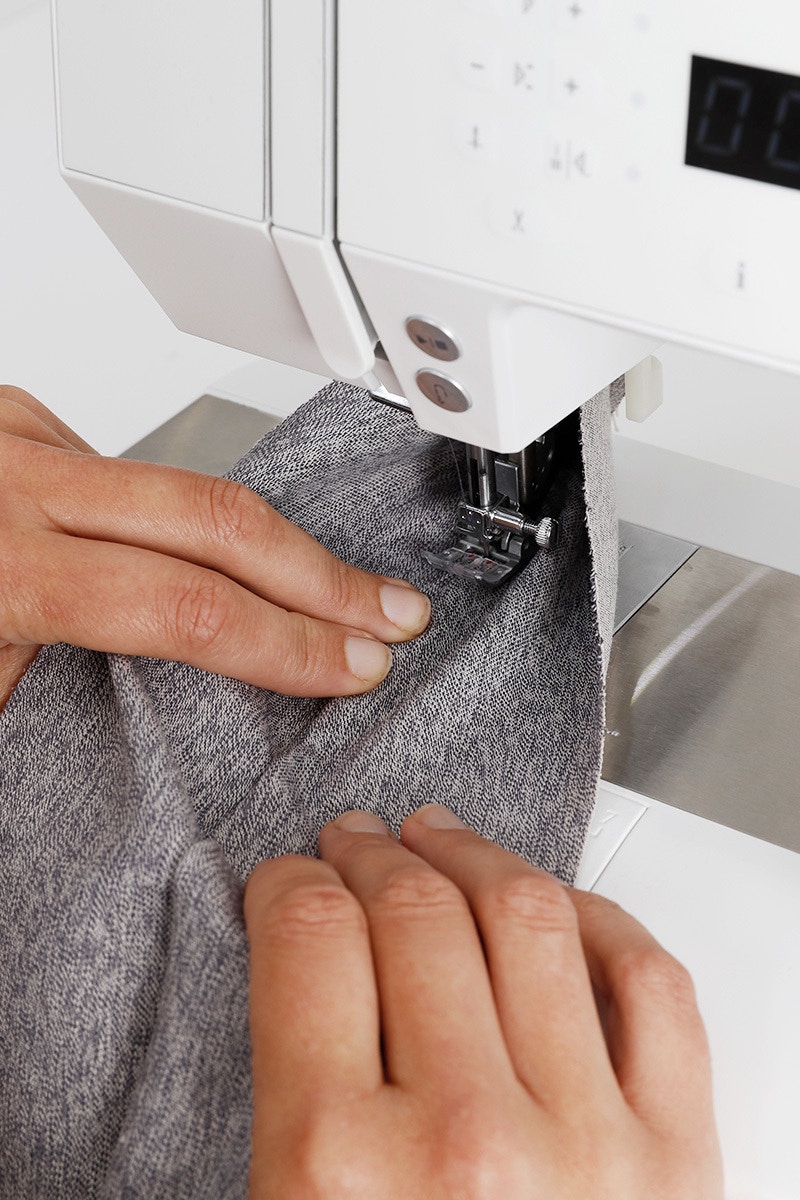
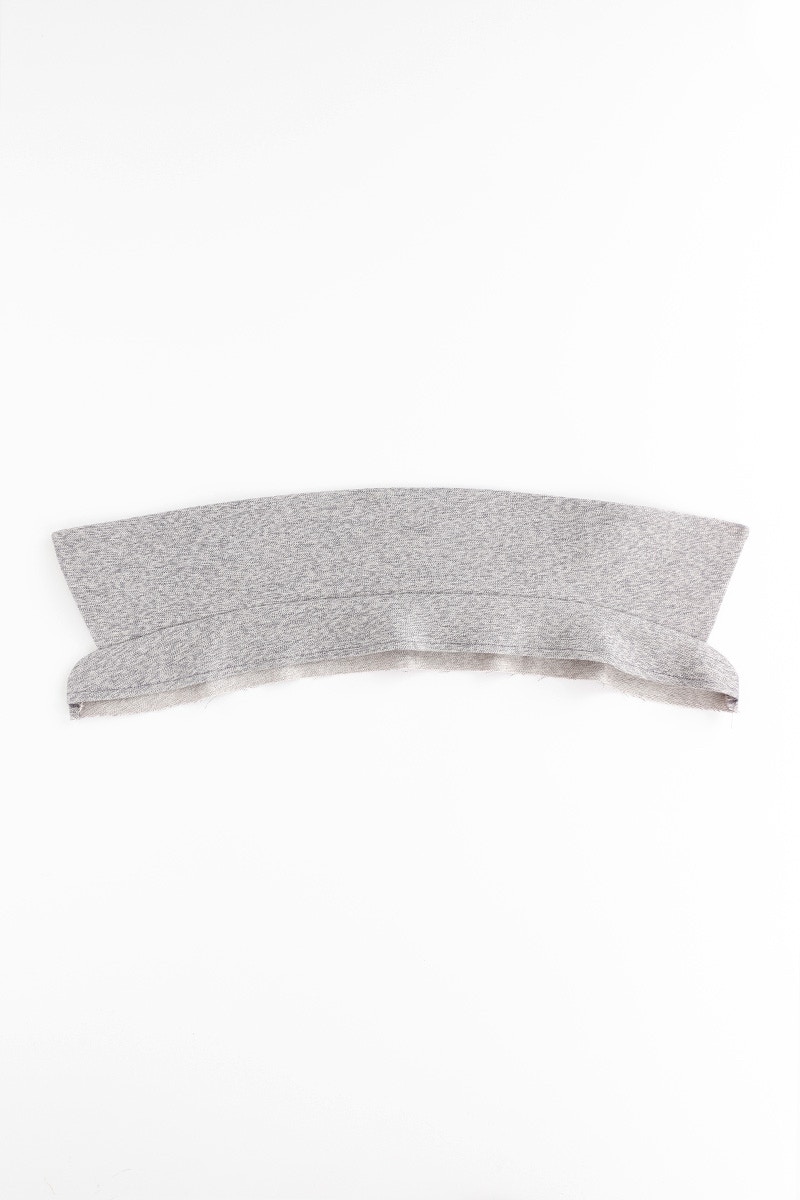
Press the seam allowance towards the under collar. Then, edge stitch on the under collar, starting just after the curve and stopping before it starts again. This is approximately 30cm depending on the size you are making. It can be a little tricky under stitching here due to the curve in the collar. Use your fingers to make sure the seam allowance is going towards the under collar.
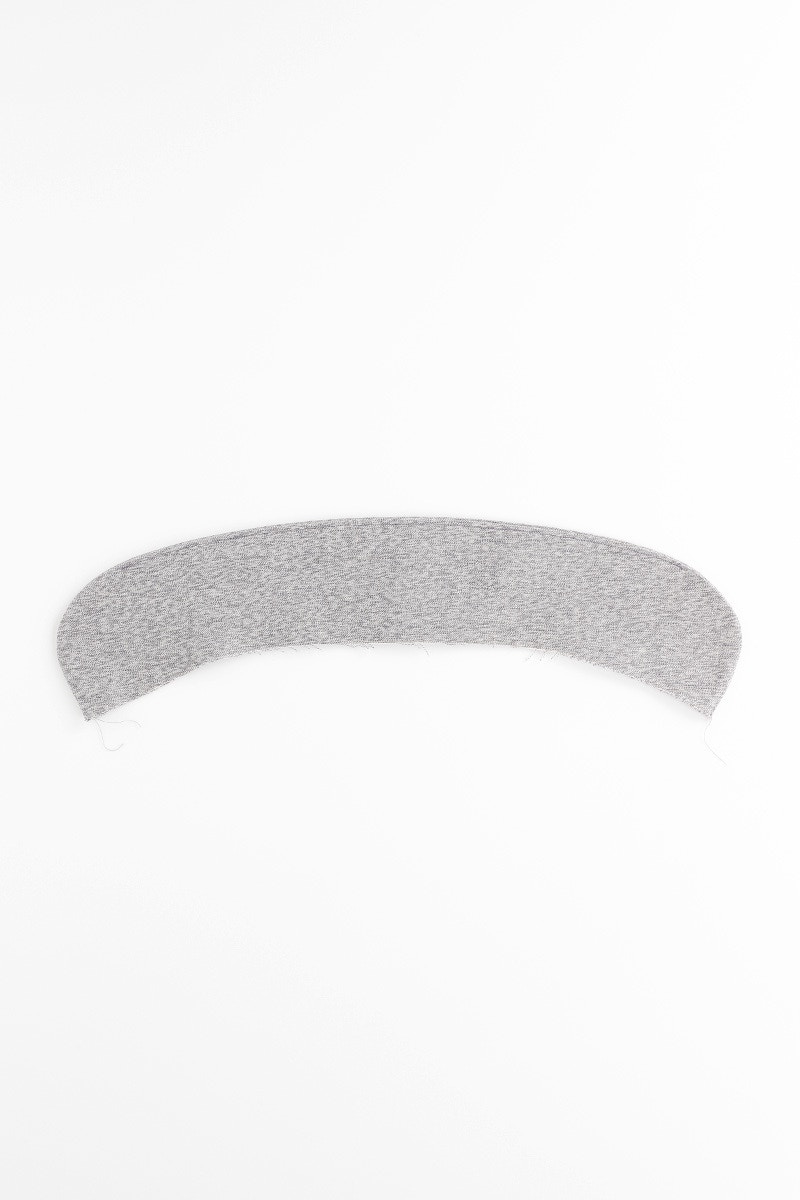
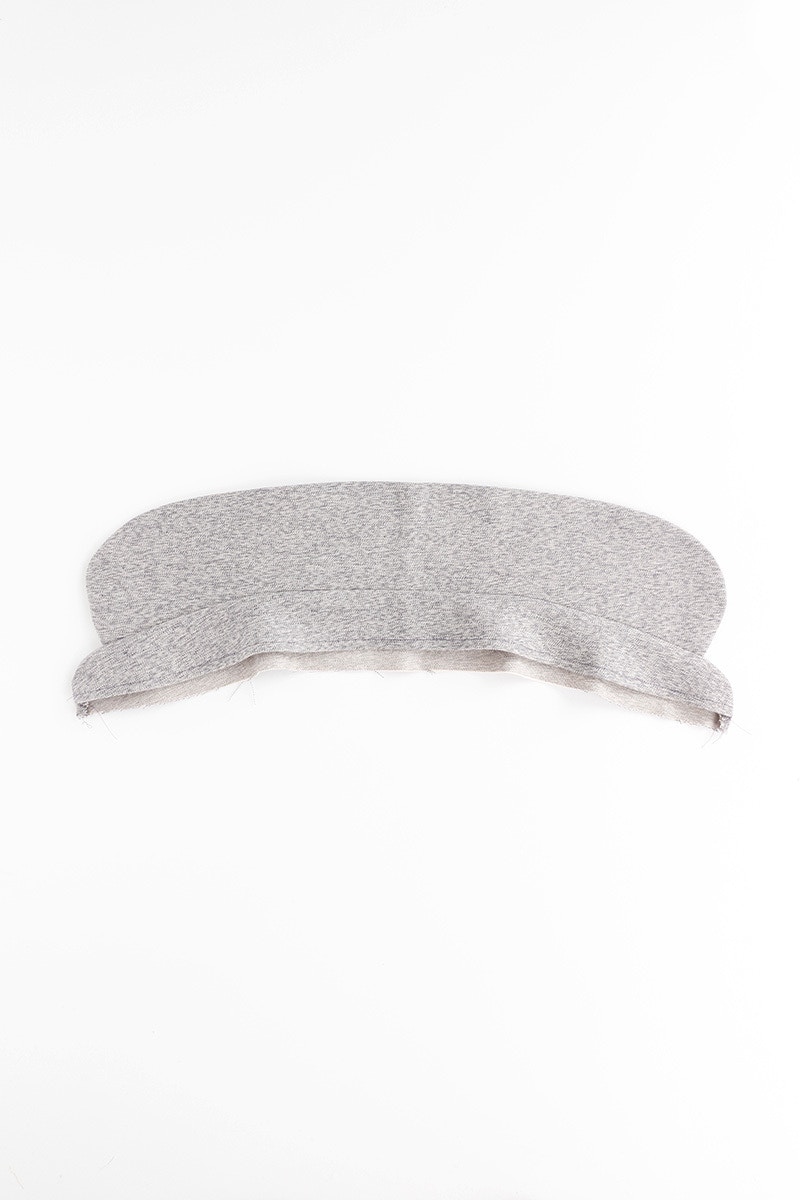
Turn your collar right side out and give it a press, making sure to get a smooth curve at each end. It will look like this from the underside.
Next, scroll down to start sewing the collar stand.
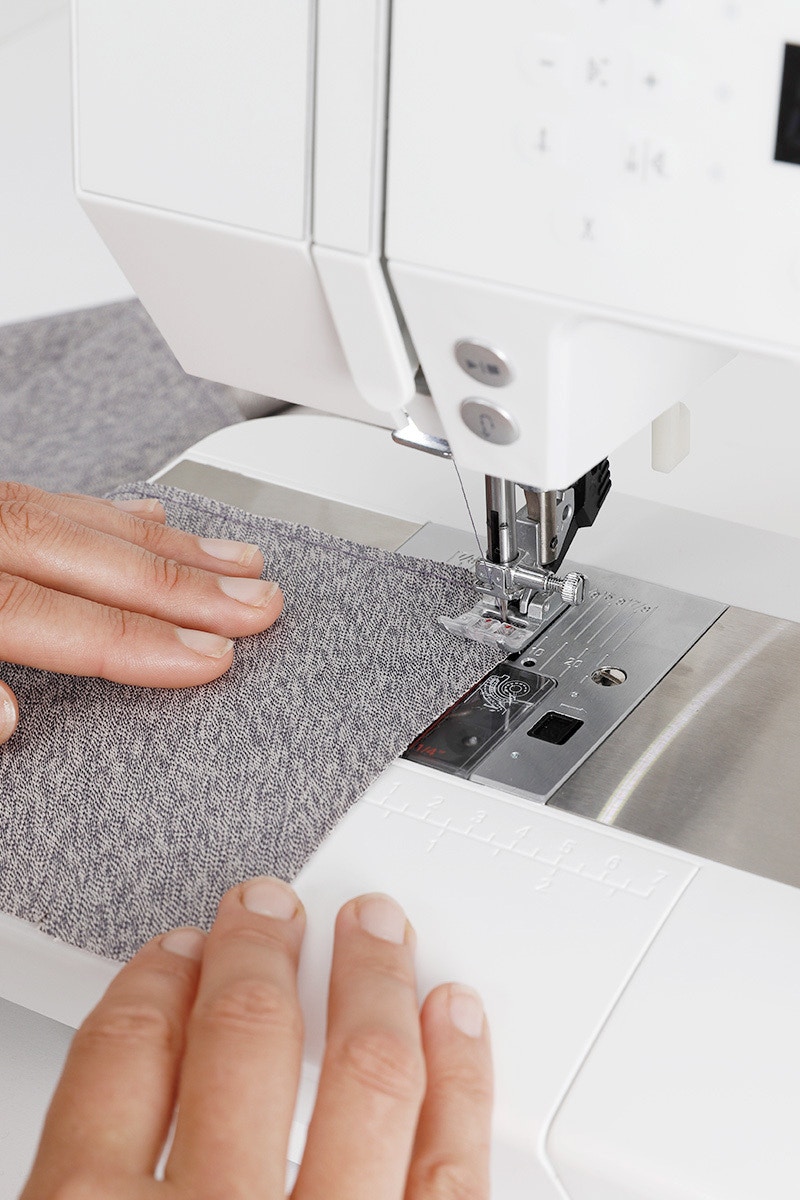
For the pleated collar, start by finishing the three outer, unnotched edges with a 6mm double fold hem. To make this easier, sew a line of stitching at 6mm along the three outer edges. Then, using this stitch line as a guide, fold the edge over twice and edge stitch in place. You may want to use pins to hold it in place, or you can fold the hem bit by bit as you sew.

Now we will start to sew the pleats. It is easiest to start at the centre back and work towards the centre front.
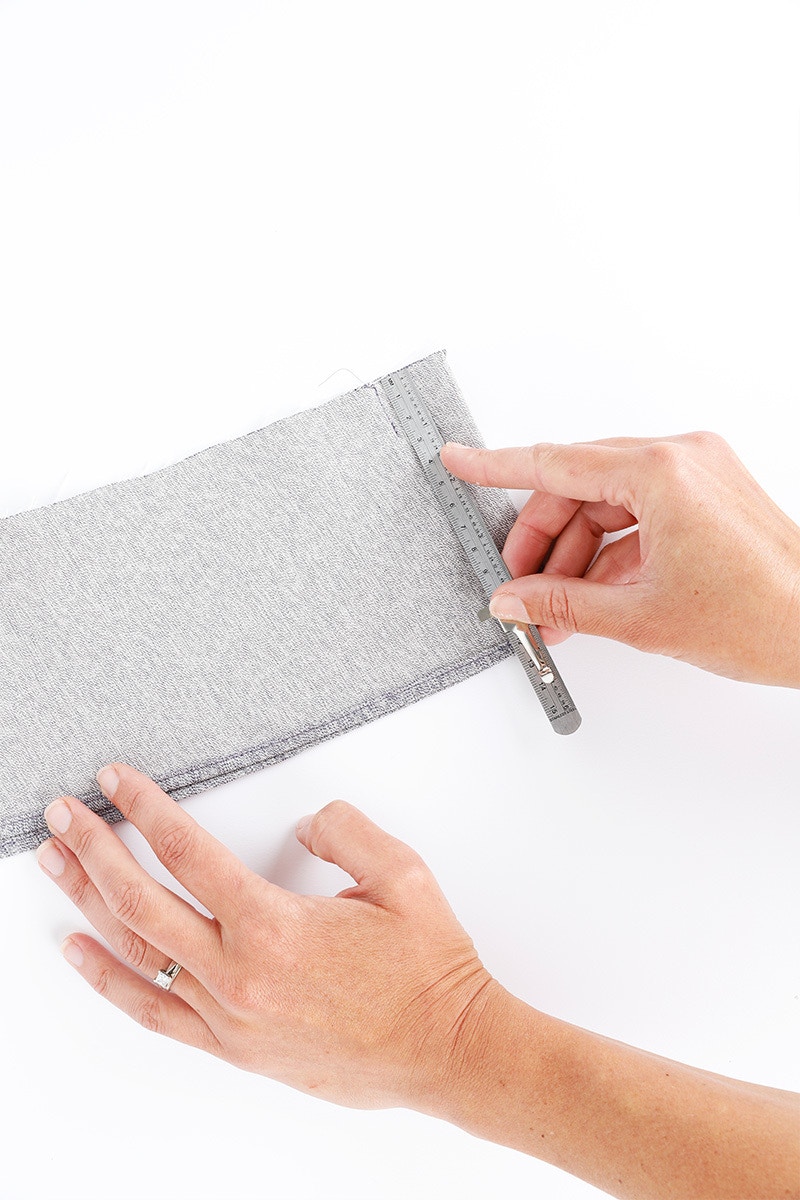
Find the centre back notch by folding the collar in half. Match the two notches either side of centre back, then measure down and mark 2.5cm. Sew the line you have just marked back tacking at each end to secure the seam.

Next, bring the centre back notch to meet the seam you have just sewn to create an inverted pleat. Baste your pleat in place at the neck edge and give it a press.
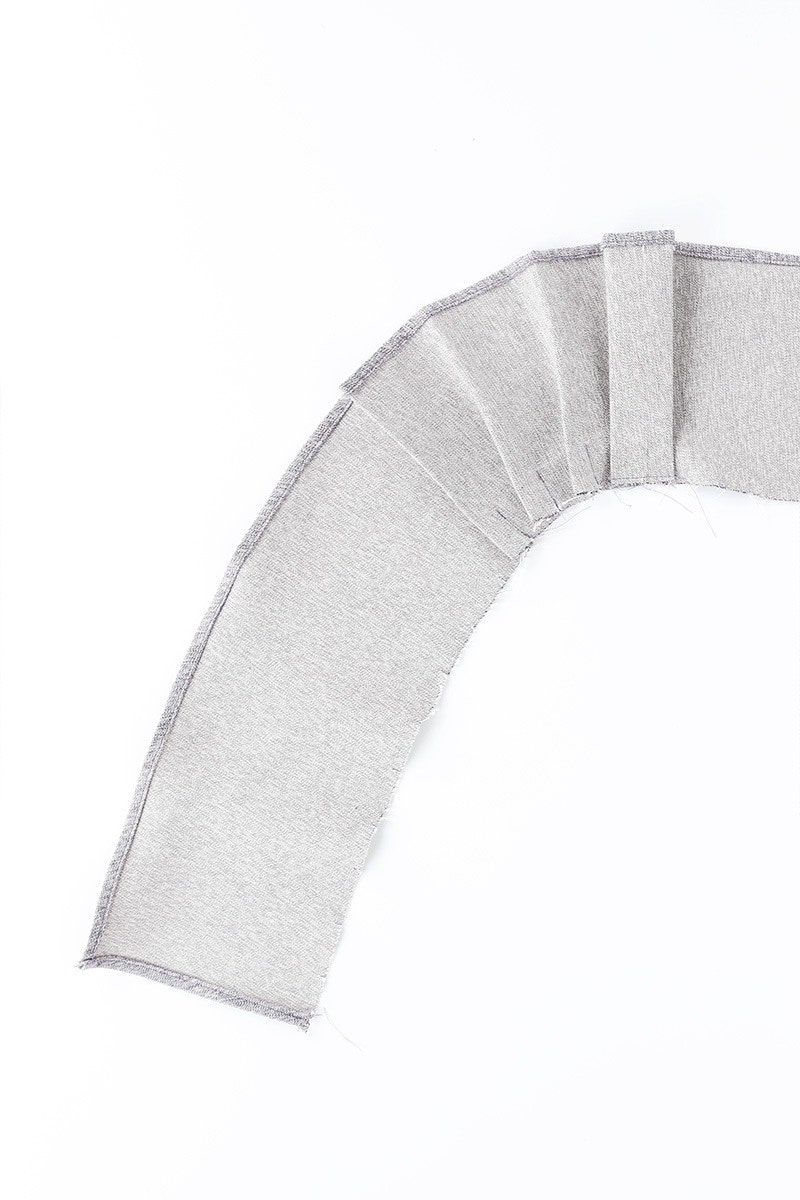
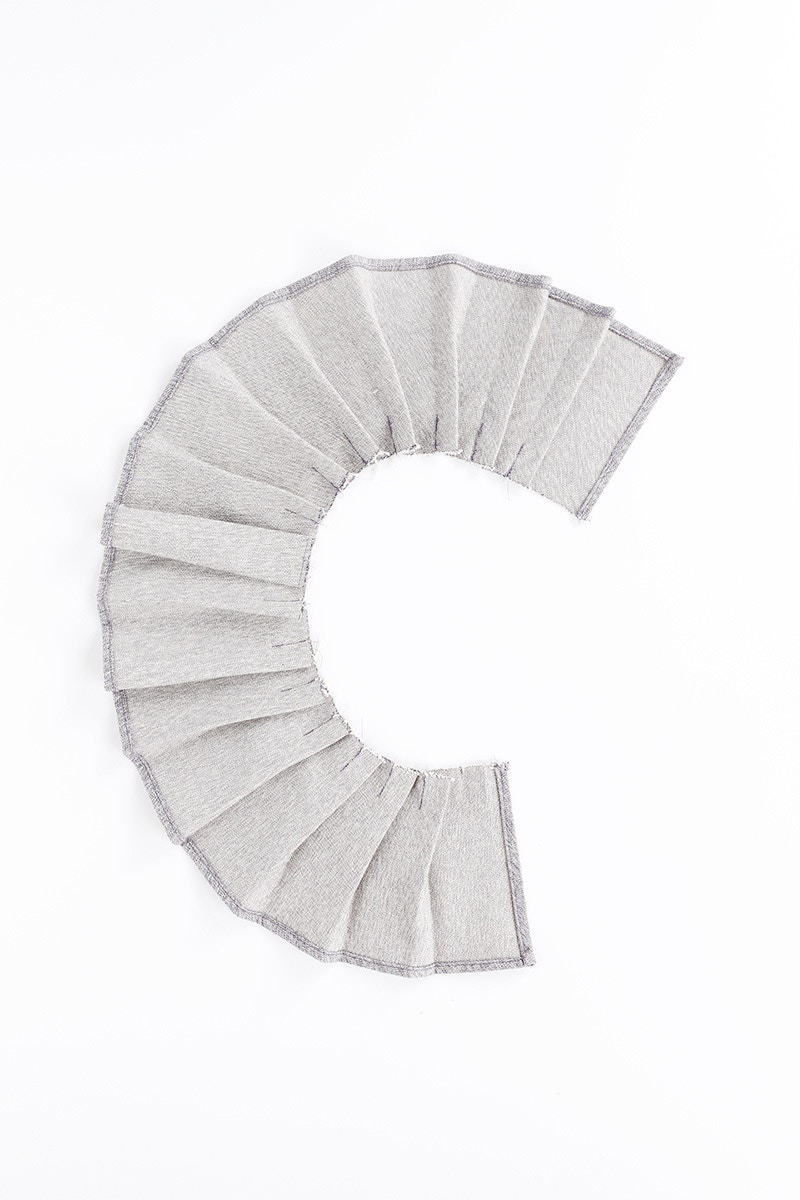
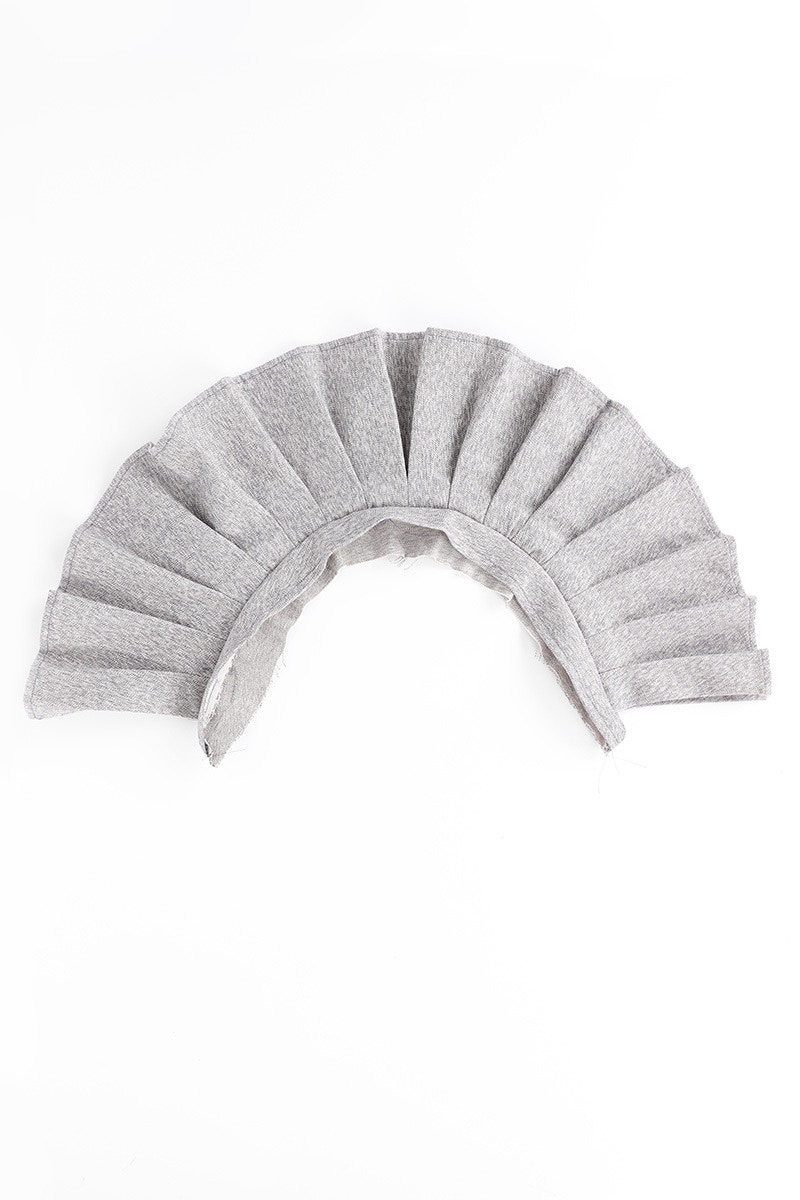
Now, working on one side, out from centre back, bring the next two notches together and sew from the notch down 2.5cm. Continue sewing the pleats in this way until you have 14 pleats in total, seven either side of centre back. Press these pleats so they open towards the centre back, and the pleat excess is towards the front when viewed from the right side.
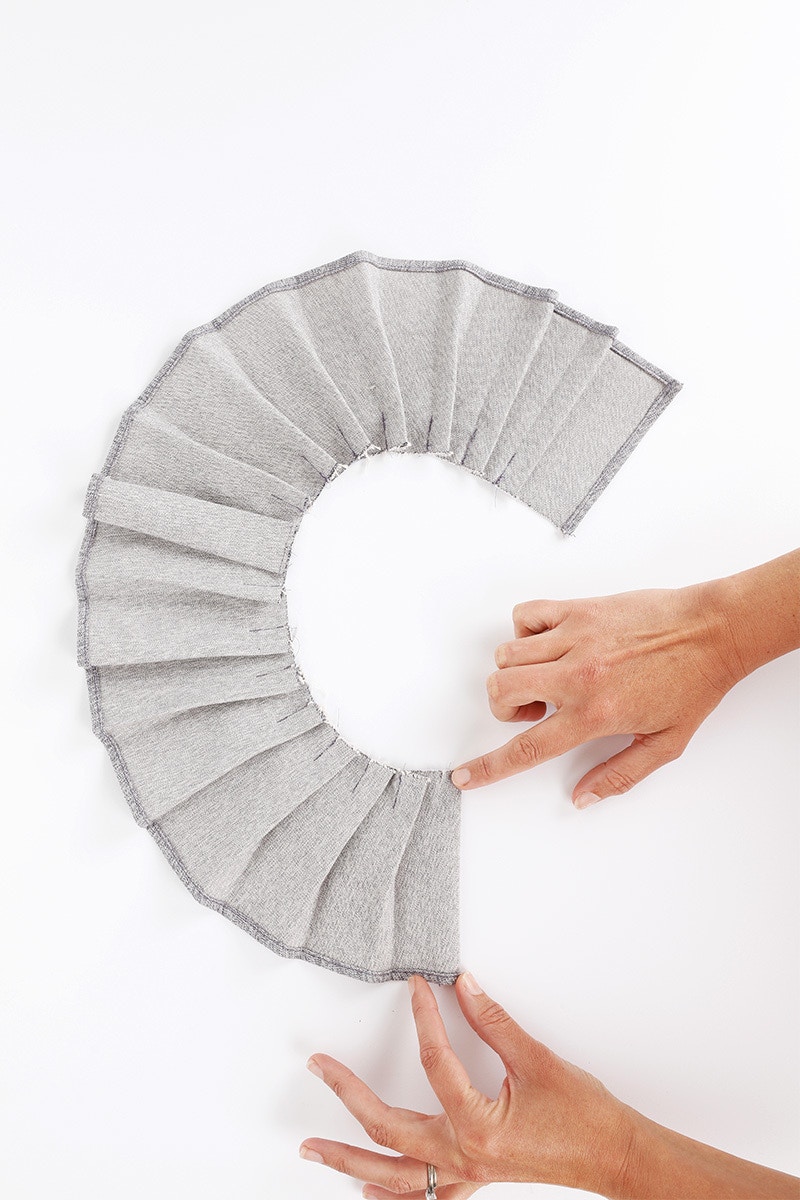
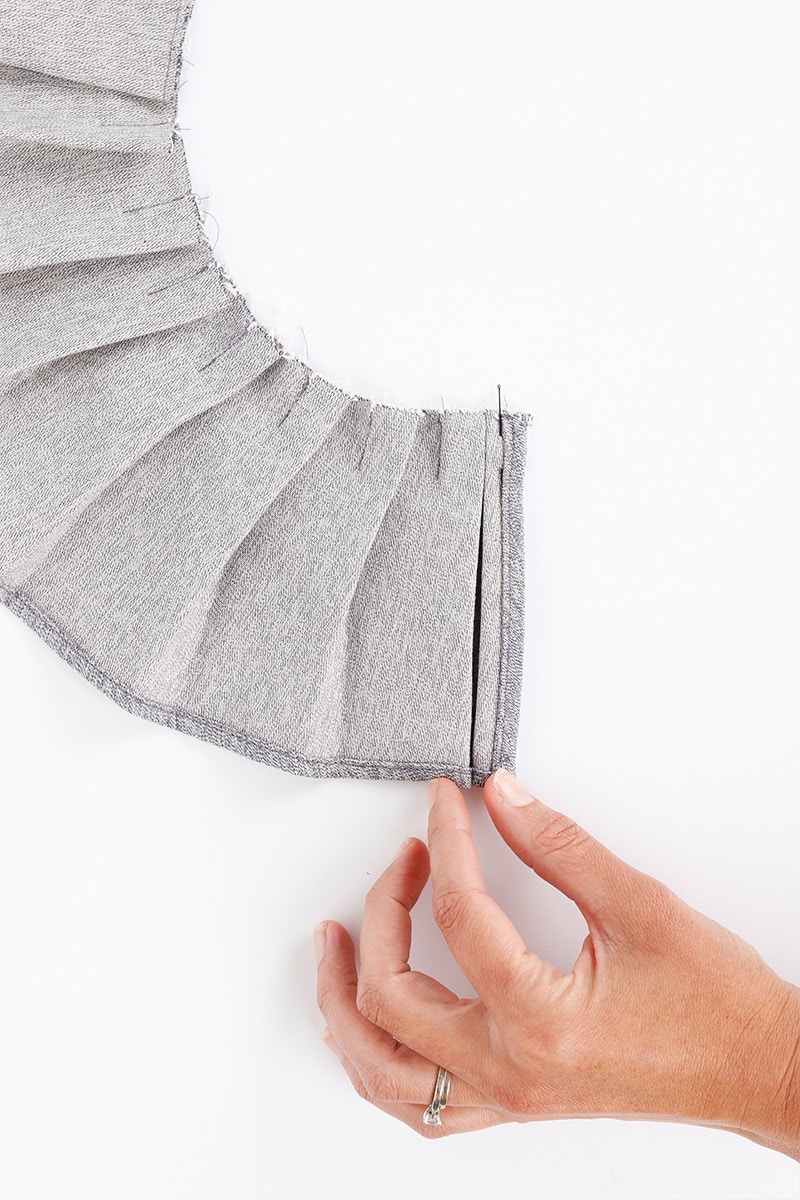
The final pleat is at the centre front. It faces the opposite direction to the pleats you have just created. Fold the centre front edge right sides together to meet the last notch. Then, fold the two layers back at the notch, wrong sides together to create the pleat. Sew a line of basting stitches along the neck edge to fold everything in place.
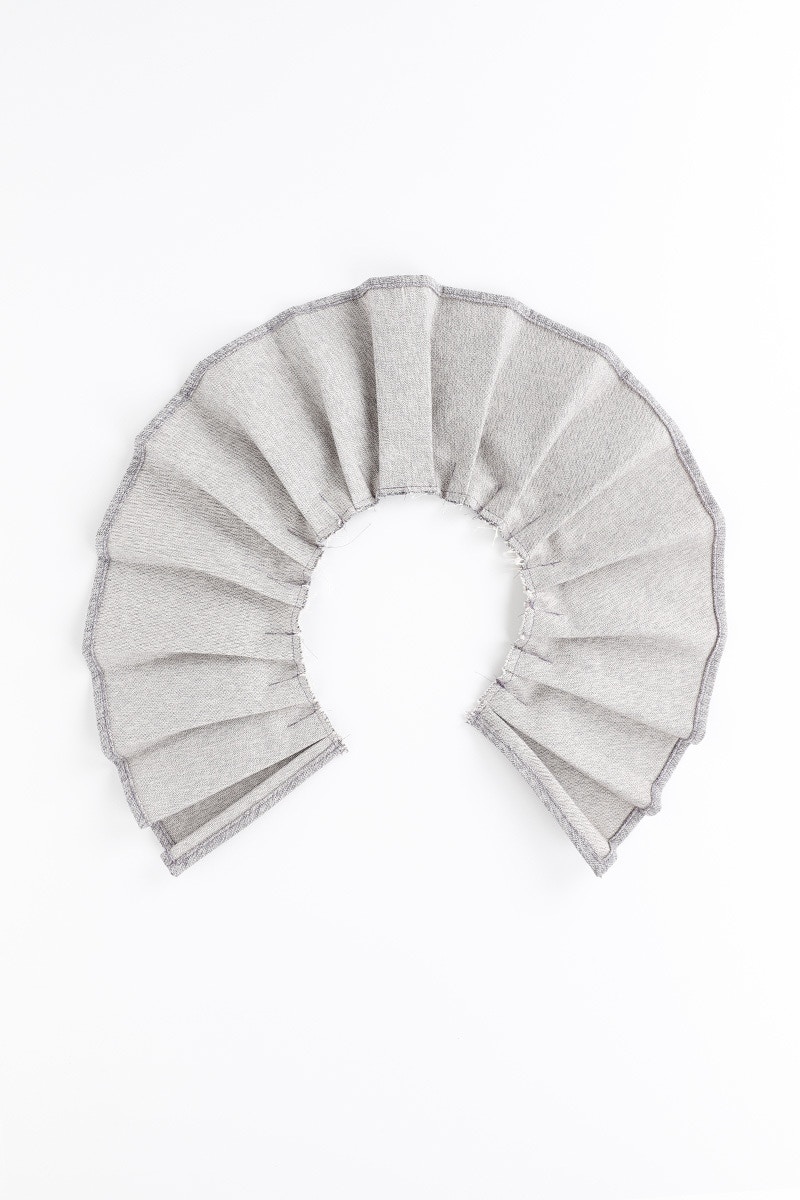
Give your pleated collar a gentle press.
We will now sew the collar stand! The collar stand is slightly narrower for the pleated collar but the sewing process is the same as for the pointed and half penny collars.

We will now sew the collar stand.
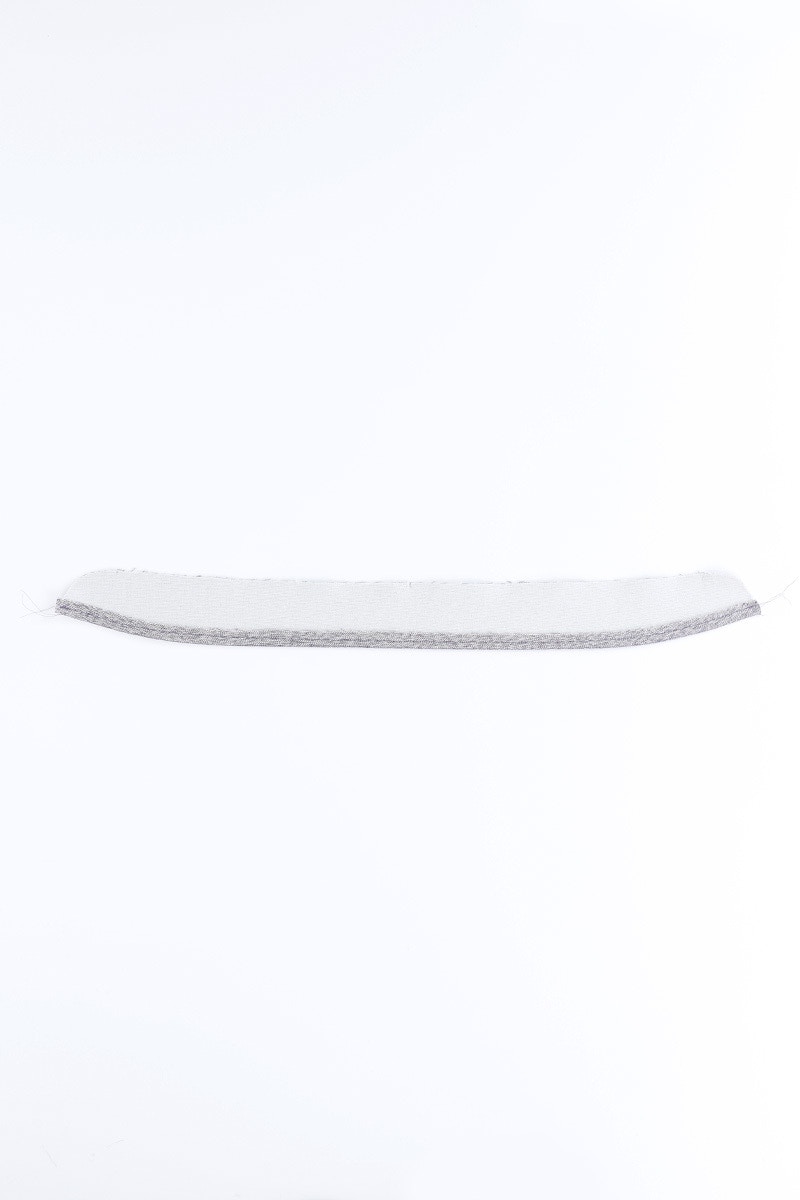
On the lower edge of the interfaced collar stand piece, sew a line of stitching 1cm from the edge. Using the stitching line to guide you, turn up the 1cm seam allowance to the wrong side and press. Sew a line of top stitching to hold the seam allowance in place.


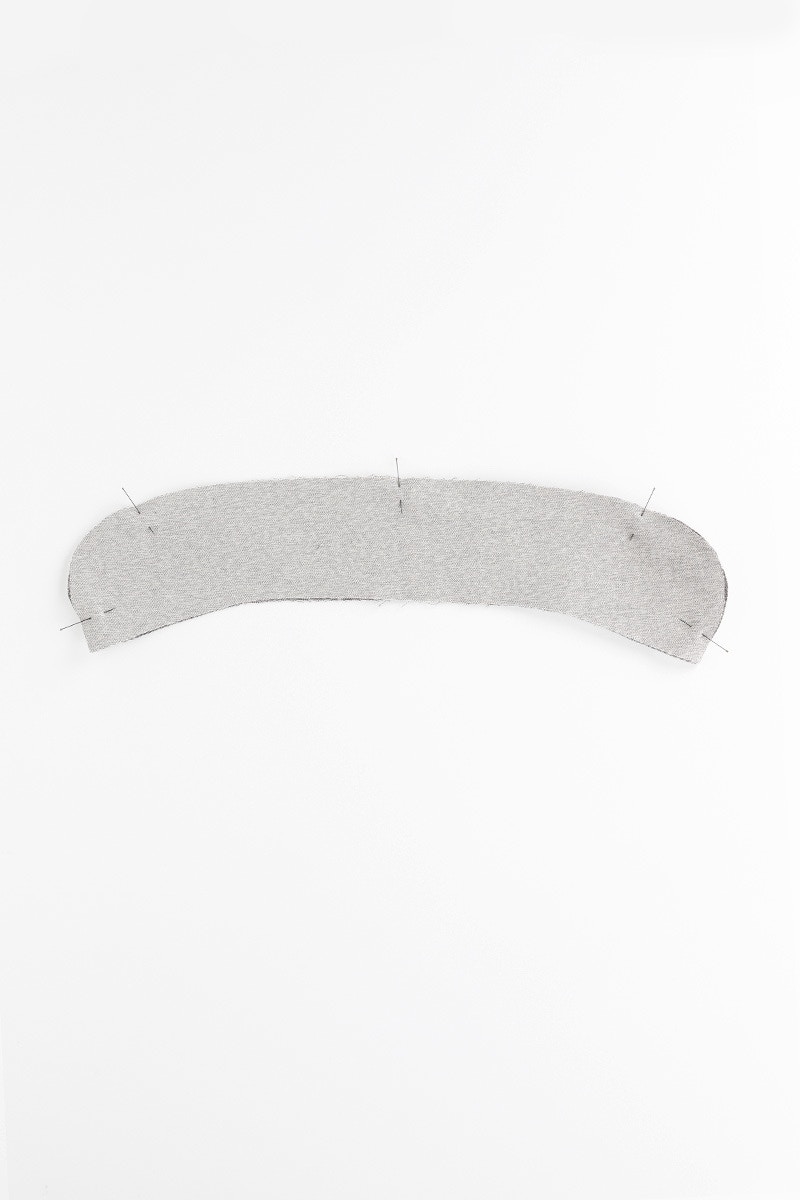
Next, we will sandwich the raw edge of your collar between the two collar stand pieces. Place the un-interfaced collar stand piece on the bottom, right side up. Then, place the collar piece, right side up, on top. Pin it in place, matching the notches as you go.
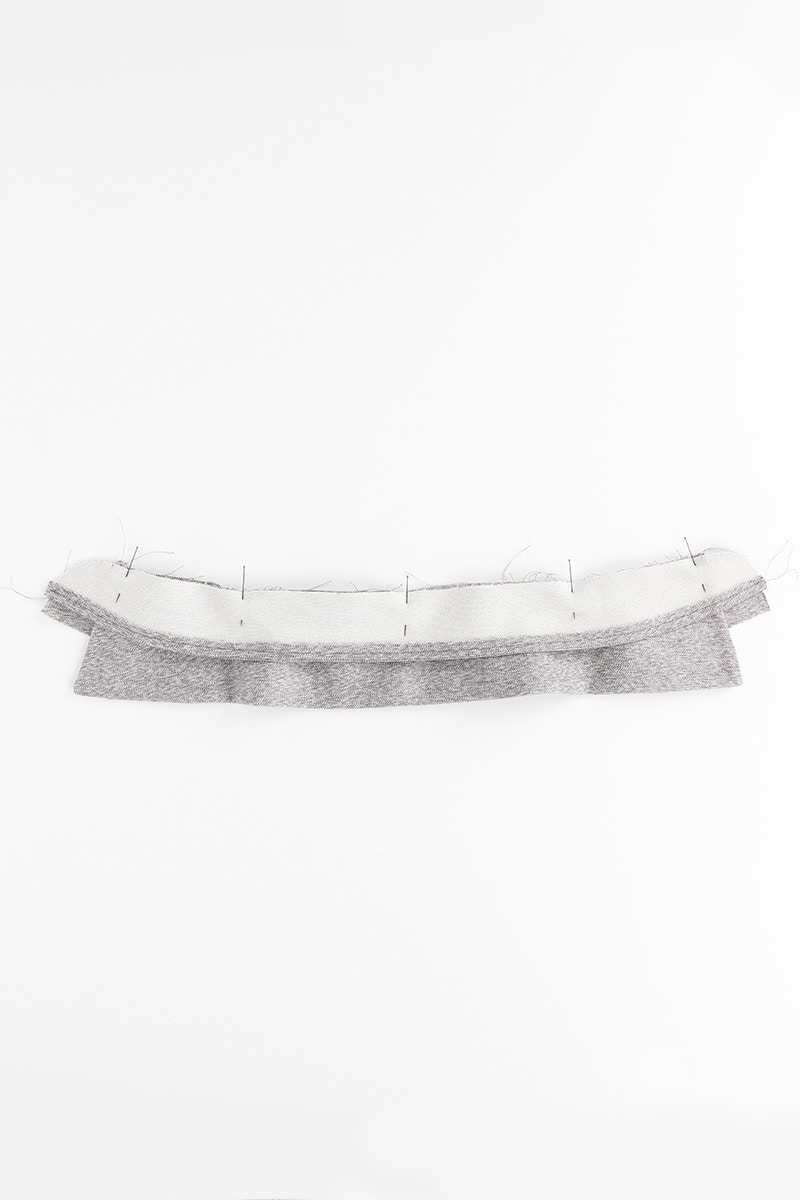

Next, place the interfaced collar stand on top and pin it together through all the layers. Sew the upper edge of the collar stand closed with a 6mm seam.
Now, trim the seam allowance back to 3mm at the curved edges. Be careful not to get too close to your stitching.
Turn your collar out and give it a press!
If you are sewing the half penny or pleated collar it will look like this.
4 — Cuffs and Sleeve Plackets

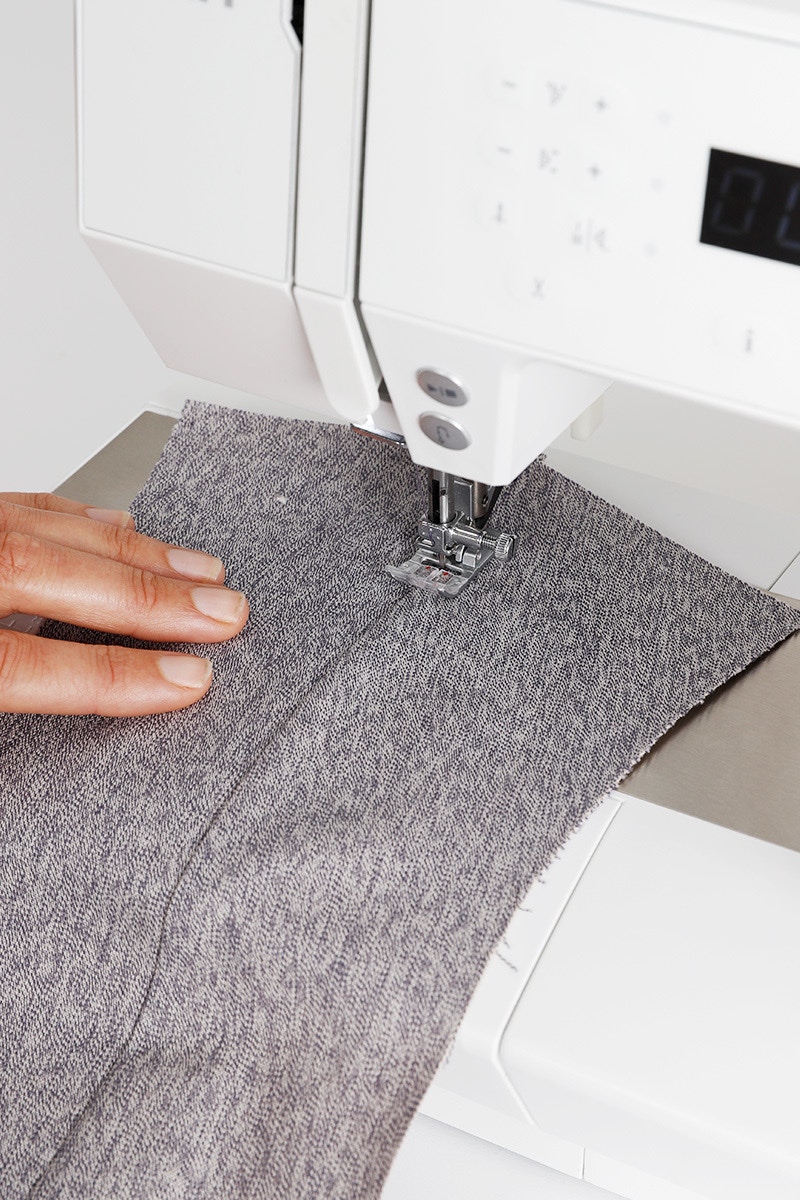
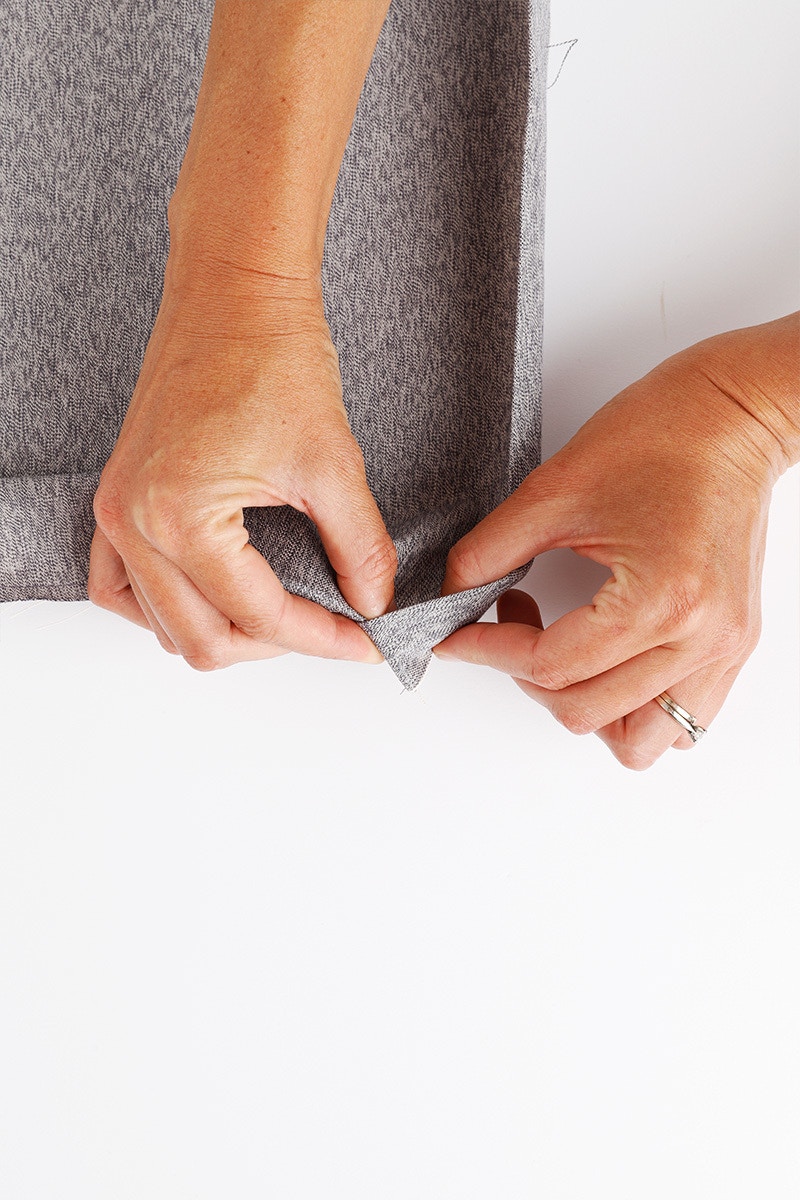
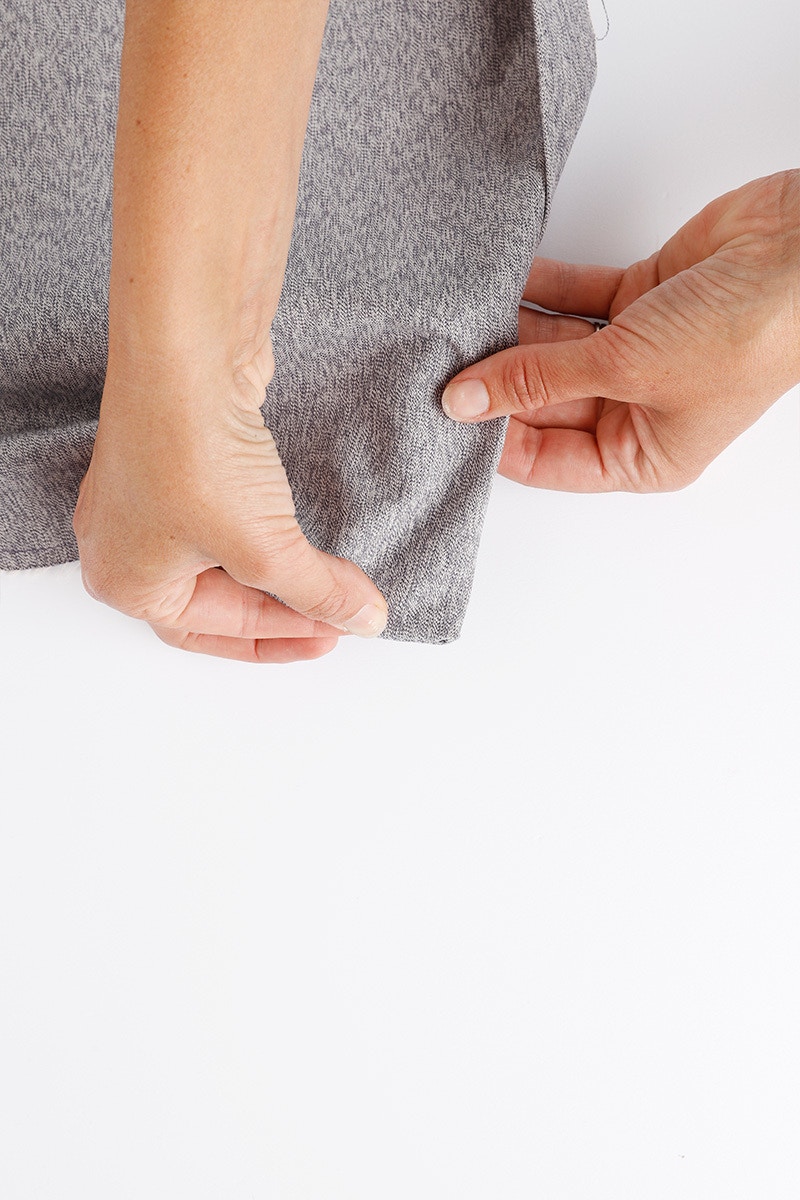
To sew the cuffs, fold the 1cm seam allowance to the wrong side along the long, interfaced edge. Then, fold the cuff in half, right sides together at the notches. Sew the short ends closed with a 1cm seam, making sure to catch the folded seam allowance as you sew.
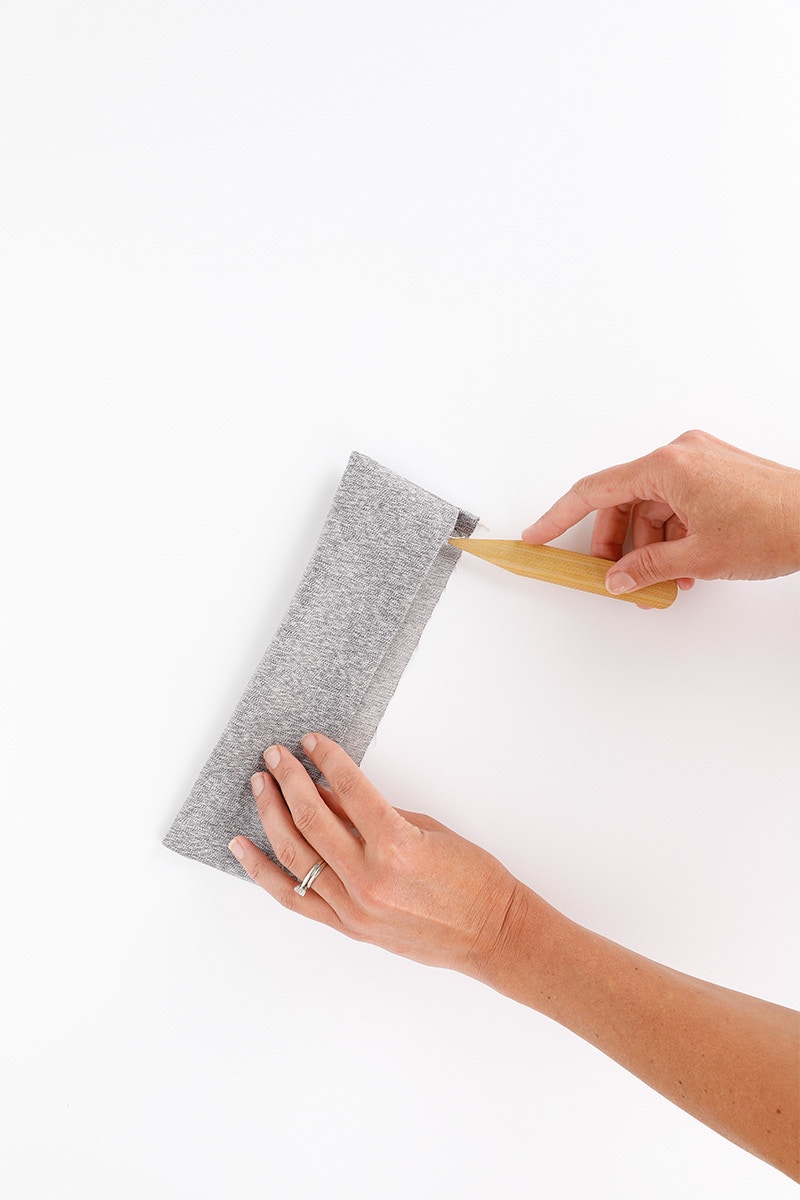
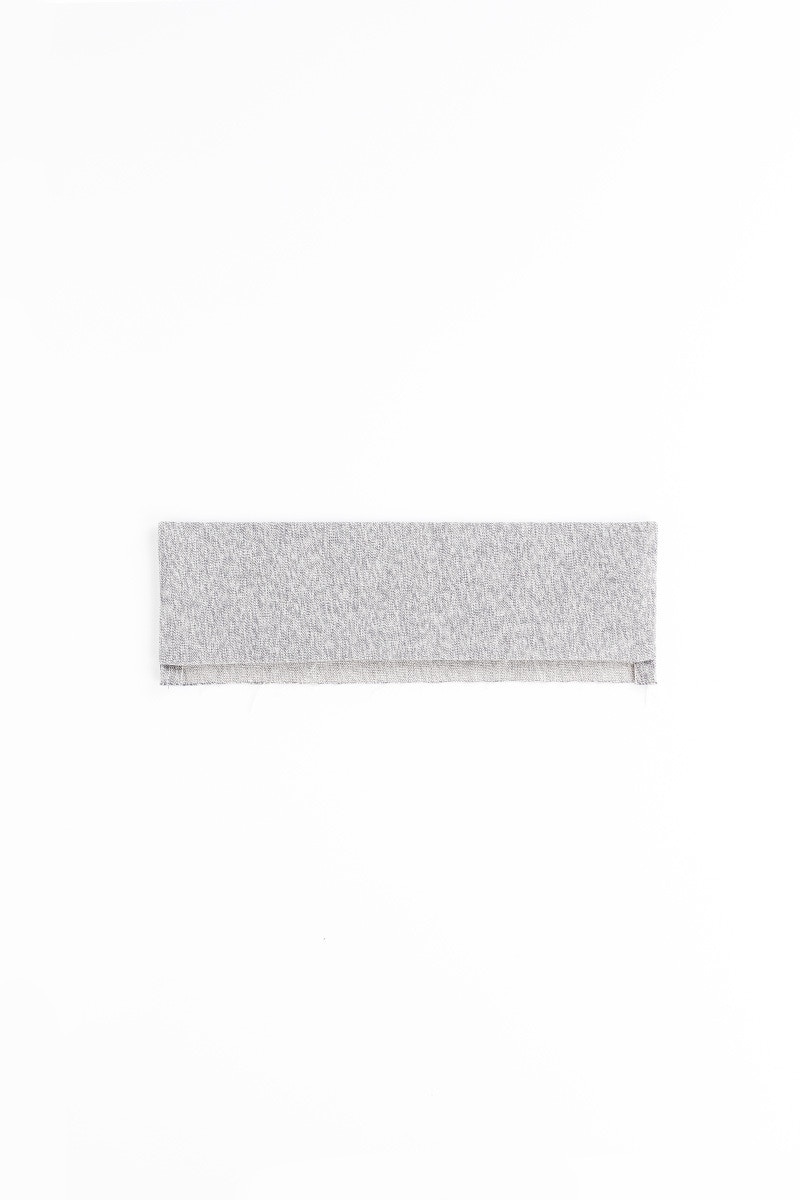
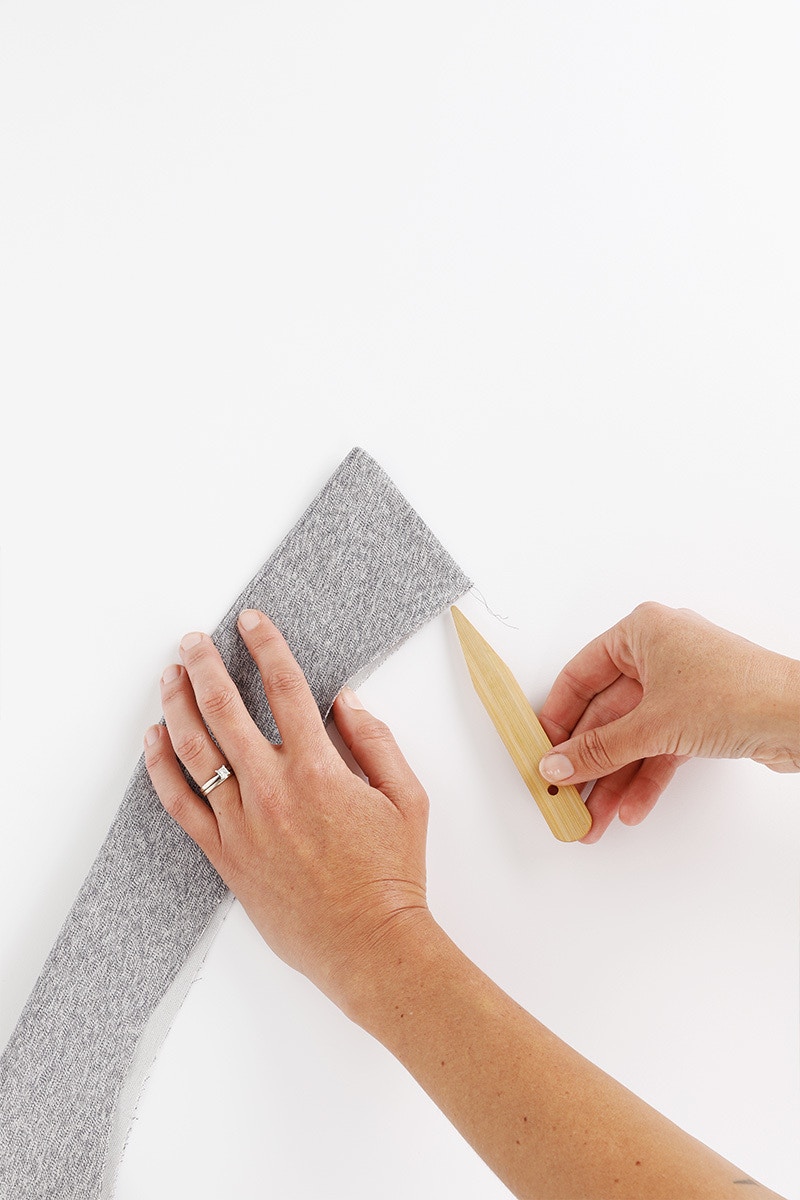
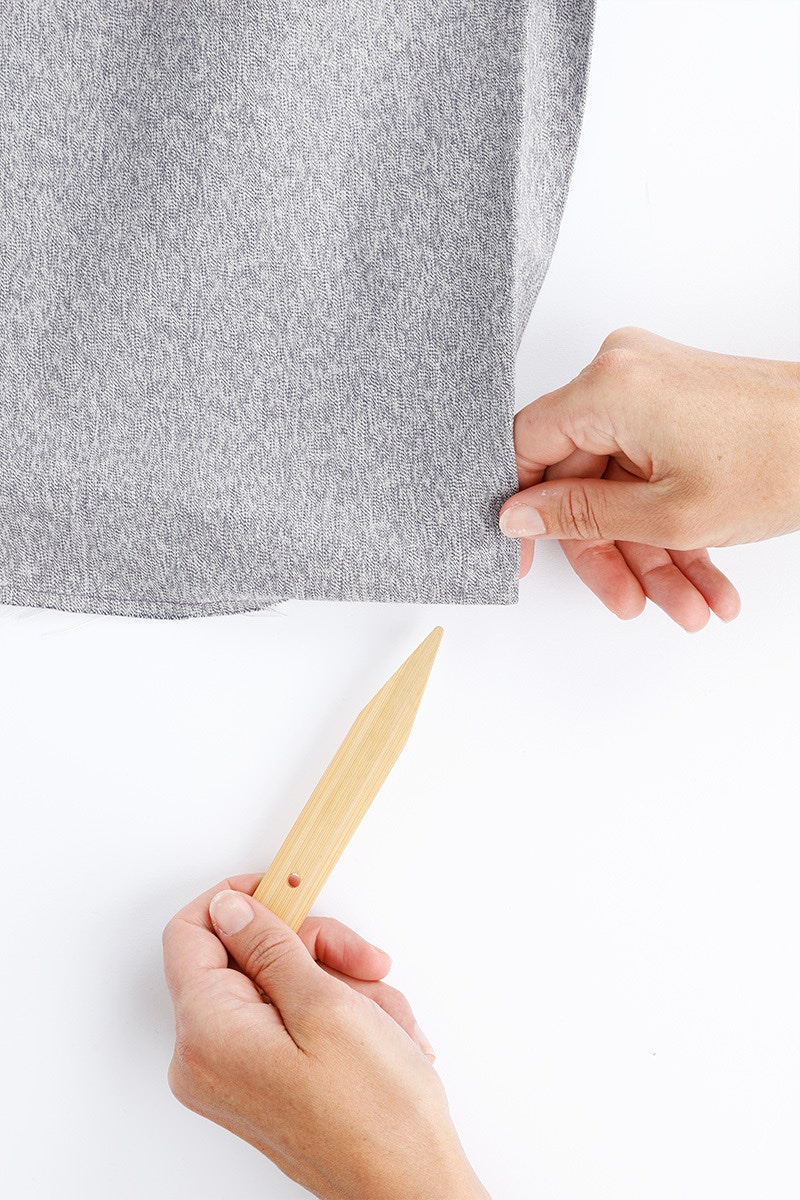
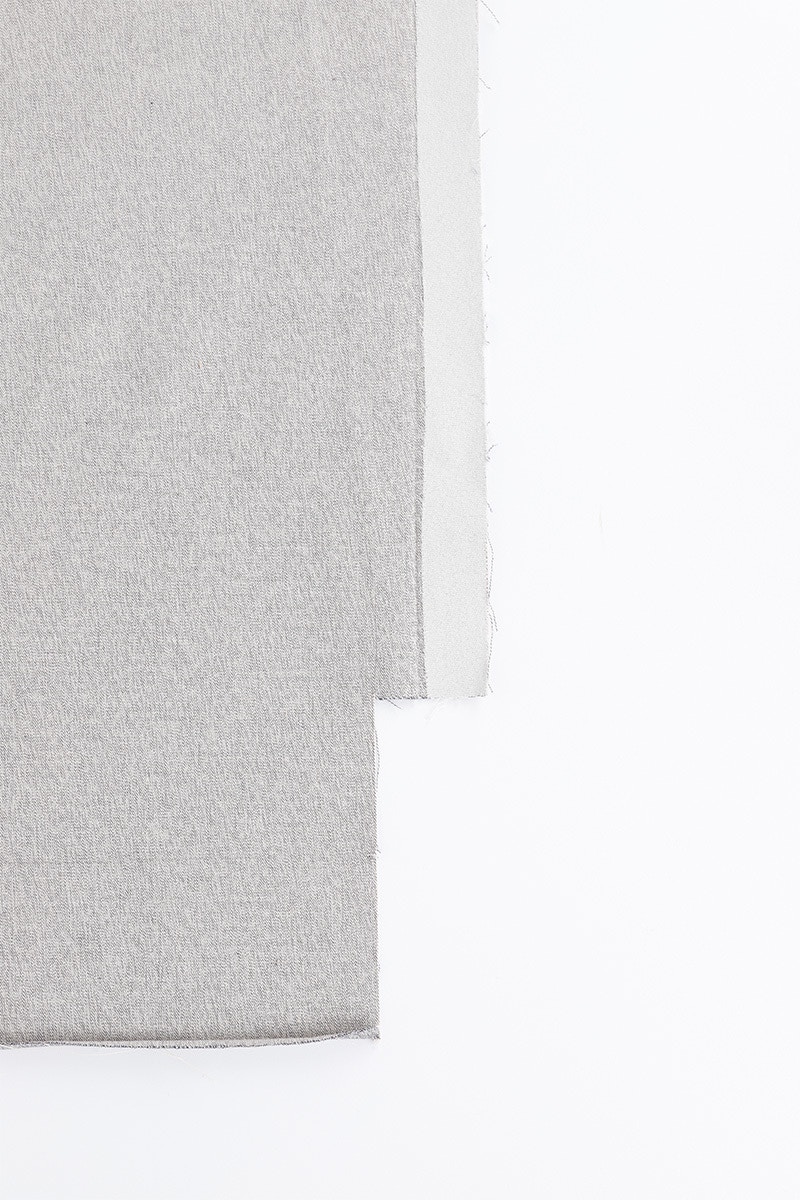
Turn out the cuff with a point turner and and give it a press. Sew the second cuff and put them both aside while we sew the sleeve plackets.
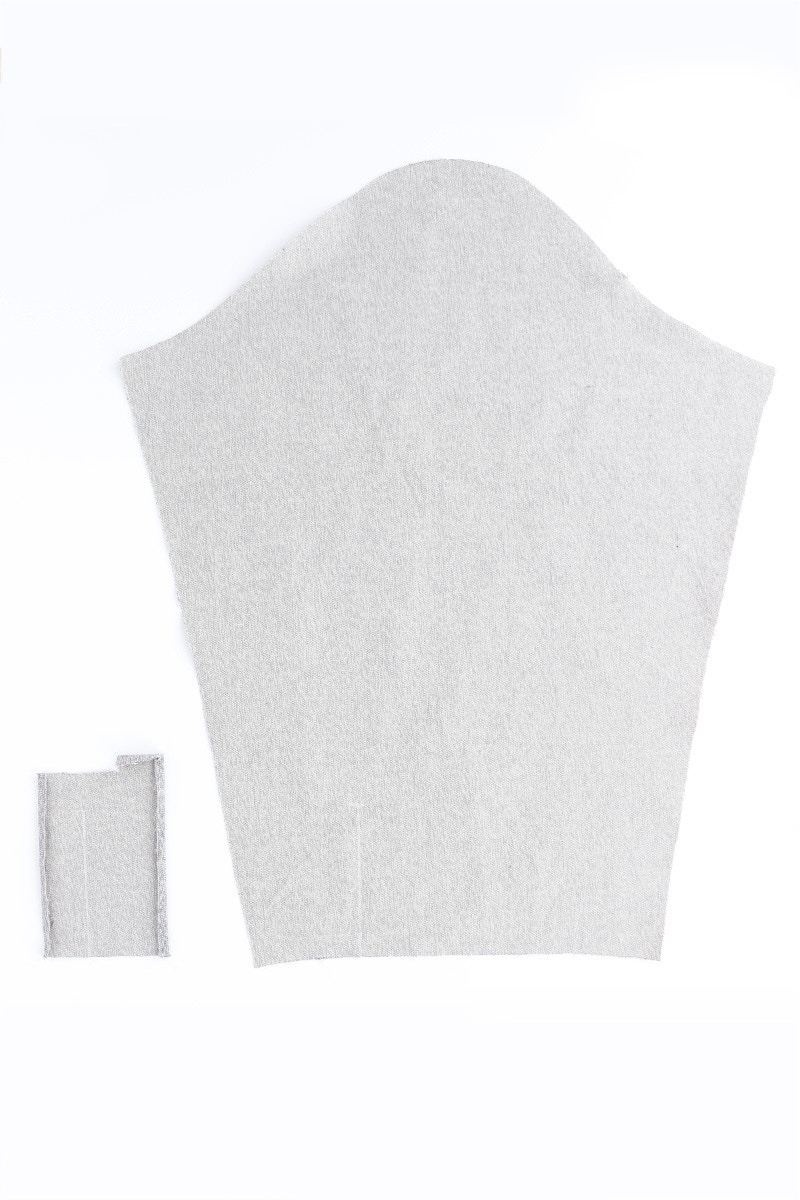
Start sewing the sleeve plackets by transferring the slash line to the wrong side of your placket piece and sleeve. This line runs from the notch to the + as indicated on the pattern. Check the outer edges of the sleeve placket are still folded as per your pressing at the beginning.
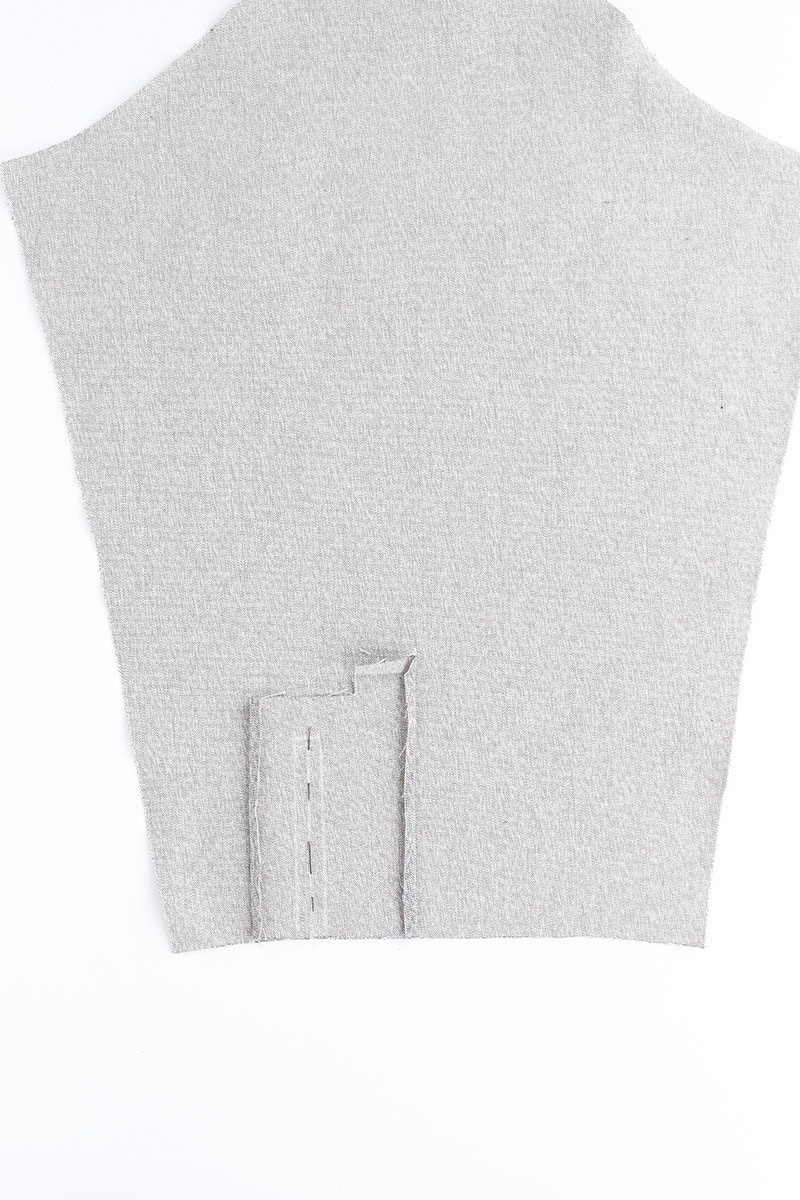
Now, pin the right side of the sleeve placket piece to the wrong side of the sleeve. Make sure to match the notch, slash line and +. The long side of the sleeve placket will be on the wider side of the sleeve.
Starting at the sleeve hem, stitch a box on three sides around the slash line, 6mm from the line. If you chose to mark on your stitching line, follow these lines. The finished box will measure 12mm wide in total.
Next, cut up the slash line to just below the + mark. Then, cut diagonally into the corners. Cut as close as you can to each corner without cutting through your stitching.
Now turn your sleeve over so it is right side up and pull the placket through to the right side. Fold and press around the box edges to get a clean edge.


The shorter side of the sleeve placket is the underlap and it will sit on the bottom. Fold out the underlap so you can see the wrong side. Now, making sure that the 6mm seam allowance is still folded under, fold the underlap in half, wrong sides together, as indicated by the notch. The edge will meet the stitching line. Ensure that all your seam allowances are tucked in and everything is sitting flat, then pin the underlap in place.
Now, edge stitch the long edge of the underlap closed and give it a press.
The long side of the sleeve placket is the overlap and it will sit on top. Fold out the overlap so you can see the wrong side. Ensure that the 6mm seam allowance is still folded under and the top is folded down 1cm. Now, fold the overlap in half, wrong sides together, as indicated by the notch. The edge will meet the stitching line. Ensure that all your seam allowances are tucked in and everything is sitting flat, then pin the overlap in place.
Next, measure down 2.5cm from top edge of the sleeve placket and mark a line across the width of the placket.

Now we will sew the placket closed!
Start at the open edge of the placket, 2.5cm from the top and stitch across the placket on the line you have just marked.

When you reach the other side, stop with your needle down, pivot 90 degrees and edge stitch to the top of the placket overlap. At the top corner, pivot another 90 degrees and edge stitch to the next corner. Pivot 90 degrees one more time and edge stitch the overlap closed. Make sure you don't catch the underlap as you sew!

Give your placket a press and repeat for the other sleeve!
Now it's time to sew your sleeve pleats.

To create the two sleeve pleats, bring the two notches to the side of the placket together and pin in place. Do the same for the next two notches. The pleats will open towards the sleeve placket. Baste them in place and then give them a gentle press. Then sew your pleats for the other sleeve.
5 — Back Yoke
Now we begin to assemble our garment, starting with the back yoke.

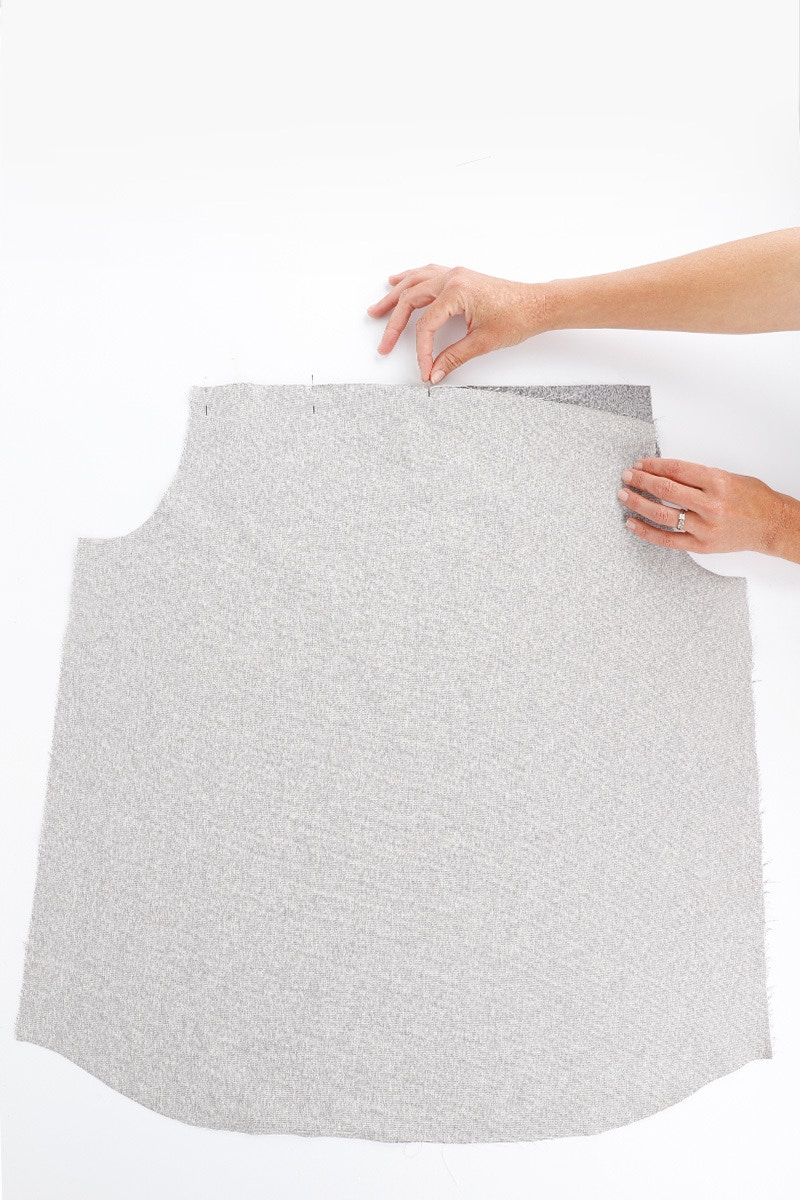
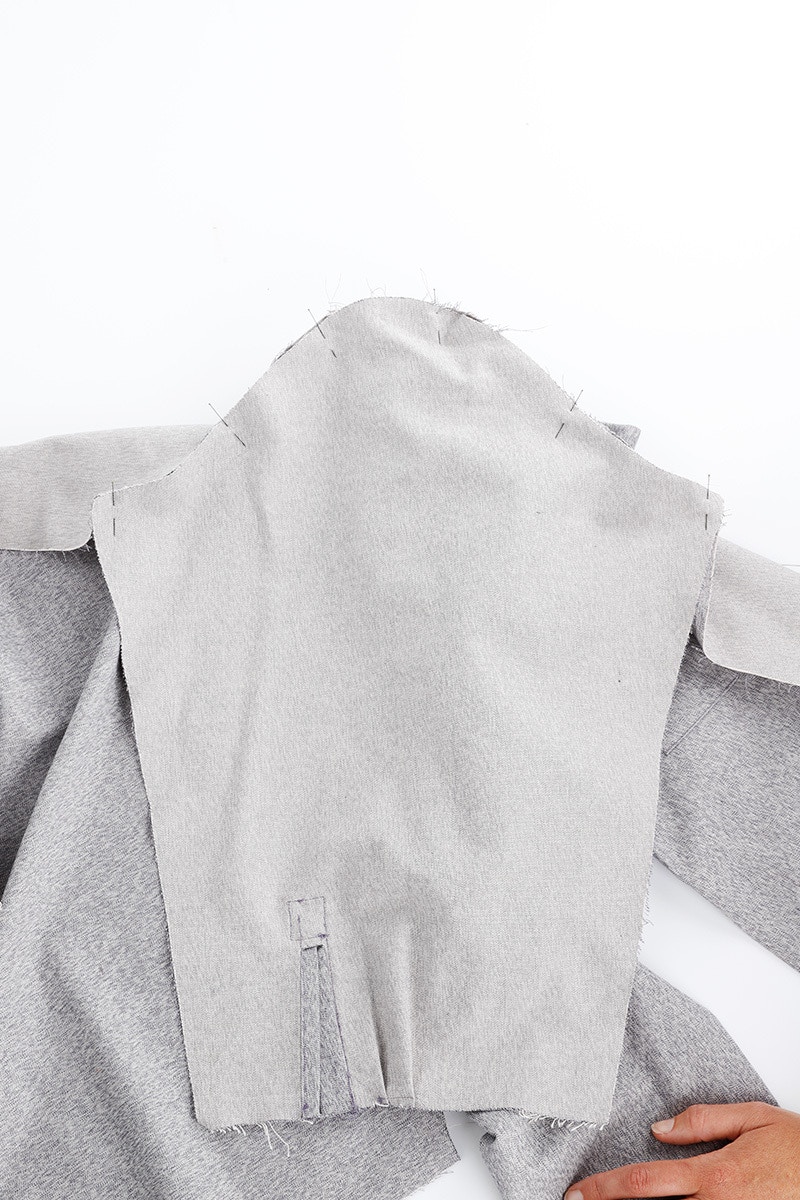
To sew the back yoke, place one of the yoke pieces on the bottom right side up. This is the piece that will be visible from the outside. Lay your back piece on top of the yoke so the right sides are together and pin them together.
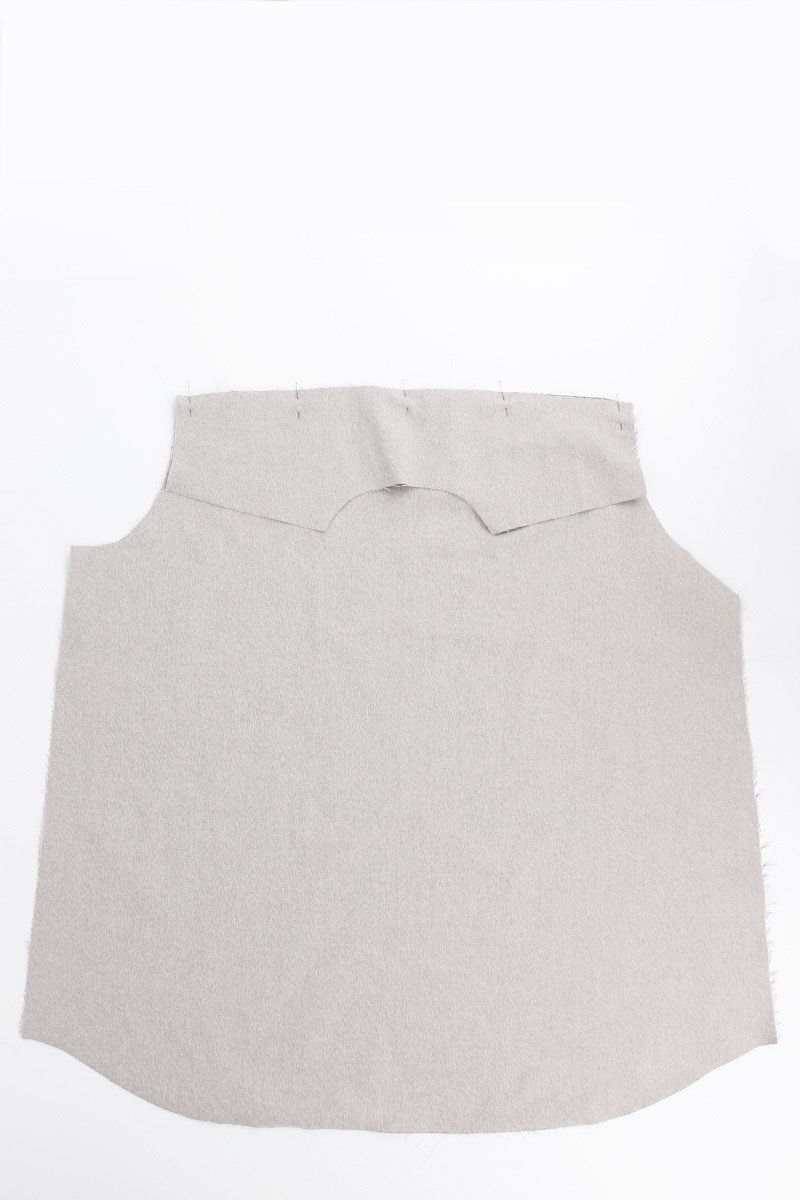
Now place the second yoke piece on top. The right side of the yoke will face the wrong side of the back piece. Pin the three layers together, matching the notches and edges as you pin.
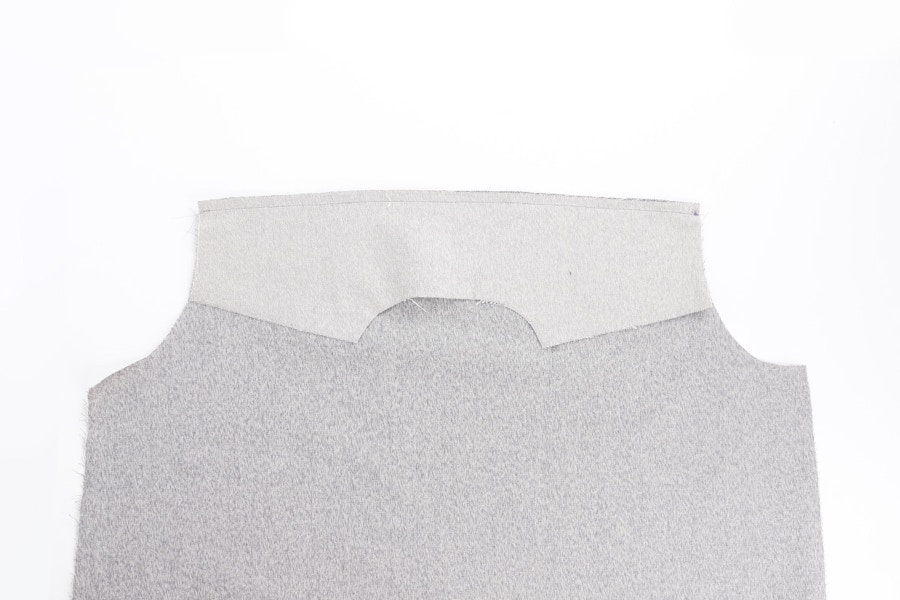
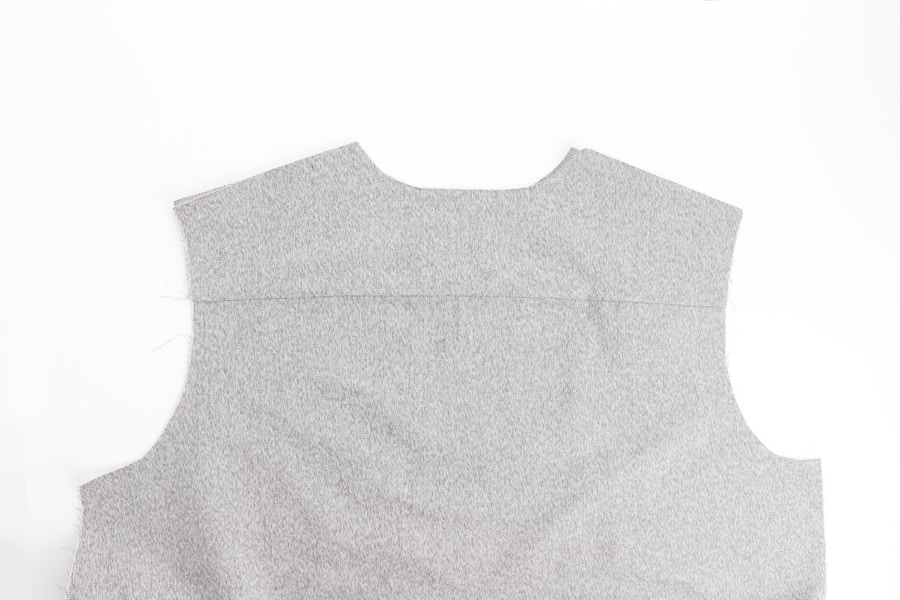
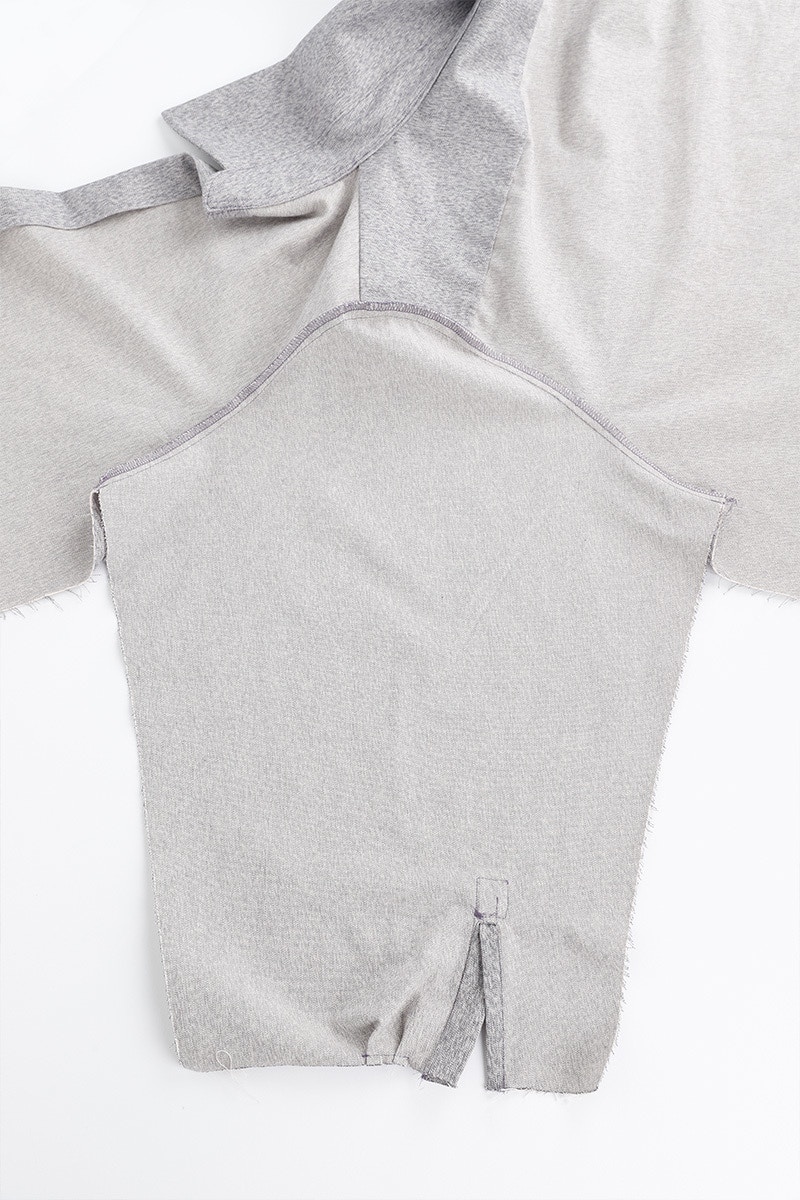
Now, sew through all the layers with a 1cm seam. Press the yoke pieces upwards, with the wrong sides together.
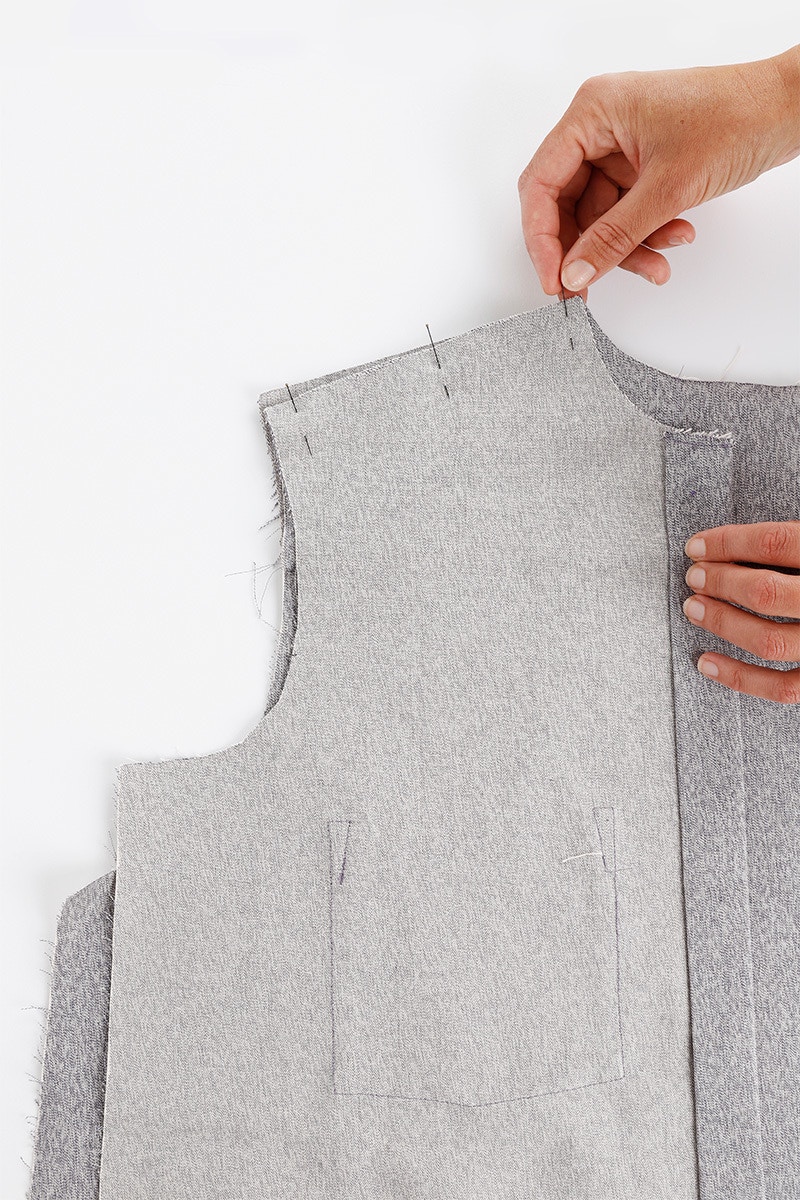
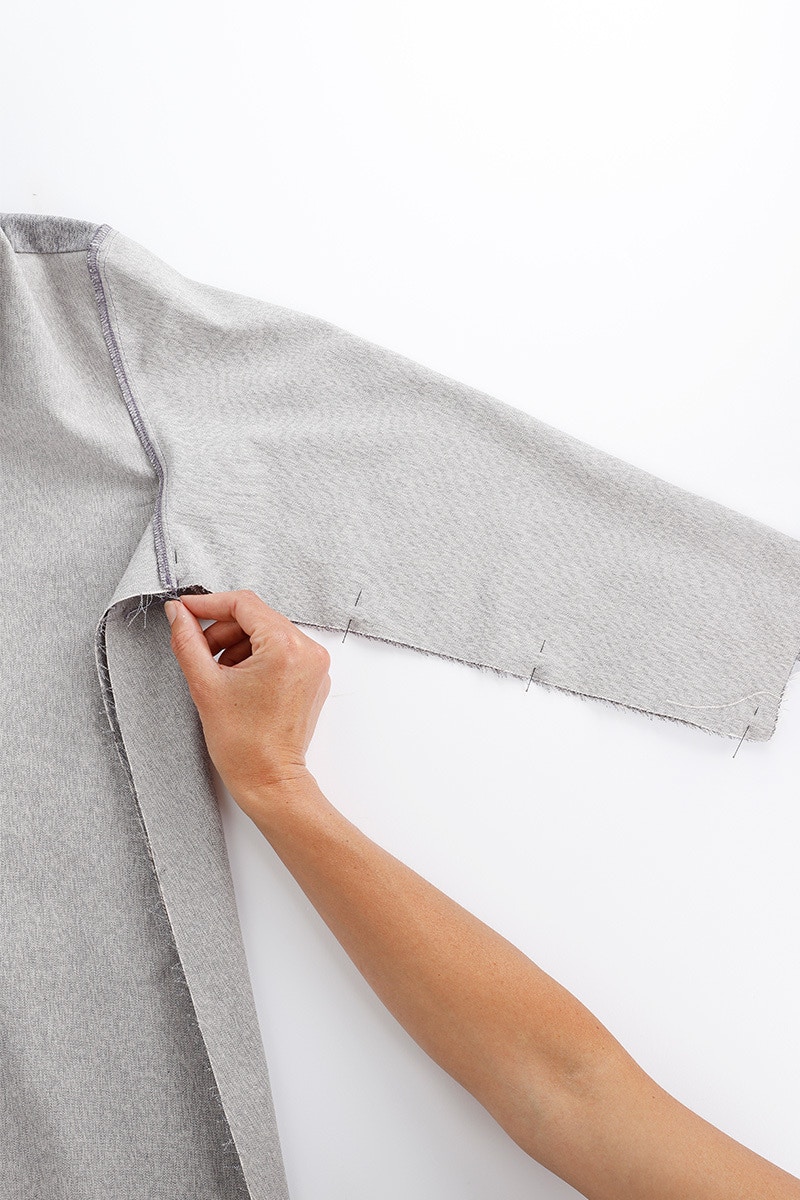
Now we will attach our front and back pieces at the shoulder. To do this, first pin the left outer yoke shoulder to the left front shoulder with the right sides together. Be sure to leave the inner yoke piece free in this step.
Baste the shoulder seams together just inside the 1cm seam allowance.

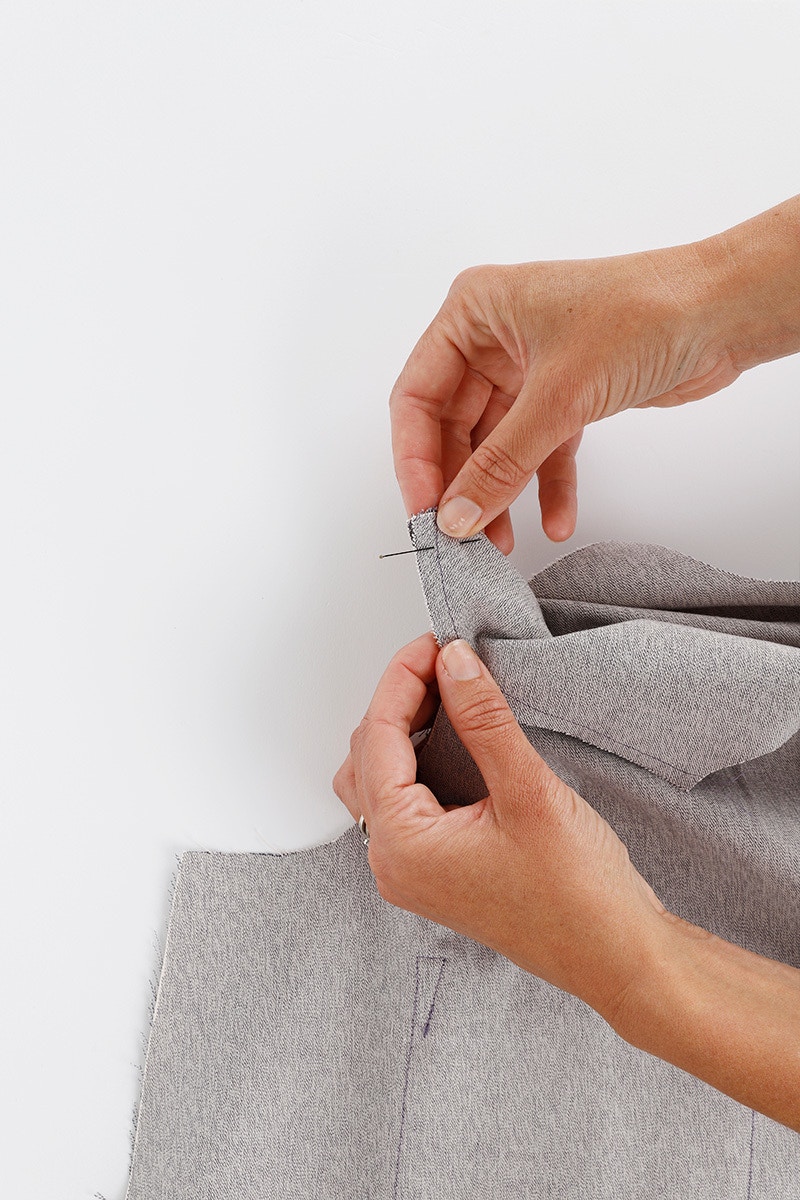
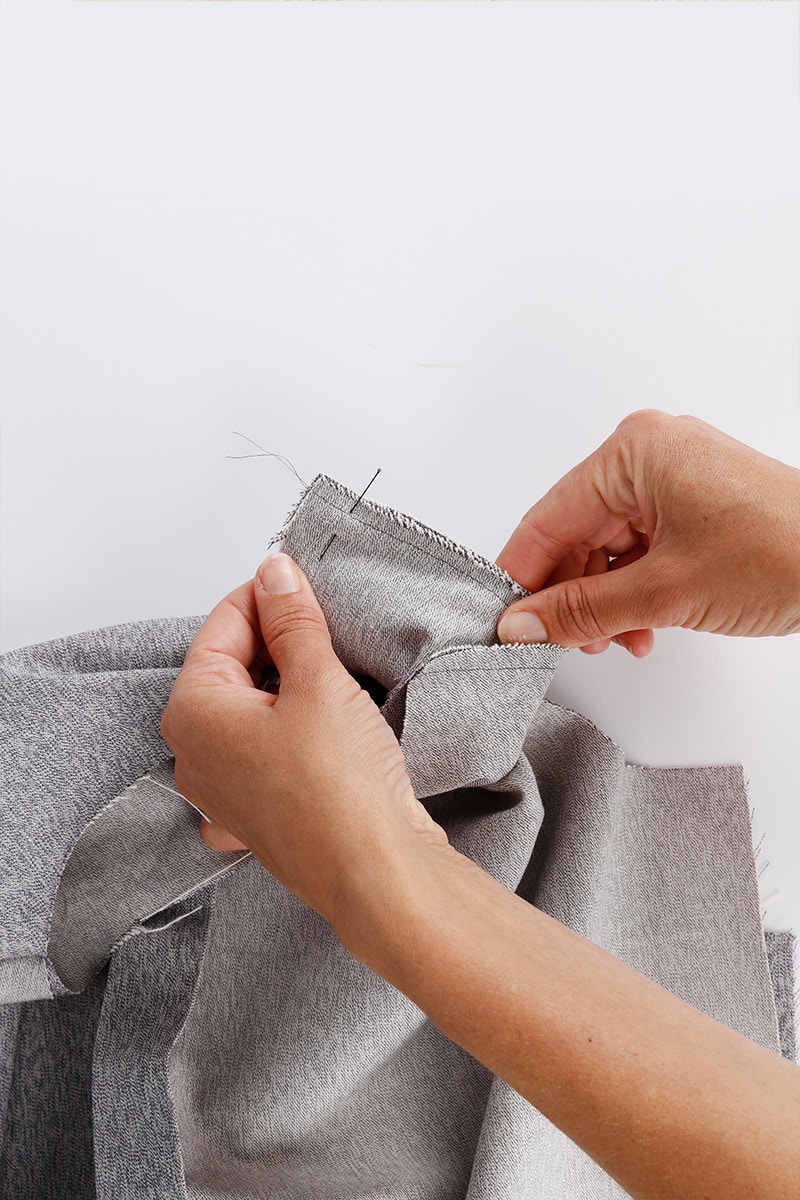
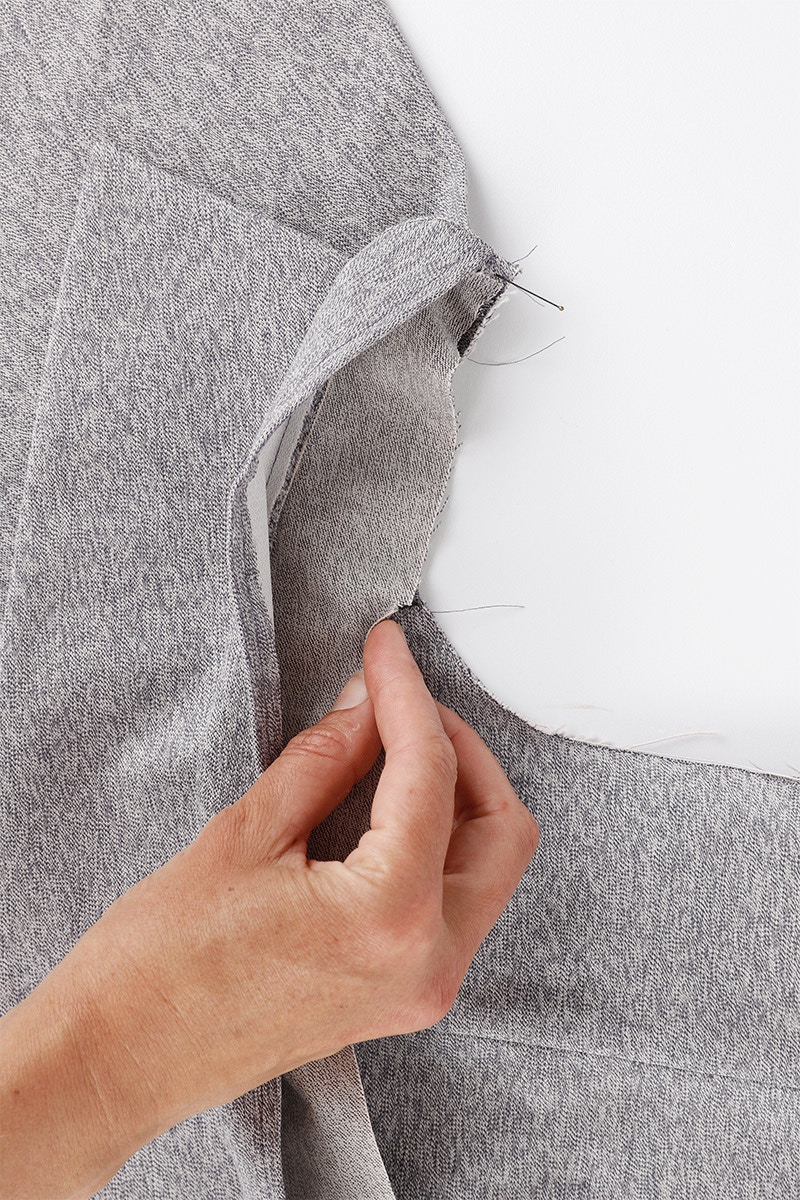
Now we will attach the inner yoke at the shoulder. Working at the sleeve edge, fold your pieces around and pin the right side of the inner yoke to the wrong side of the left front at the shoulder. Your front and back pieces will be pulled into your yoke as you do this.
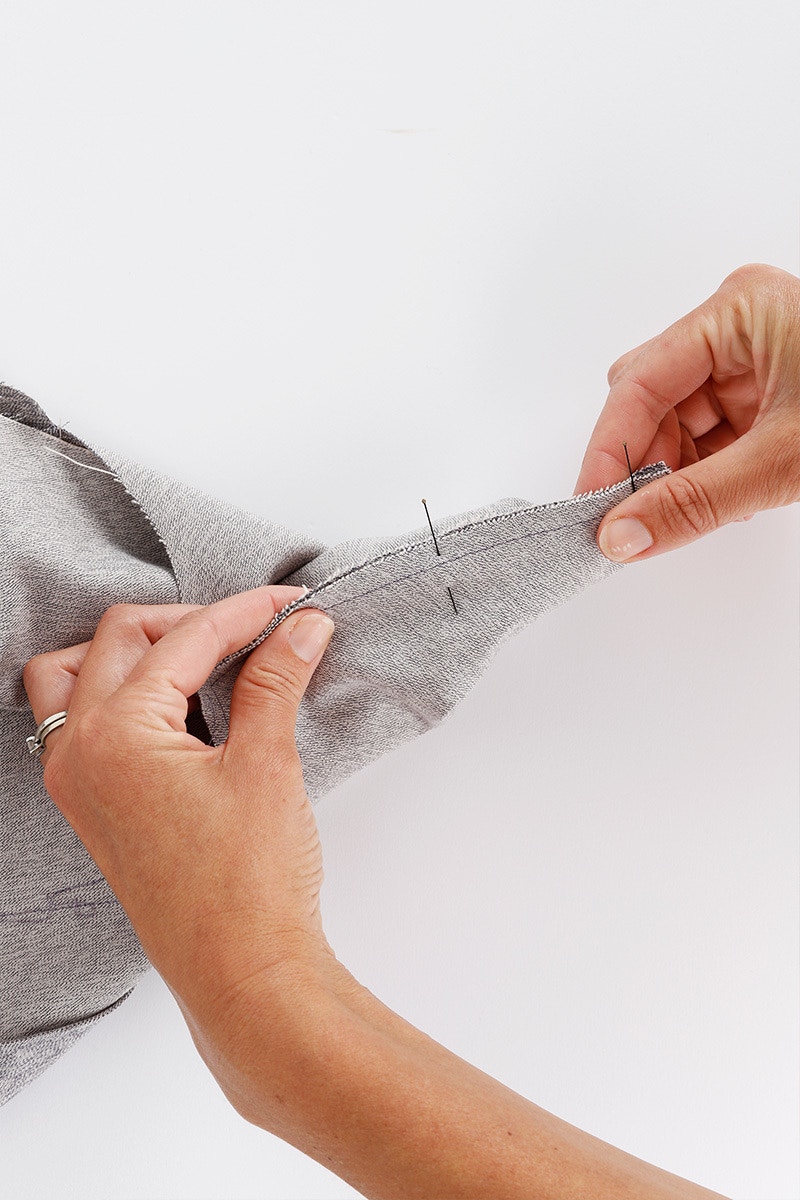
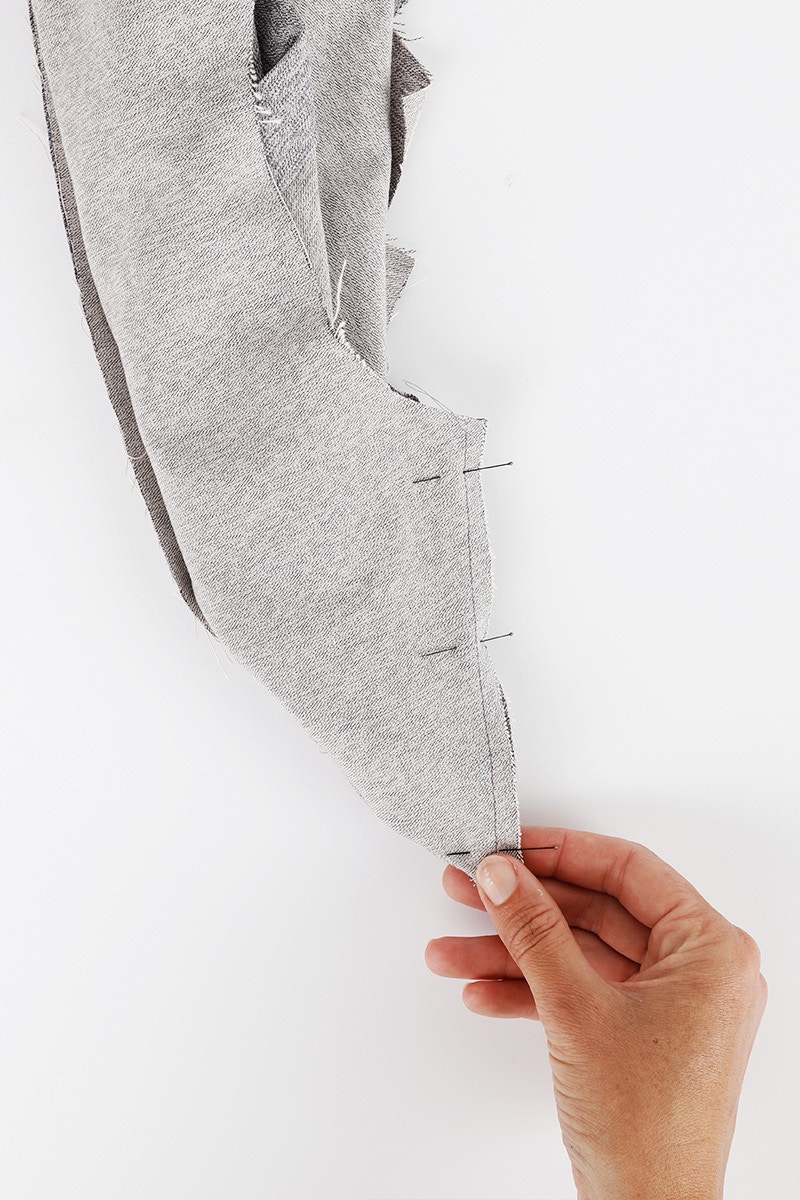
Continue to match the shoulder edges, pinning place as you go. It may require a bit of manoeuvring of your pieces as you do this, especially if you are sewing in a heavier fabric. Be careful not to catch the main body of your front or back piece with as you pin.

Now sew the shoulder seam with a 1cm seam.
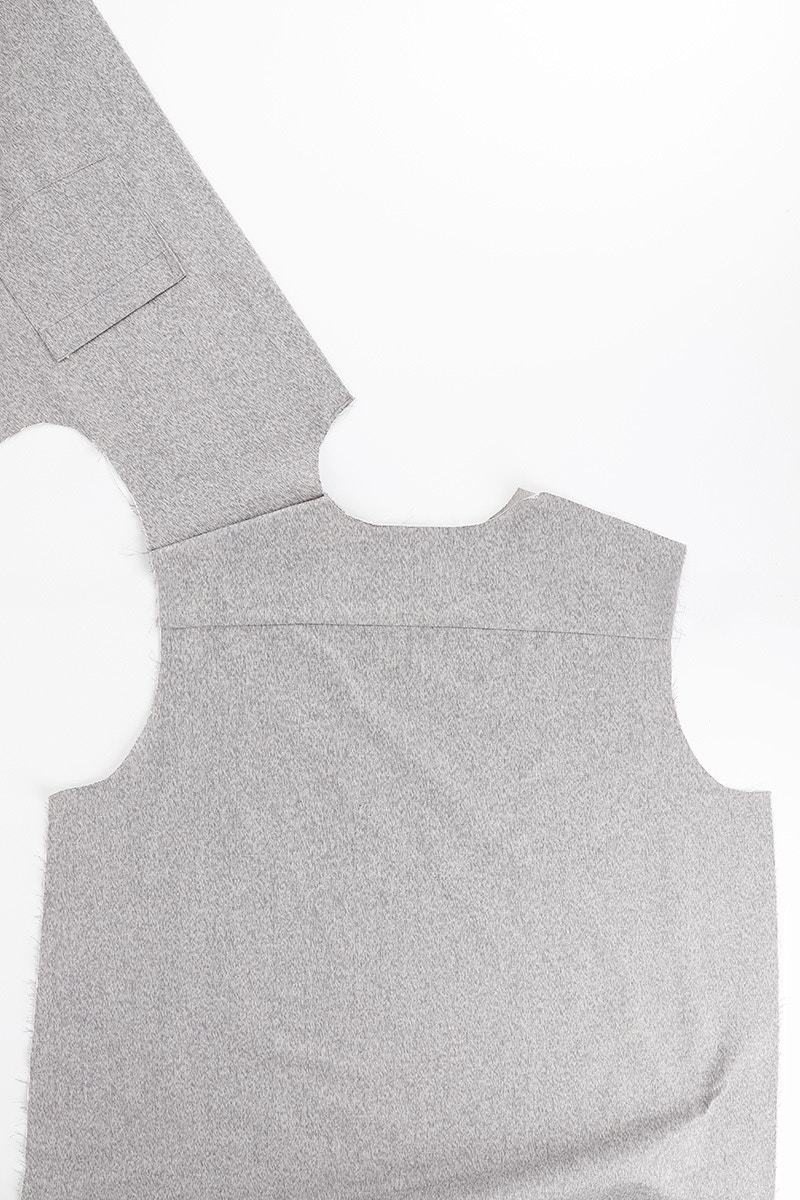
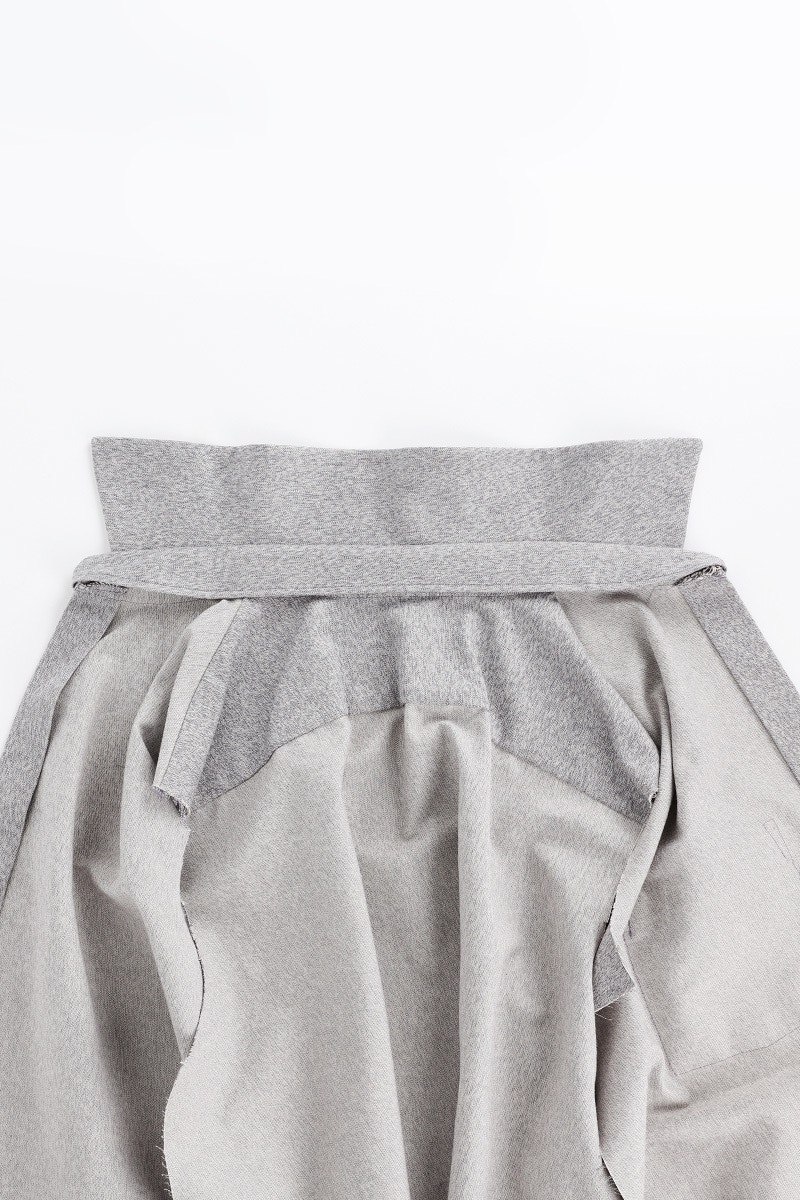
Turn your garment right side out and give it a press.

Repeat the process for the right shoulder.
First sew the right outer yoke shoulder to the right front shoulder with the right sides together. Be sure to leave the inner yoke piece free in this step. Baste the shoulder seams together just inside the 1cm seam allowance.
Pin the right side of the inner yoke to the wrong side of the right front at the shoulder. Continue to match the shoulder edges, pinning place as you go. Sew the shoulder with a 1cm seam.
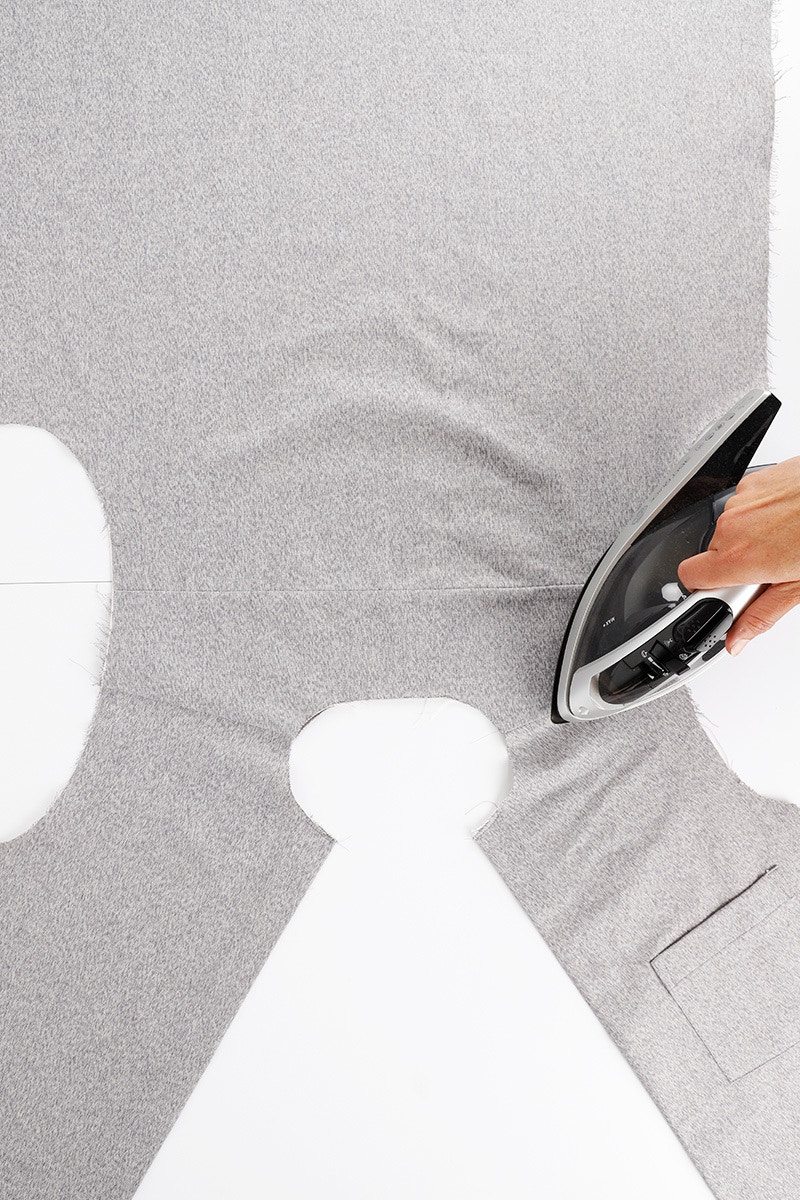
Turn your garment right side out and give your completed shoulders a press!
6 — Attach Collar
Now that we have sewn the yoke, it is time to attach the collar. The method is the same for all three collars. Attach the collar to your shirt or dress body at the neck edge by pinning the raw edge of the collar stand to the right side of the shirt matching the shoulder and centre back notches.
Sew the two layers together with a 1cm seam, then press this seam into the collar stand.

Pin the collar stand closed. The folded edge of the collar stand will meet the line of stitching you have just sewn.
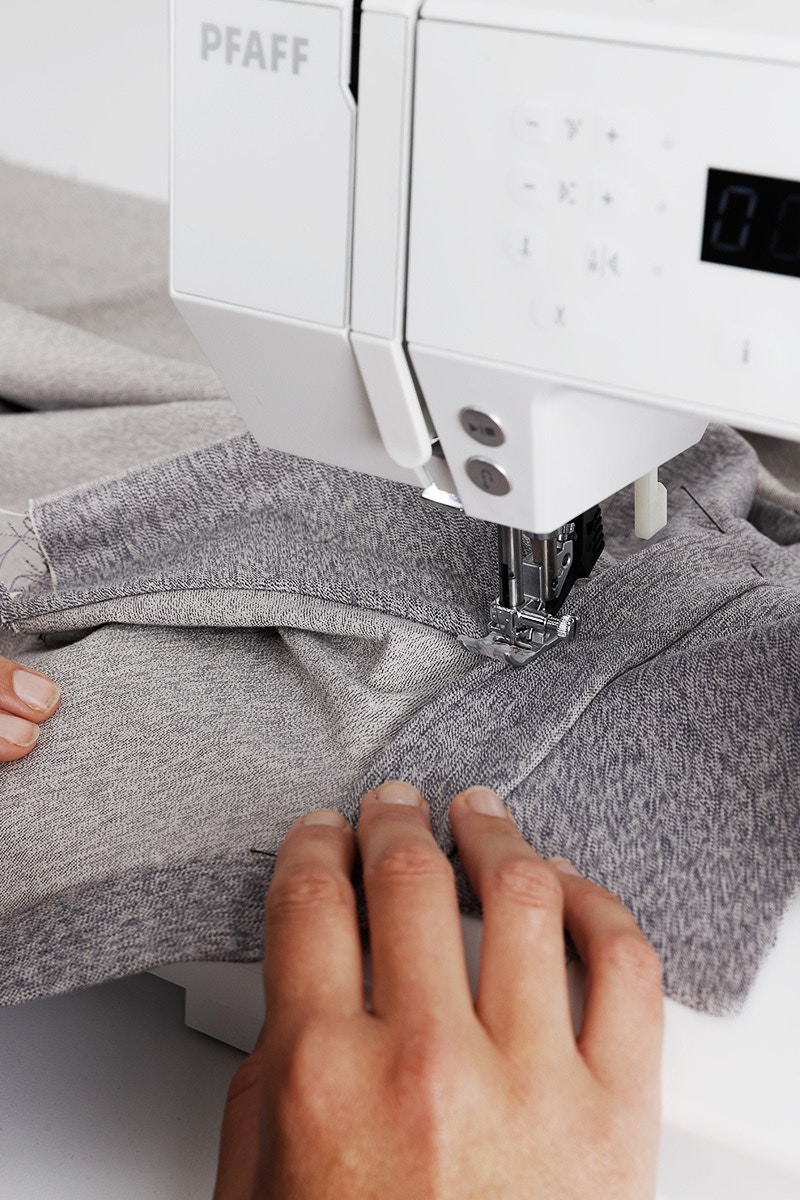

Now we will sew the stand closed. With the wrong side of the garment facing up and starting at the left shoulder seam, edge stitch around the entire circumference of the collar stand, finishing at the left shoulder again.

Now your collar is attached!
7 — Attach Sleeves and Side Seams
Now we will attach the sleeves. The process is the same whether you are sewing long or short sleeves. With the right sides together, match the back, shoulder and front notches and pin in place.
Sew the sleeve to the body with a 1cm seam, then neaten the seam with your overlocker or serger.

Now, press this seam towards the body of the garment and top stitch the seam allowance to the body of your shirt or dress. Do the same for the other sleeve.
Next we will sew the side seams. The process is a little different depending on whether you are sewing the shirt or the dress.

To sew the shirt side seam, pin the side seams together, matching the sleeve seam. Sew them together with a 1cm seam then neaten with your overlocker or serger. Now press this seam to the back and repeat for the other side. Now you are ready for to attach your cuffs in the next step.

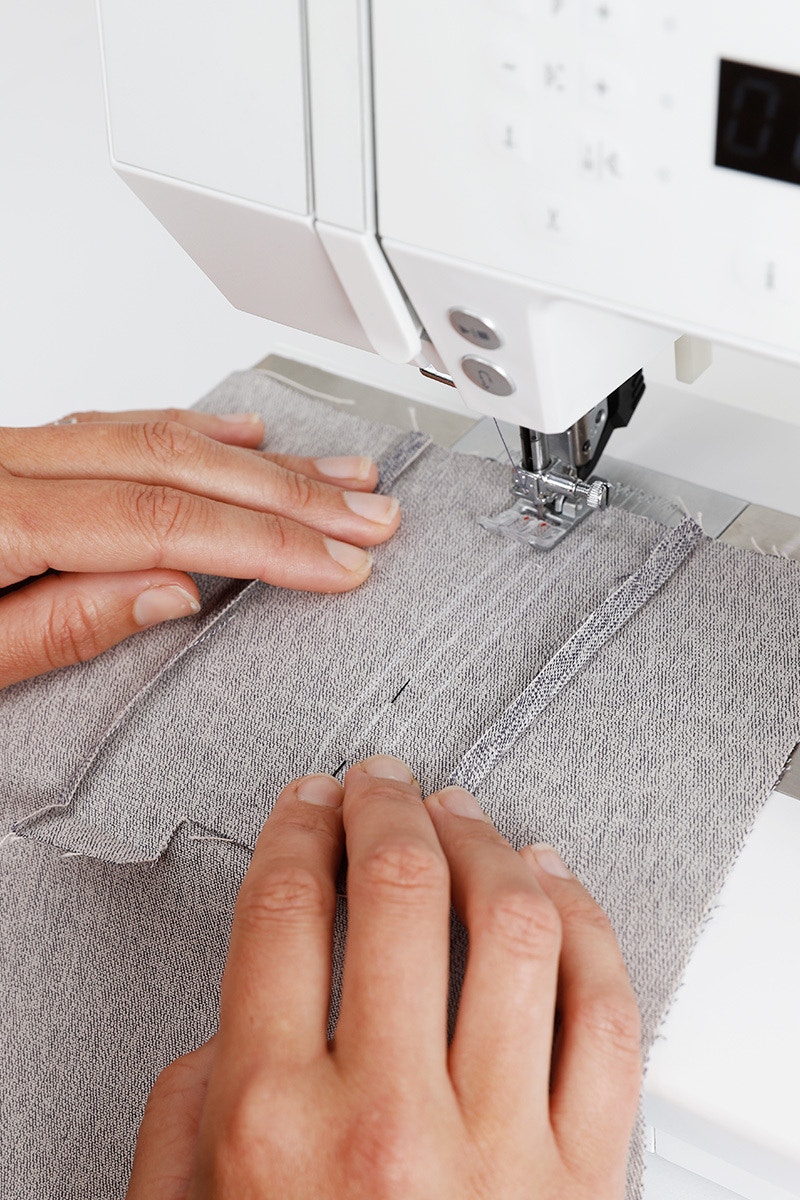
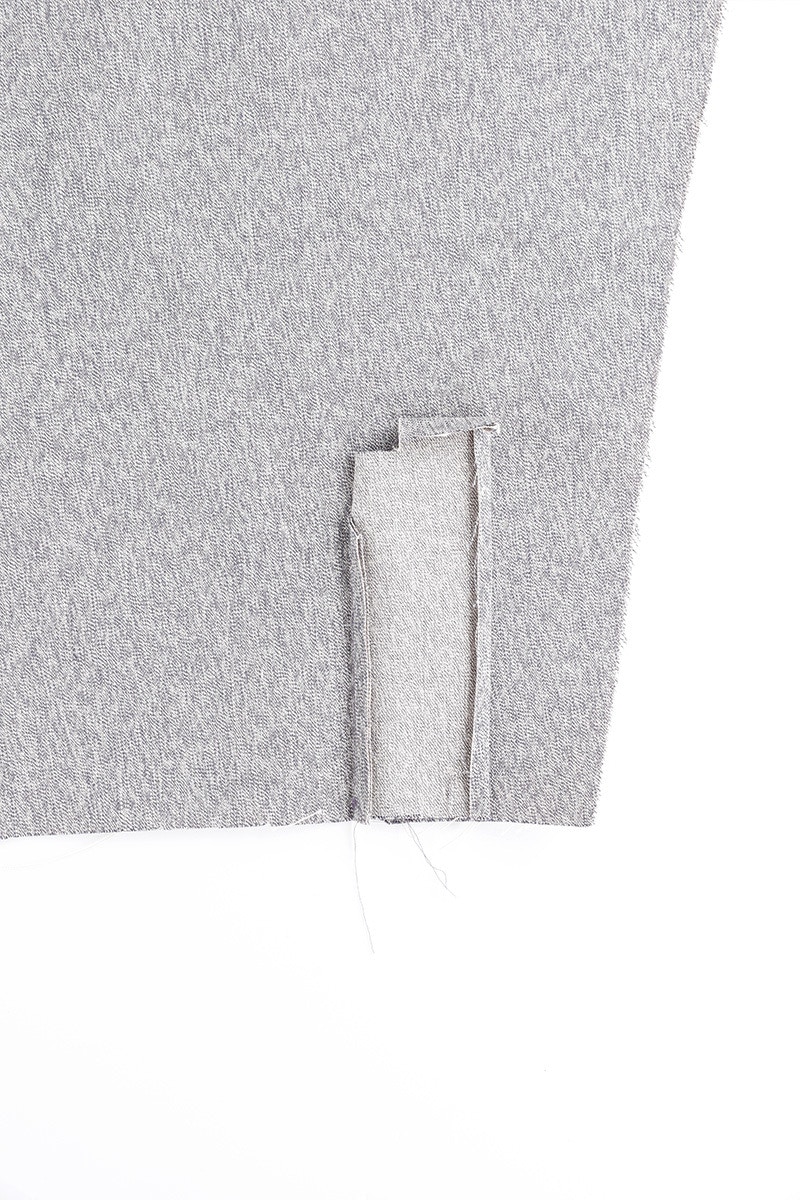
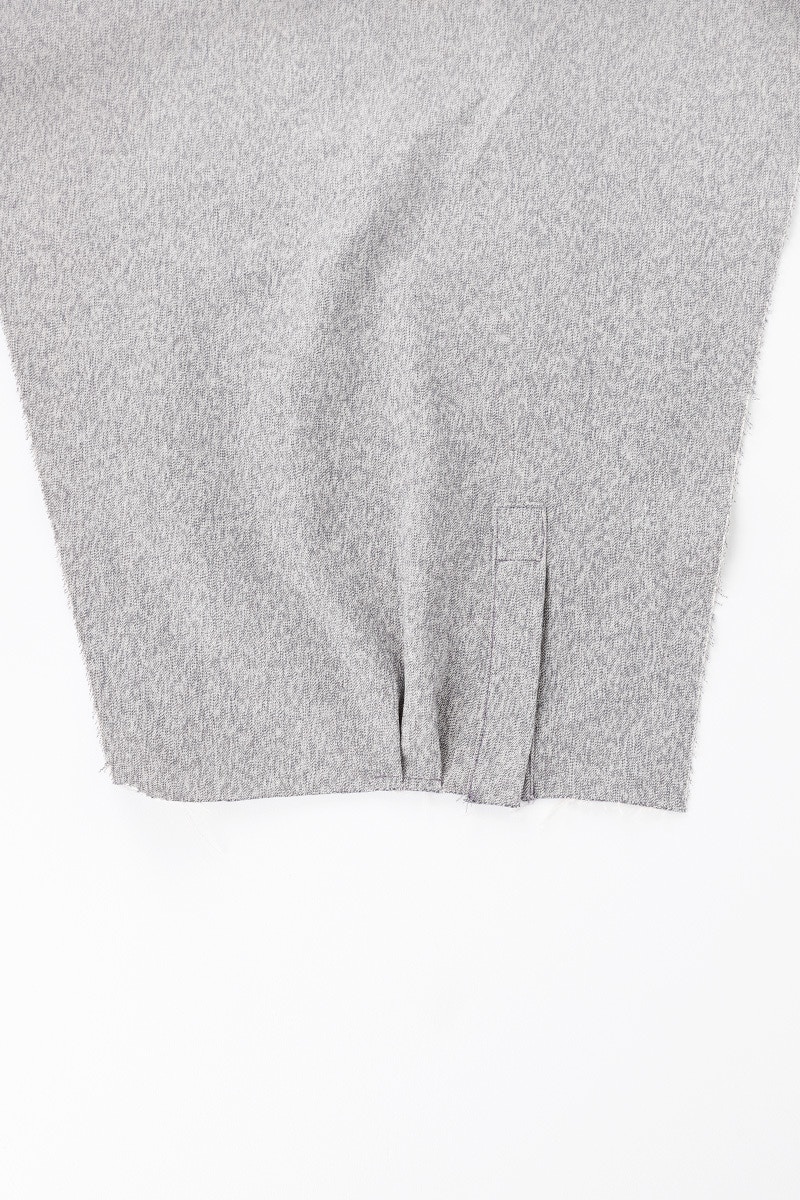
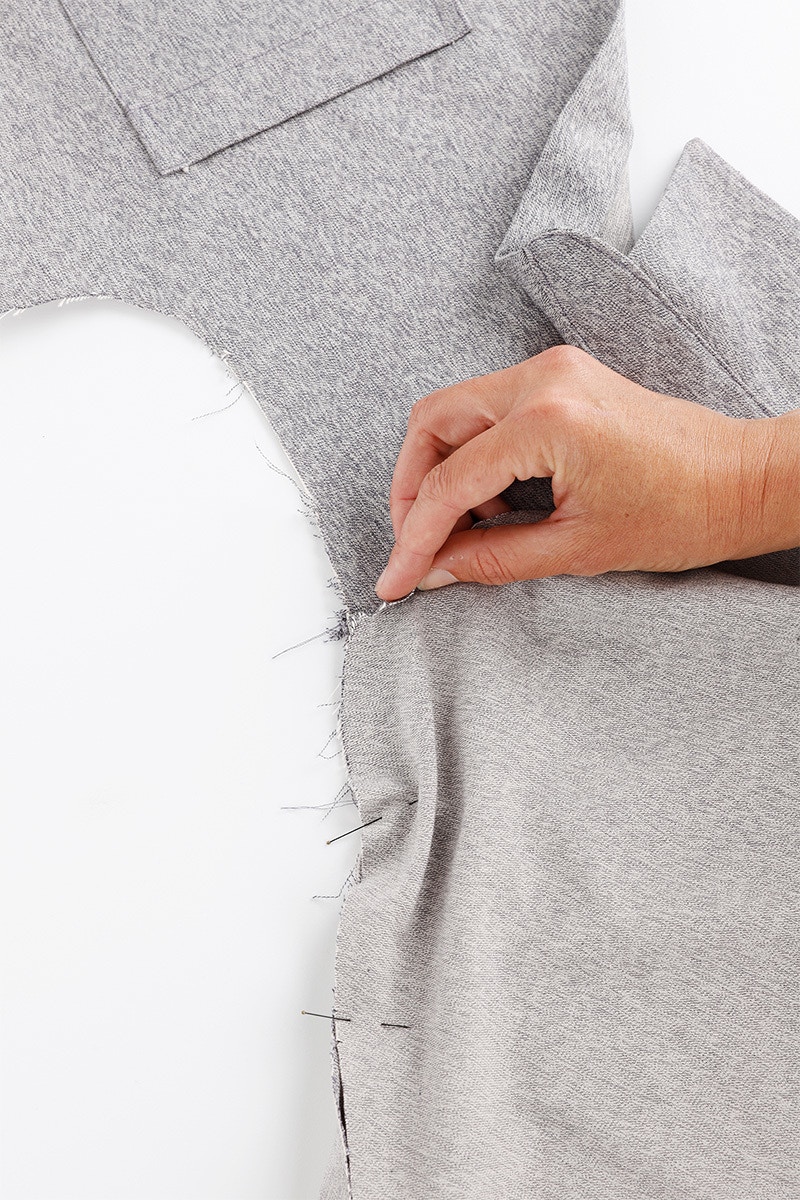
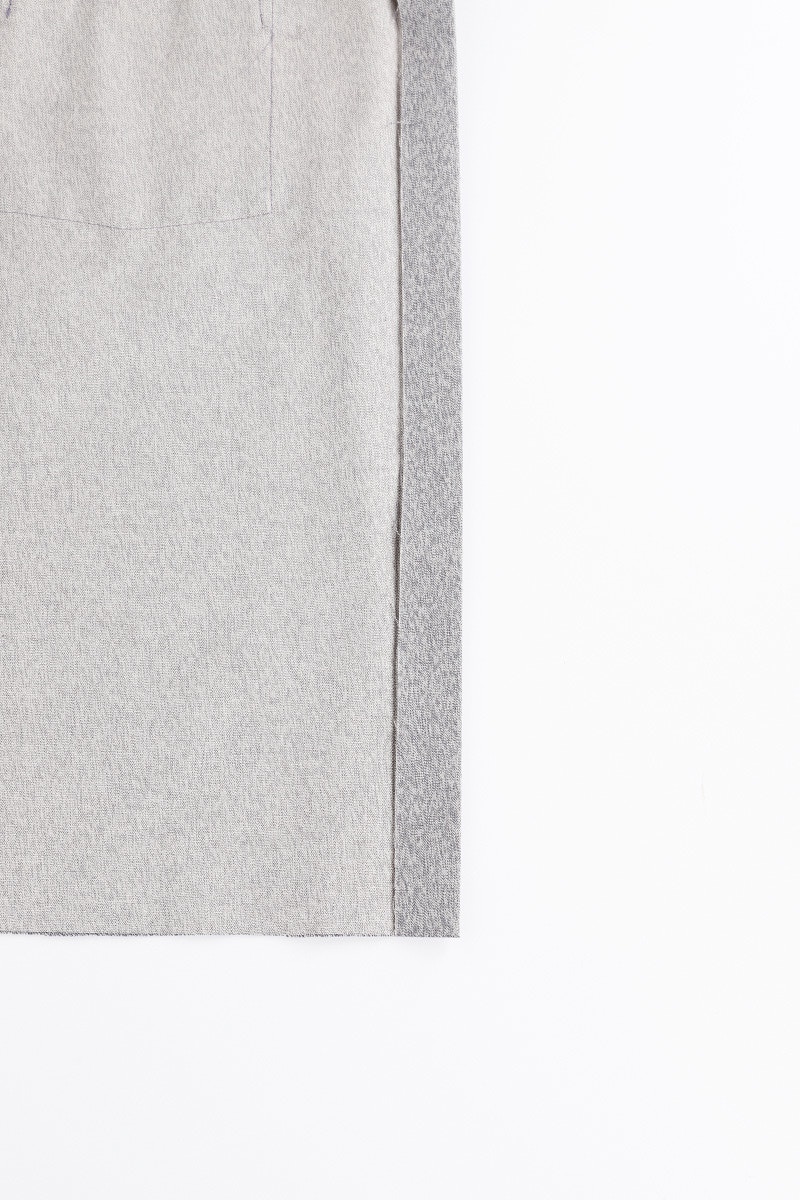
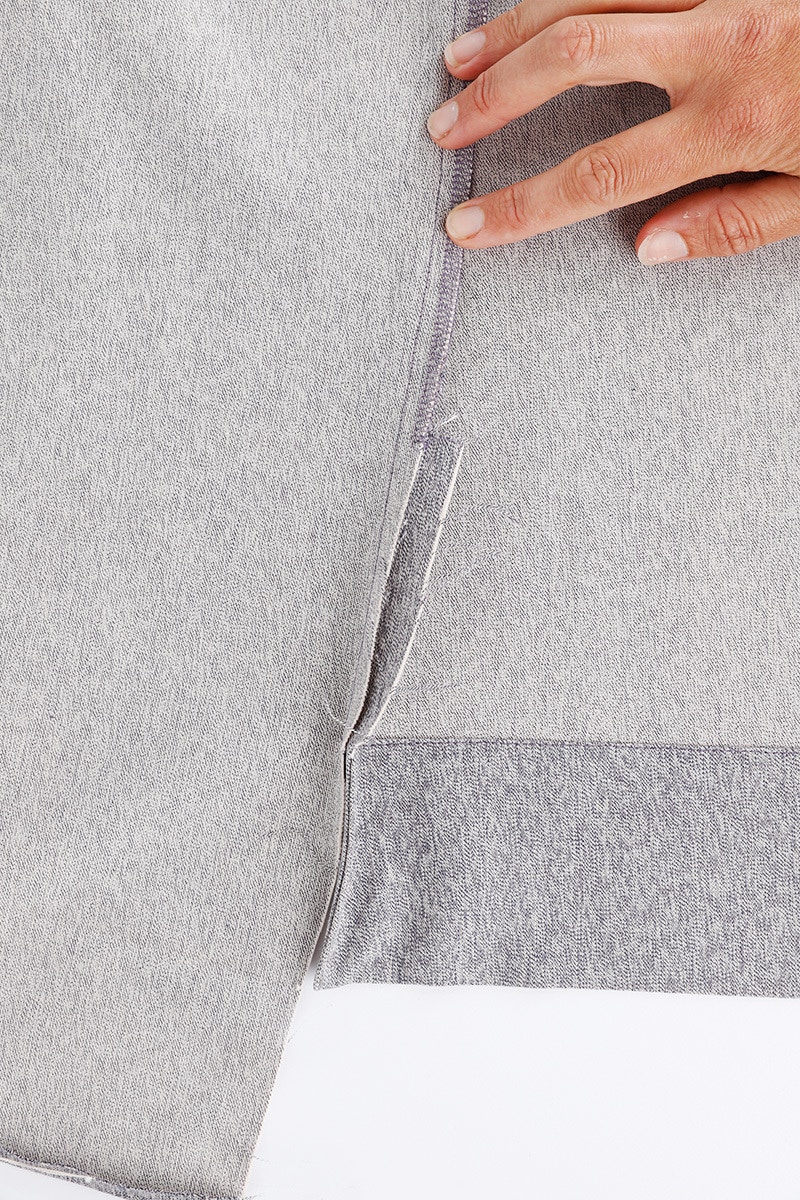
If you are sewing the dress, pin the side seams together, matching the sleeve seam, notches and + at the hem. It may help to mark the stitching line from where the vent extension starts to the +. The stitching line at this here is 2cm from the side edge on the front piece, and 1cm from the side edge on the back.

Sew the side seams together, starting at the cuff and finishing at the + where the vent opens near the dress hem. Take care that the side pocket doesn’t get caught in the seam as you sew. Now neaten the raw edge with your overlocker or serger, finishing at the top of the vent extension. Press this seam to the back and repeat for the other side.
8 — Attaching the Cuffs
If you are sewing a long-sleeved shirt or dress, attach the cuff by pinning the raw edge of the cuff piece to the wrong side of the sleeve, aligning the cuff edges with the sleeve placket opening. Sew this edge with a 1cm seam.

Press the seam allowance inside the cuff and pin the cuff closed. The edge of the cuff will just meet the previous stitching line. Then, starting at one corner, edgestitch the cuff closed. Give your cuff a press then repeat for the other side.
Next, move on to hemming your shirt or dress.
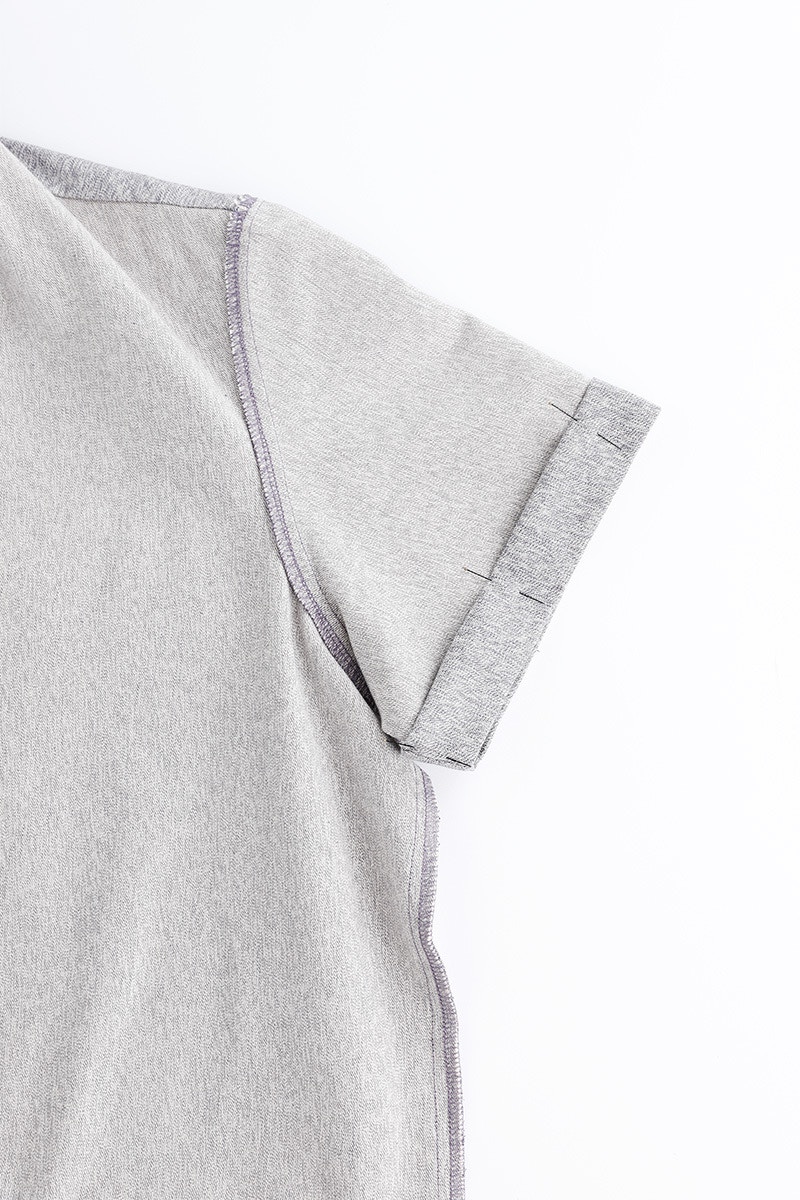

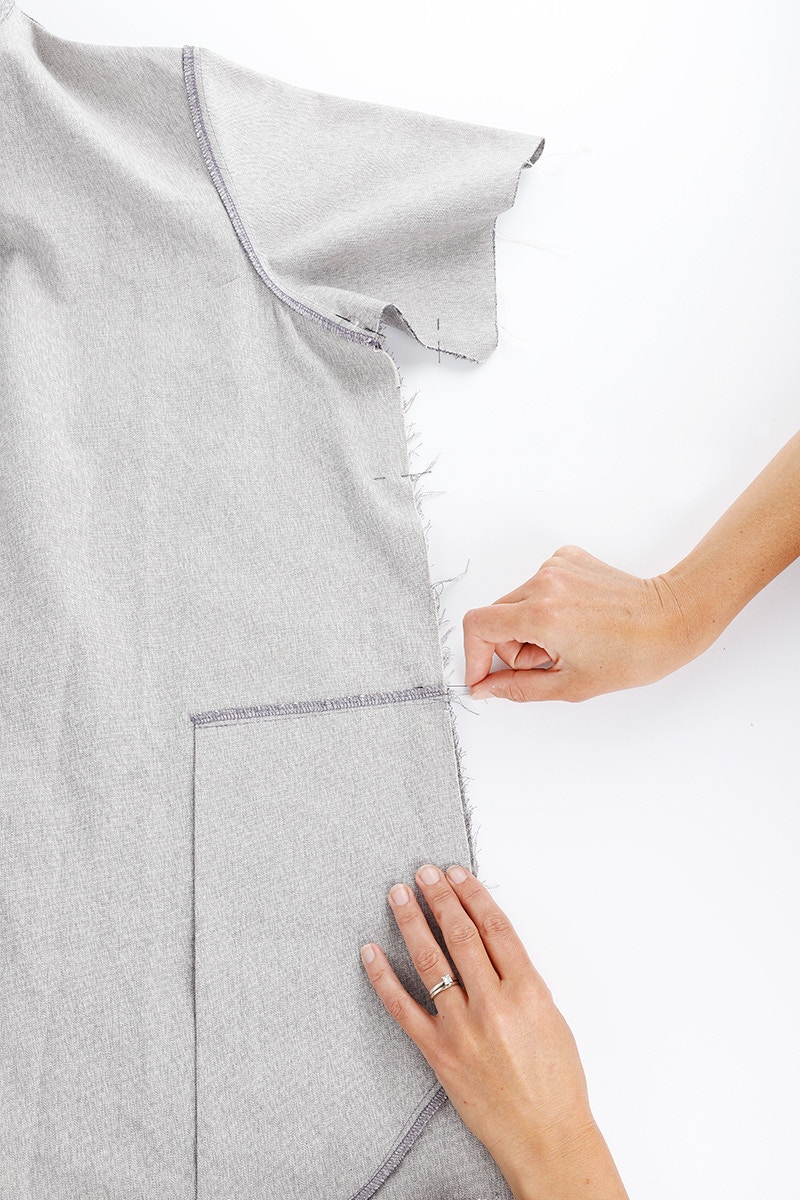
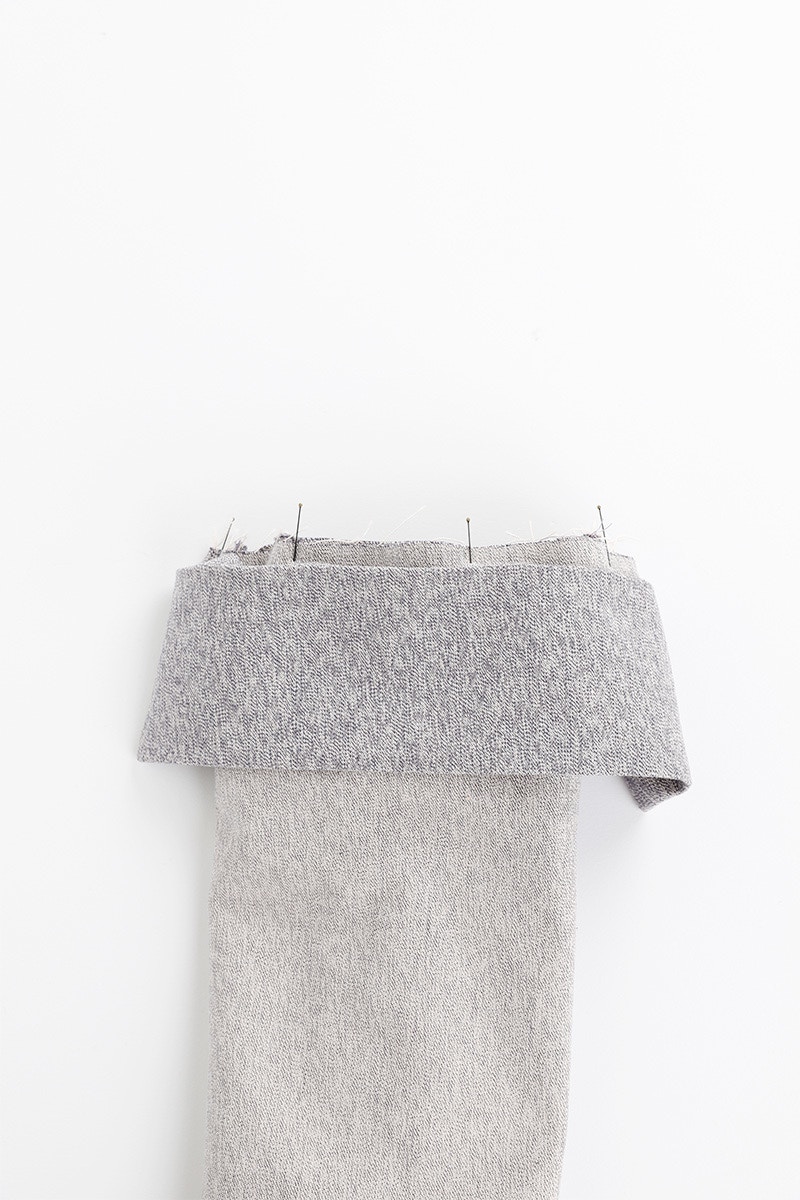
If you are sewing a short-sleeved shirt or dress fold back the 1 cm seam allowance, then another 3cm for the hem to the wrong side. Pin the sleeve hem in place then edgestitch the hem closed. You may find it easiest to sew your sleeve hems with the garment right side out.

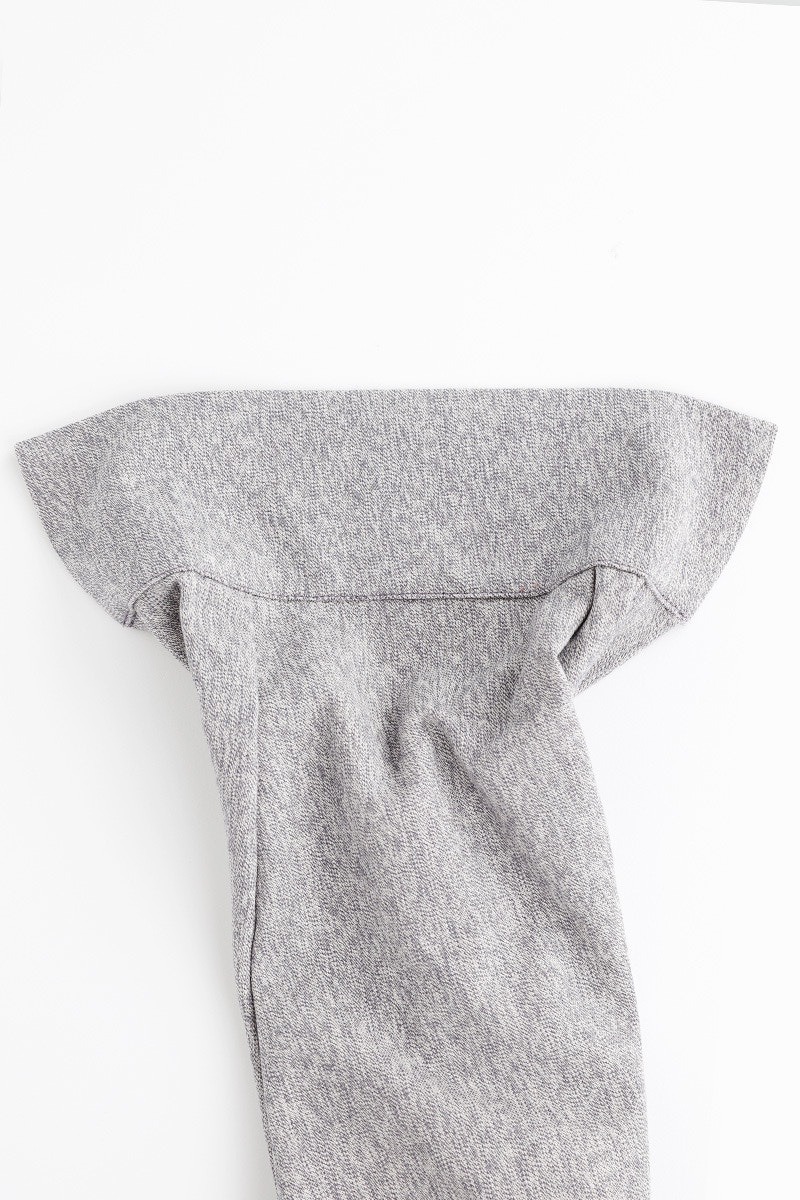
Give your sleeve hem a press and repeat for the other sleeve.
9 — Sewing the Hems
To sew the shirt hem, first, fold the centre front placket under 3cm wrong sides together, as pressed at the beginning. Then fold the centre front edge 3cm again, this time right sides together. This is the opposite to how you pressed it at the beginning.

Pin the front placket to hold it in place then stitch the front placket in place 1.2cm from the hem edge. You may wish to mark this line on before you sew. Repeat for the other side, but don't turn the hem out just yet!

The shirt hem is finished with a 6mm double folded hem. To make this easier, sew a line of stitching at 6mm, the entire length of the hem.

Next, fold back the hem 6mm to the wrong side at the centre front corner, along the line of stitching you have just sewn. Then, fold the hem under another 6mm to the wrong side. This fold will be in line with the seam you sewed at 1.2cm.
Now, holding your double folded hem in place, turn out the corner so the centre front placket is now folded to the wrong side.

You can use a point turner to ensure you get a tidy looking corner, then pin to hold the folded hem in place. Repeat for the other side.


Now it is time to sew your hem. Working from the wrong side, and starting from one corner edge stitch the hem in place. You can fold the hem as you're sewing, using the 6mm line of stitching to guide. Remember to keep your needle down when you stop to fold so your shirt doesn't move.
Alternatively, you can fold, press, and pin your entire hem before you start sewing.

Give your hem a press then move on to the final step, sewing the buttons and buttonholes!

To sew the dress hem, first, fold the centre front edge 3cm once to the wrong side.
We have interfaced the centre front edge of our dress for this example. You may not have interfacing on your dress, depending on the weight of the fabric you are using and your personal preference.
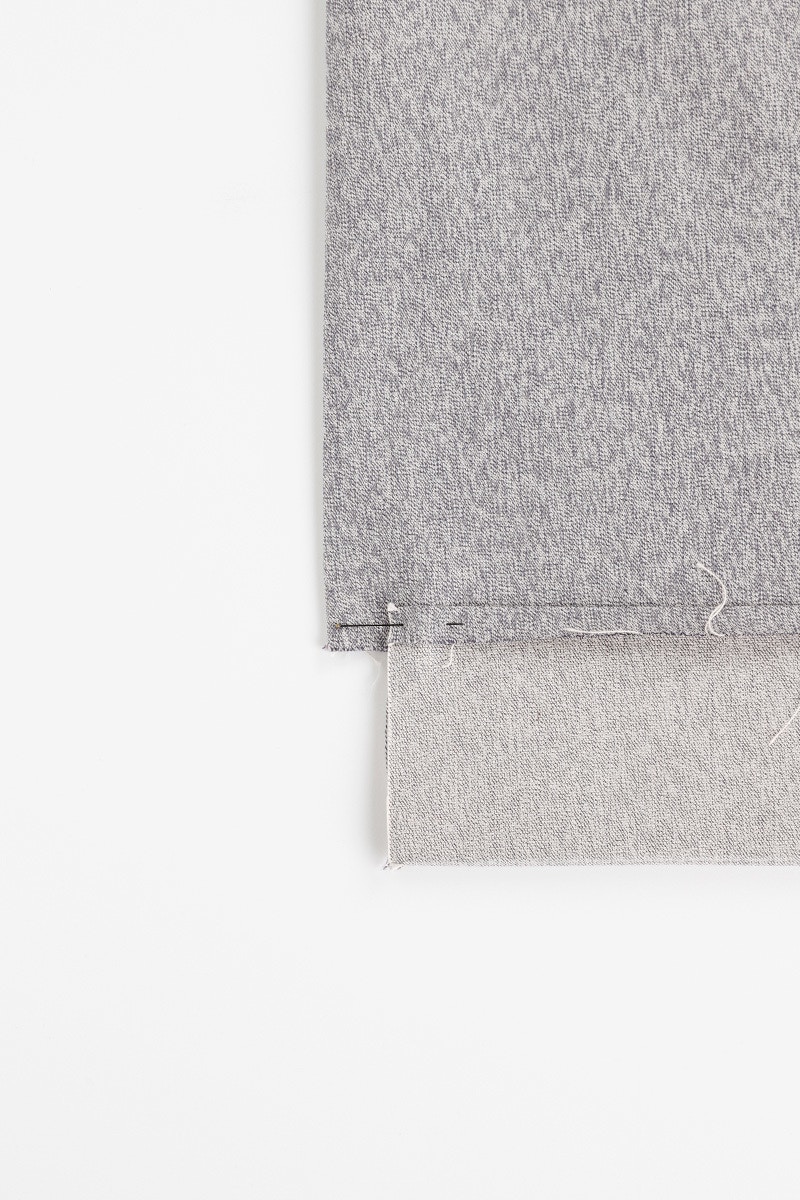
Staying at the centre front, fold back the 1cm hem seam allowance to the wrong side, then fold up another 8cm right sides together. This is the opposite direction to what you pressed at the beginning. Stitch the front edge of the hem closed with a 1cm seam, catching the seam allowance as you sew.
Now move to the front side seam and fold back the 1cm seam allowance to the wrong side, then fold up the hem 8 cm, right sides together. Sew the edge closed with a 1cm seam, catching the seam allowance as you sew.
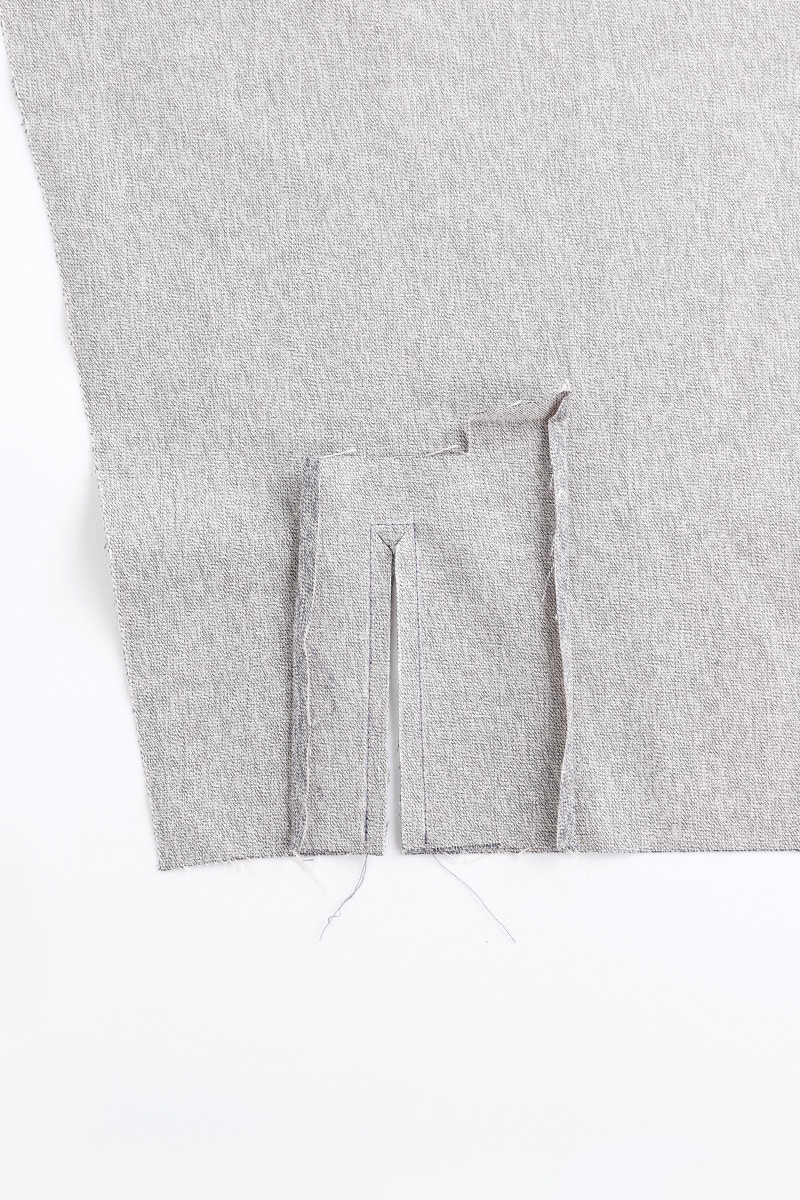
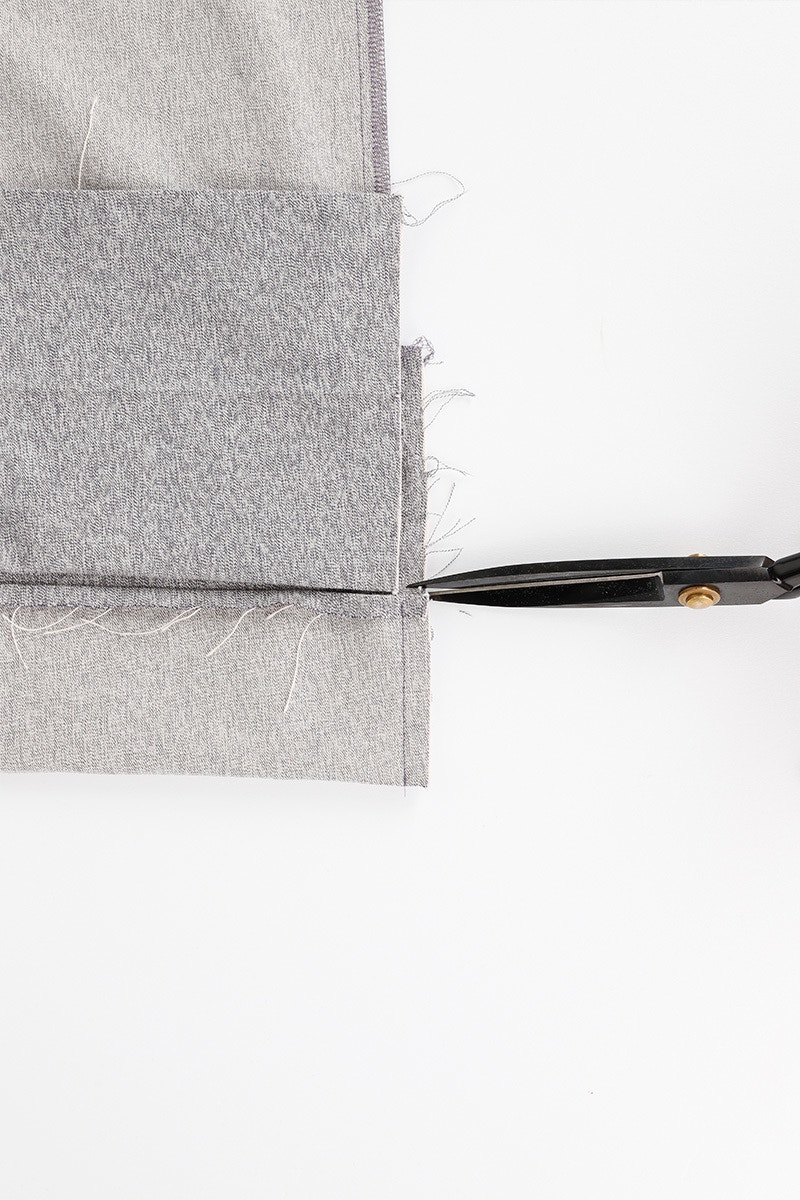
Then, carefully clip into the vent extension 1cm, just above the hem edge. Be sure to keep your back piece folded out of the way!

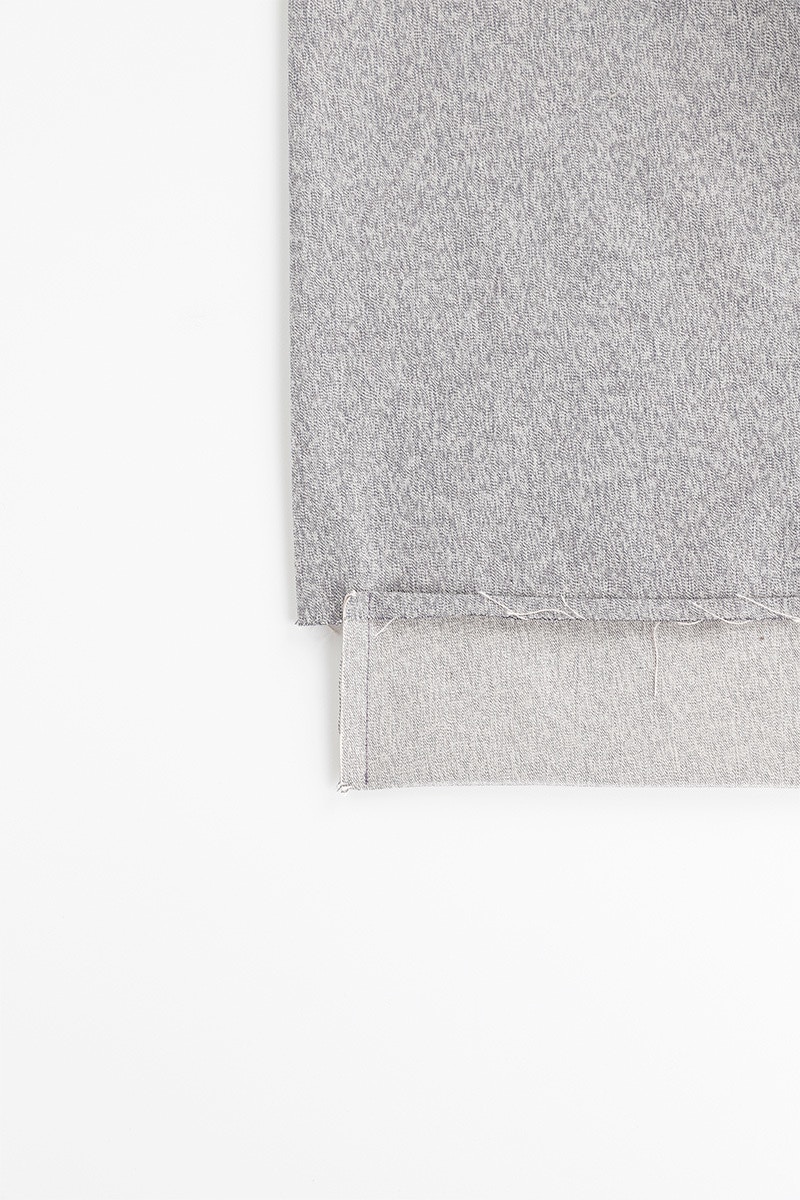
Now, turn your hem out so the right sides are together, using a point turner to help you with the corners. Keeping the 1cm seam allowance folded in, fold the entire hem up 8cm. The pressing you did at the start will help you here. Pin the hem, then edge stitch it closed, taking care not to catch your back piece.
Repeat for the other front.
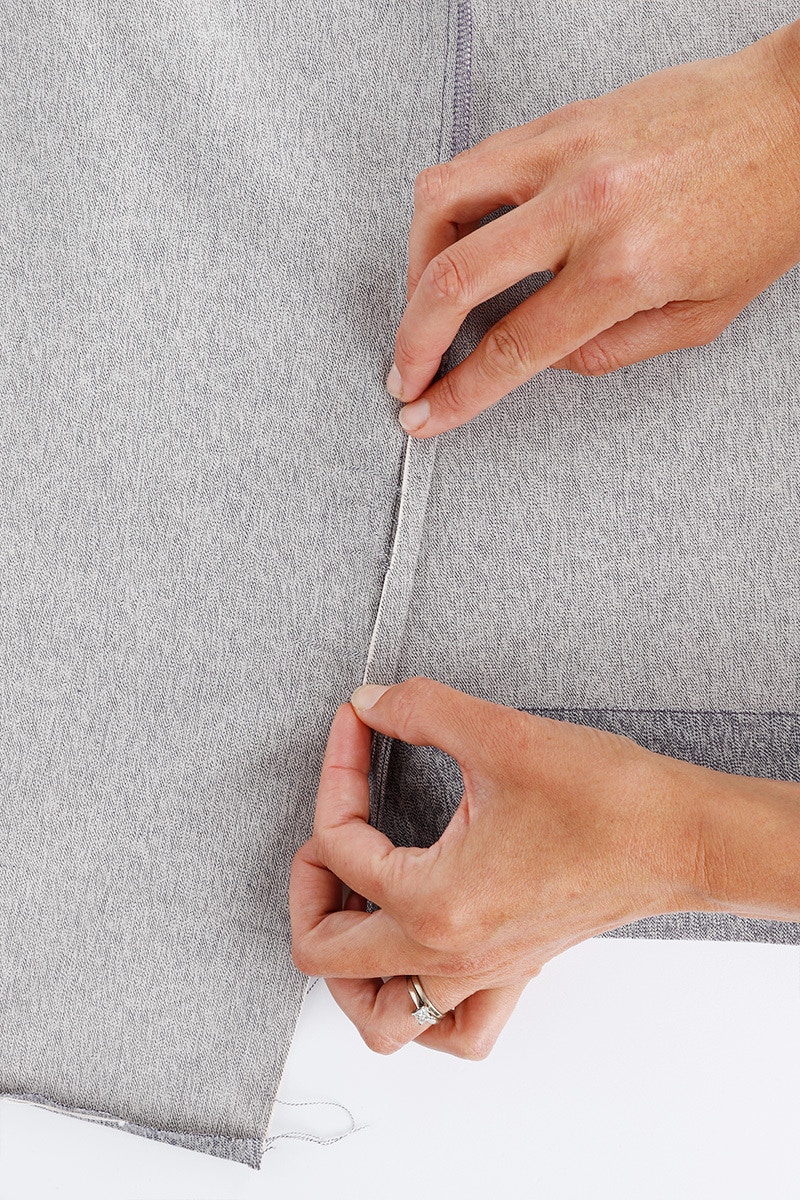
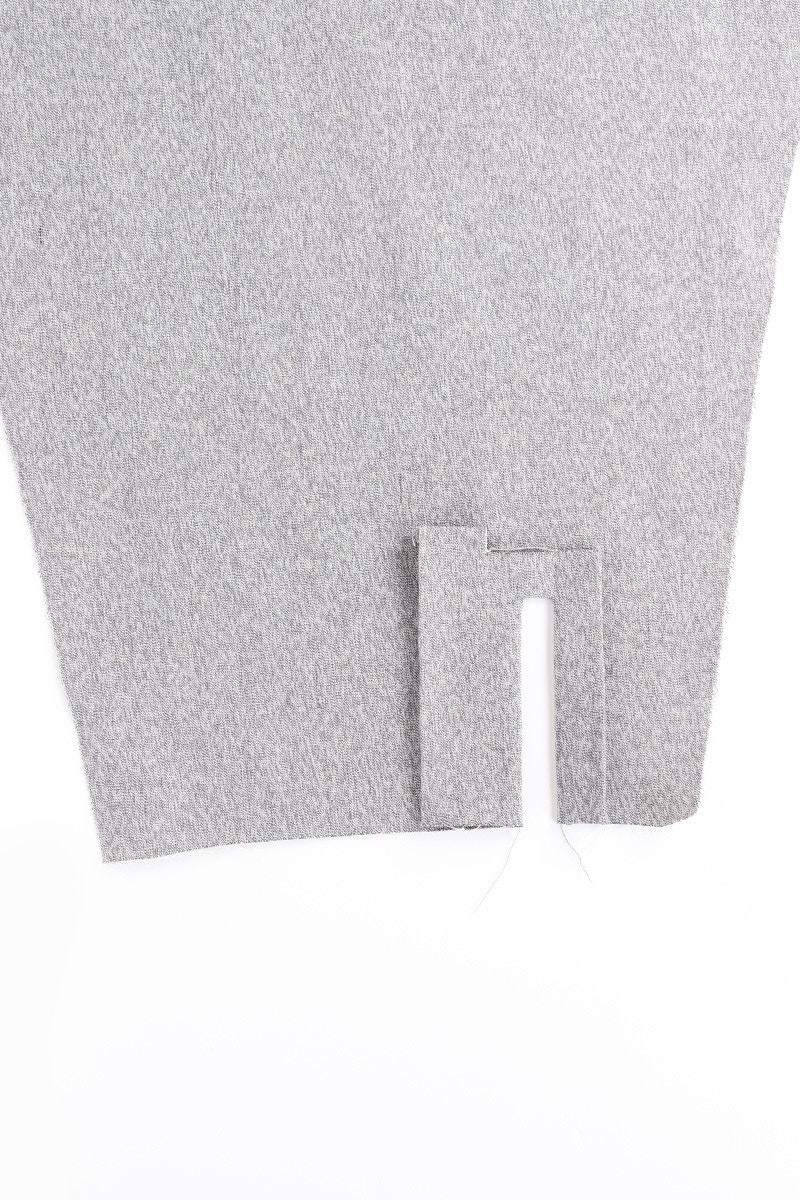
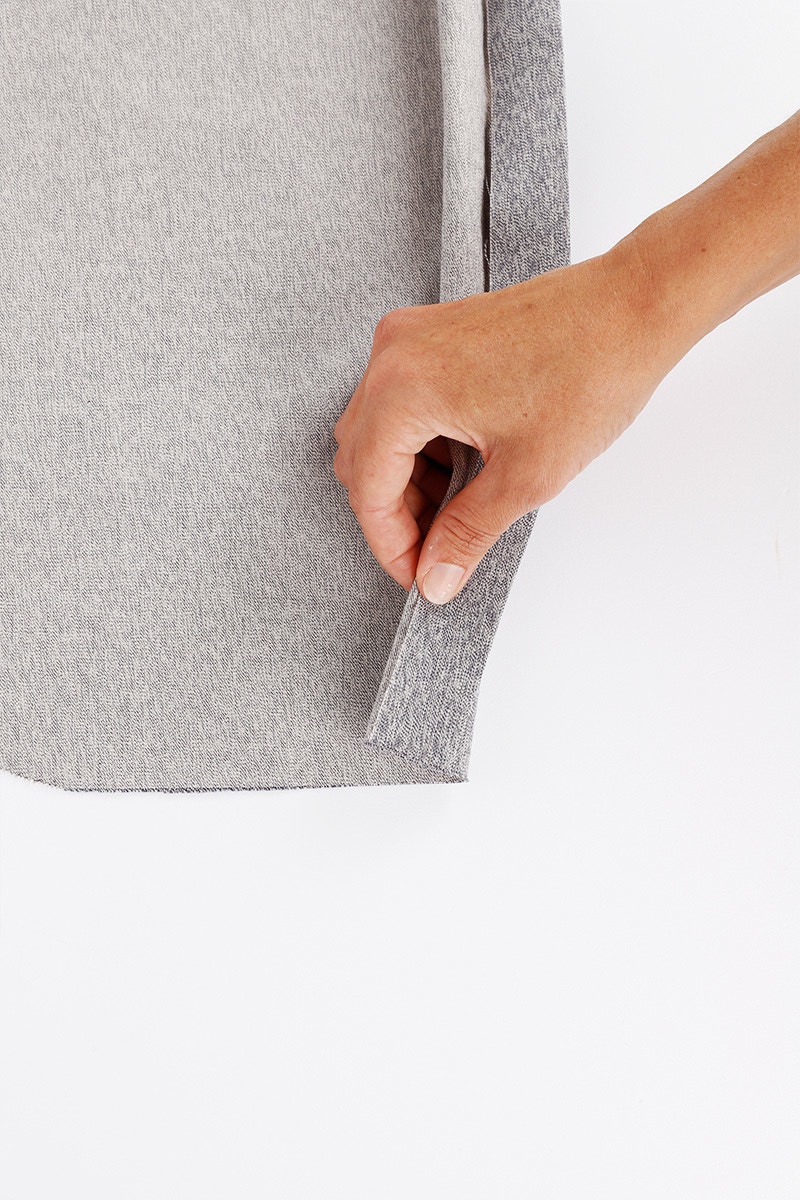
We will now finish the side vents. Wrap the front vent extension around the back side seam allowance to enclose the raw edge.


Give your folded vent a press and pin in place.
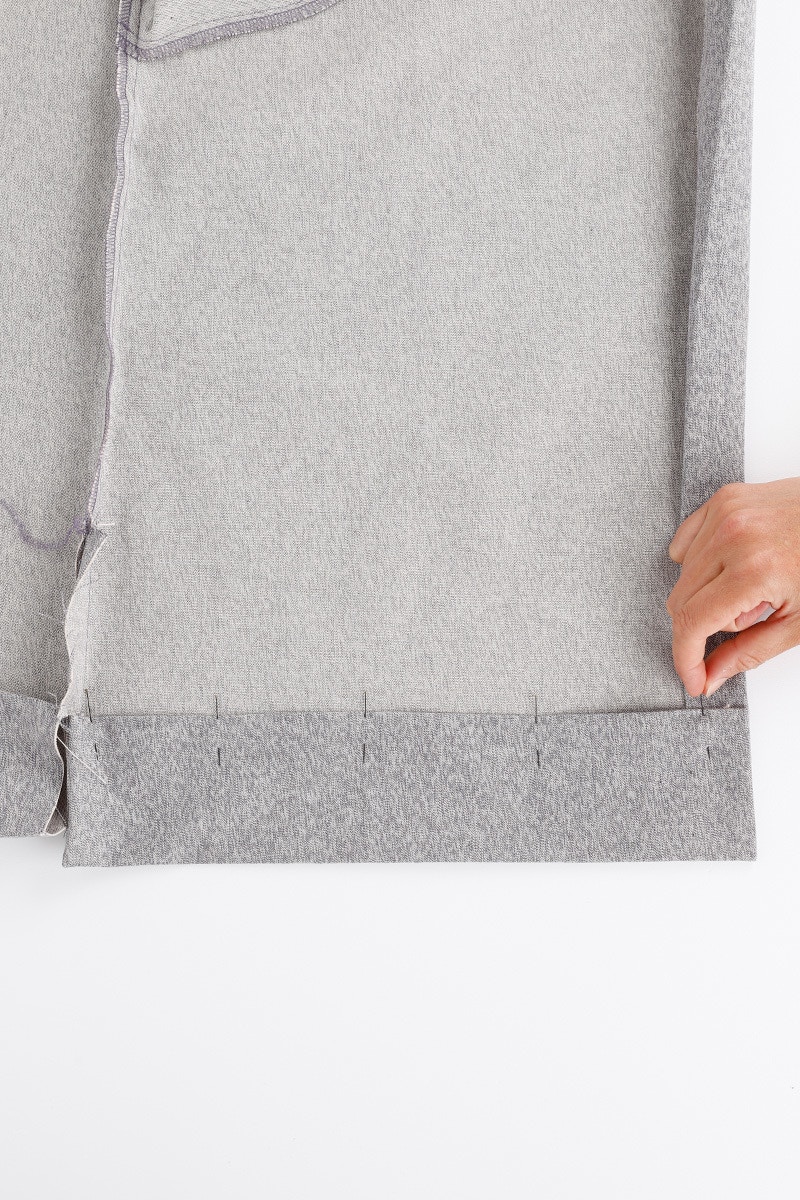
Now, fold the 1cm seam allowance to the wrong side, then fold up the 8cm seam allowance right sides together. Sew the edge with a 1cm seam, catching the seam allowance as you sew. Repeat for the other side.
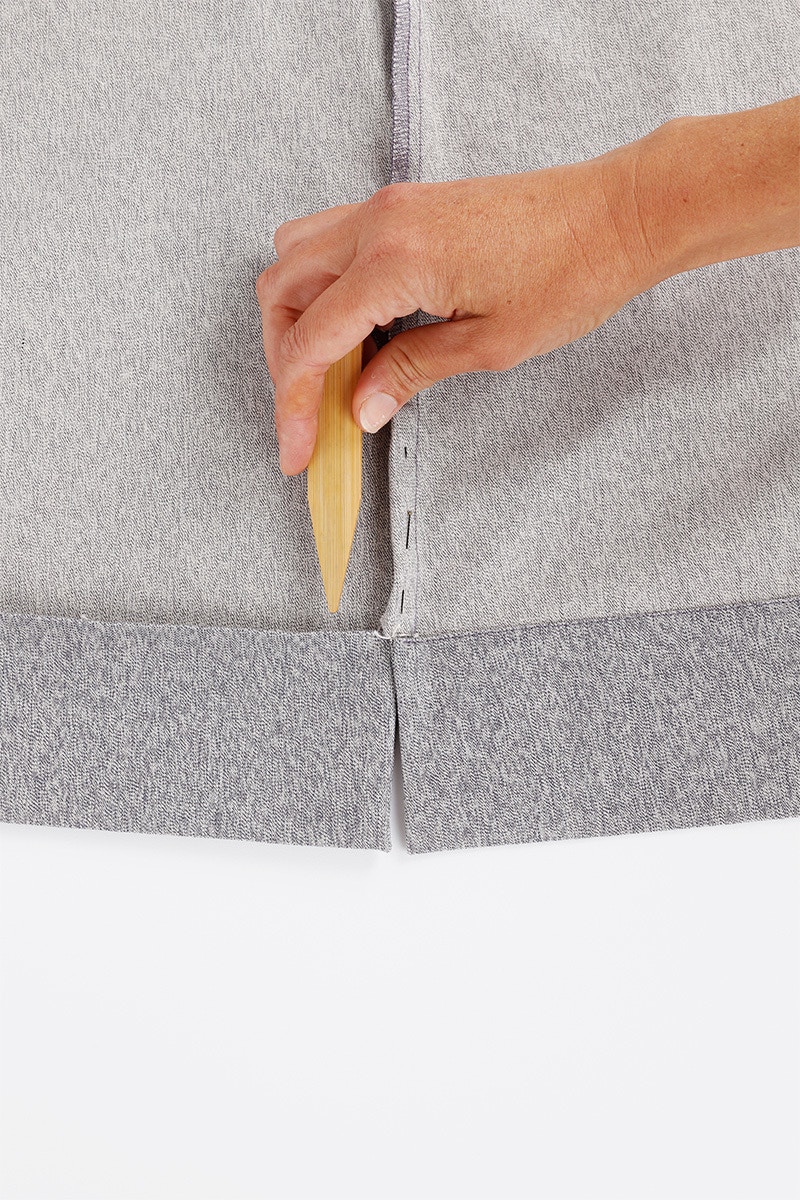
Now turn out your back hem so the wrong sides are together, using a point turner to help you.
Working with the wrong side facing up, fold the front out of the way and edge stitch the hem closed.
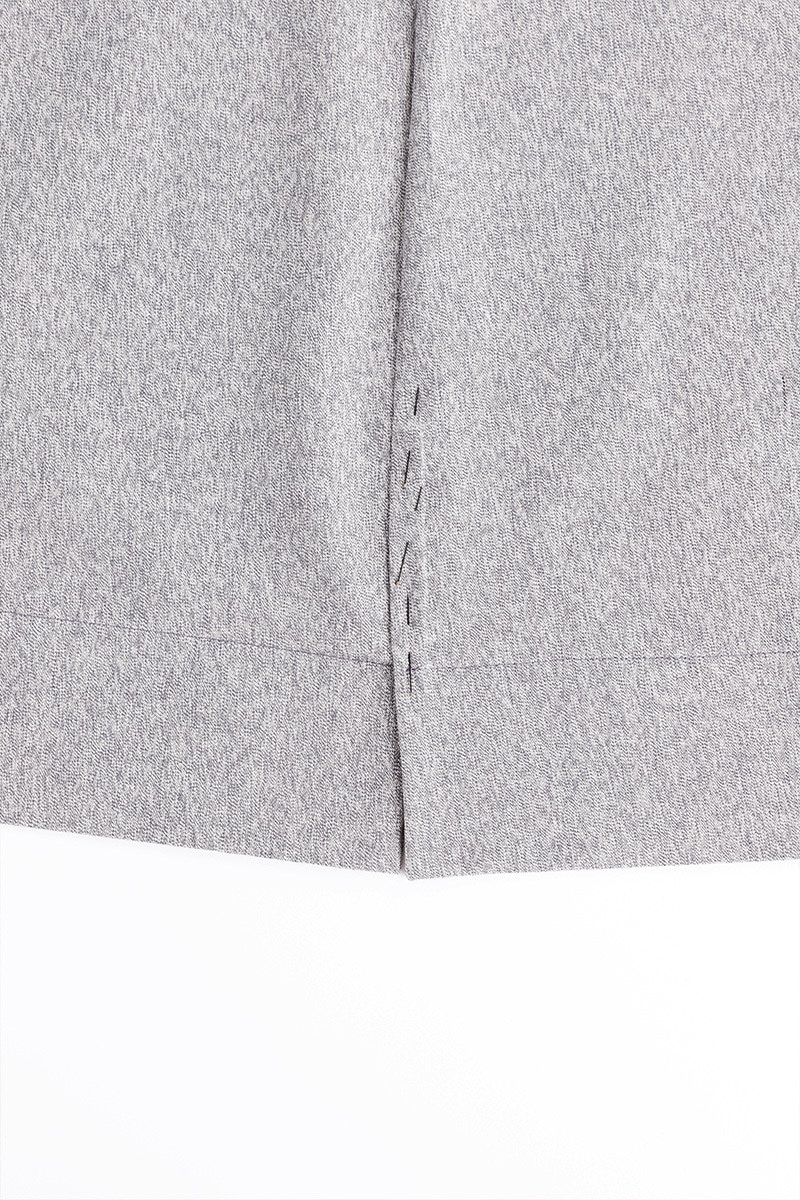
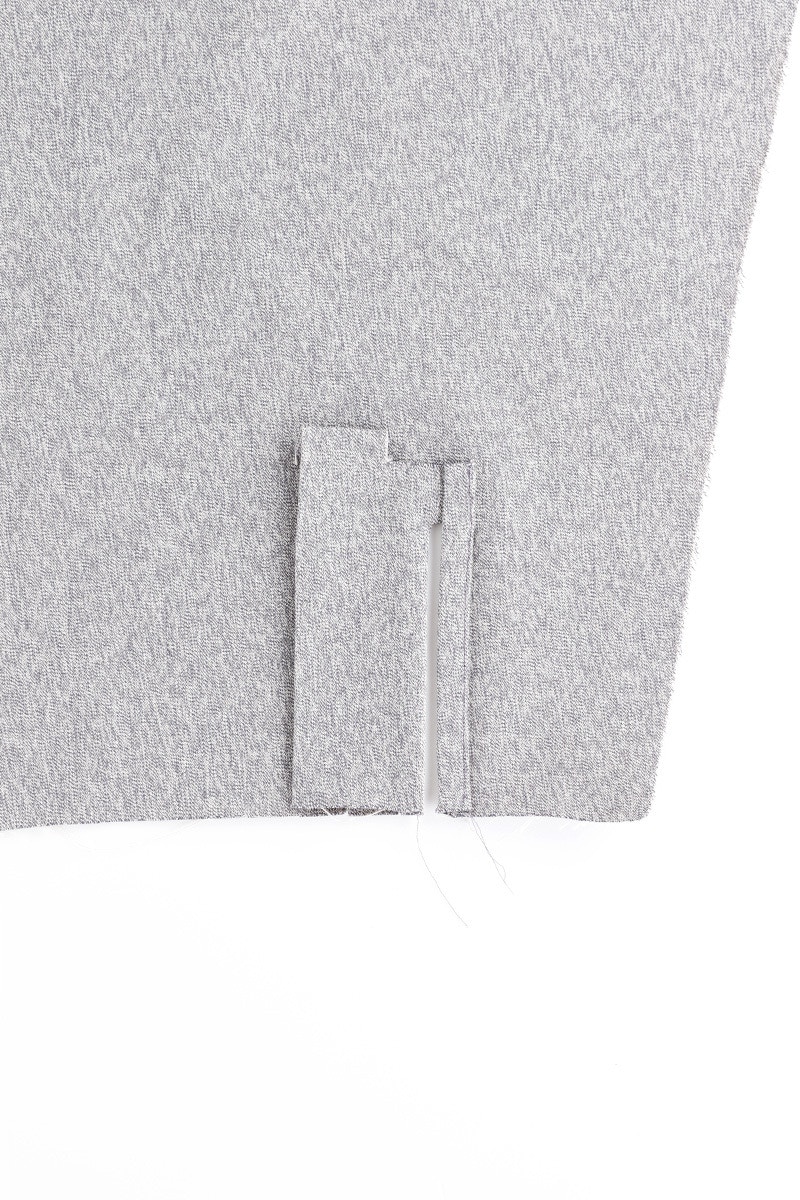
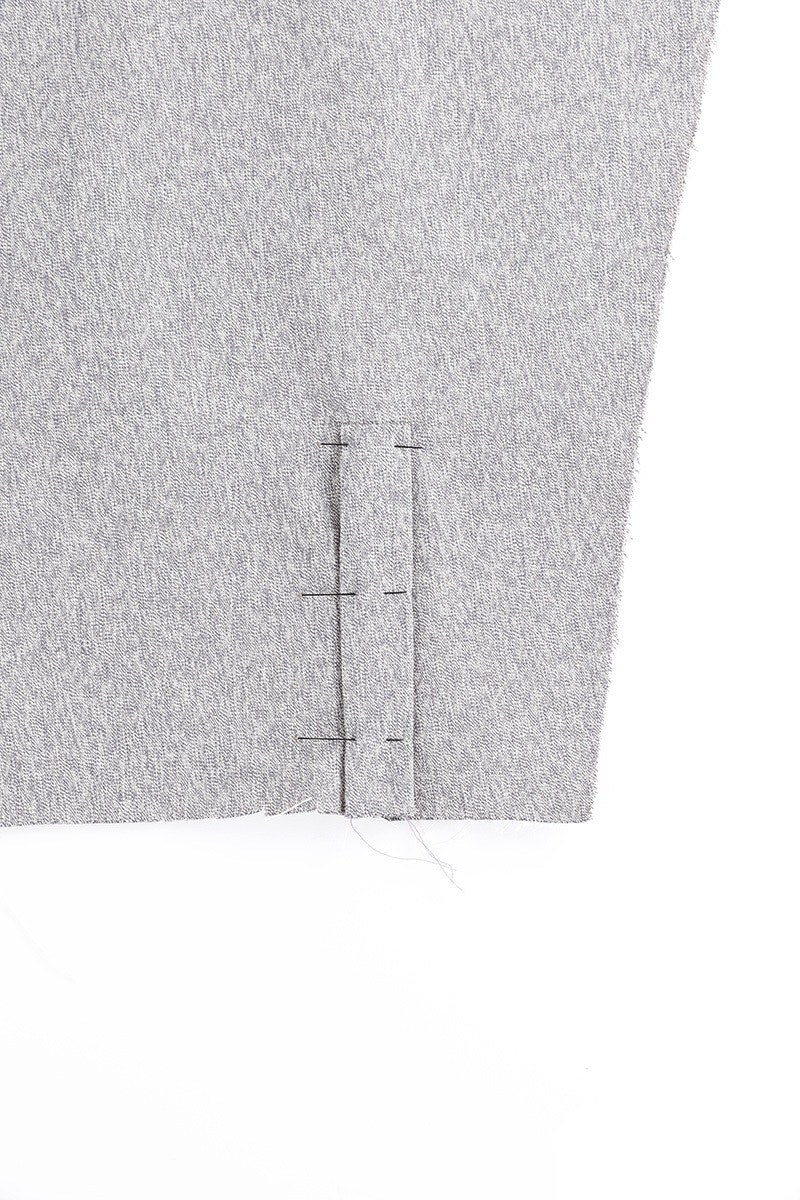
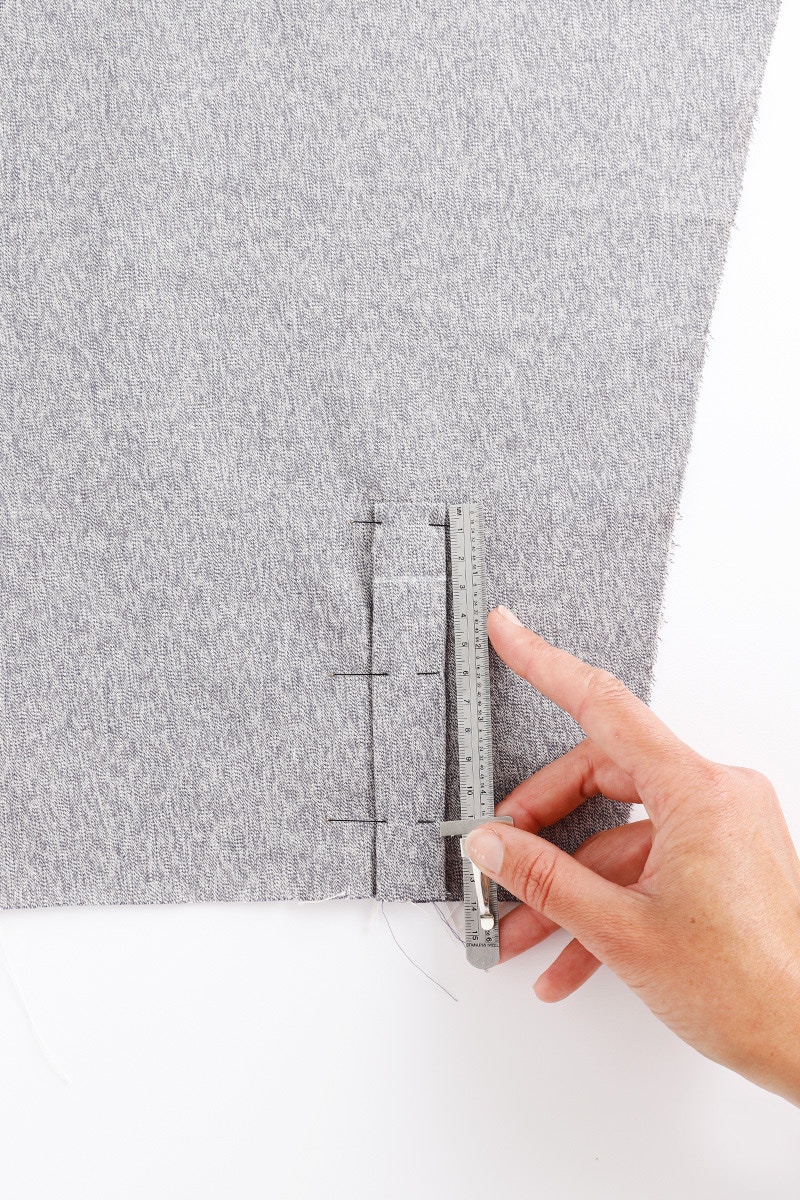
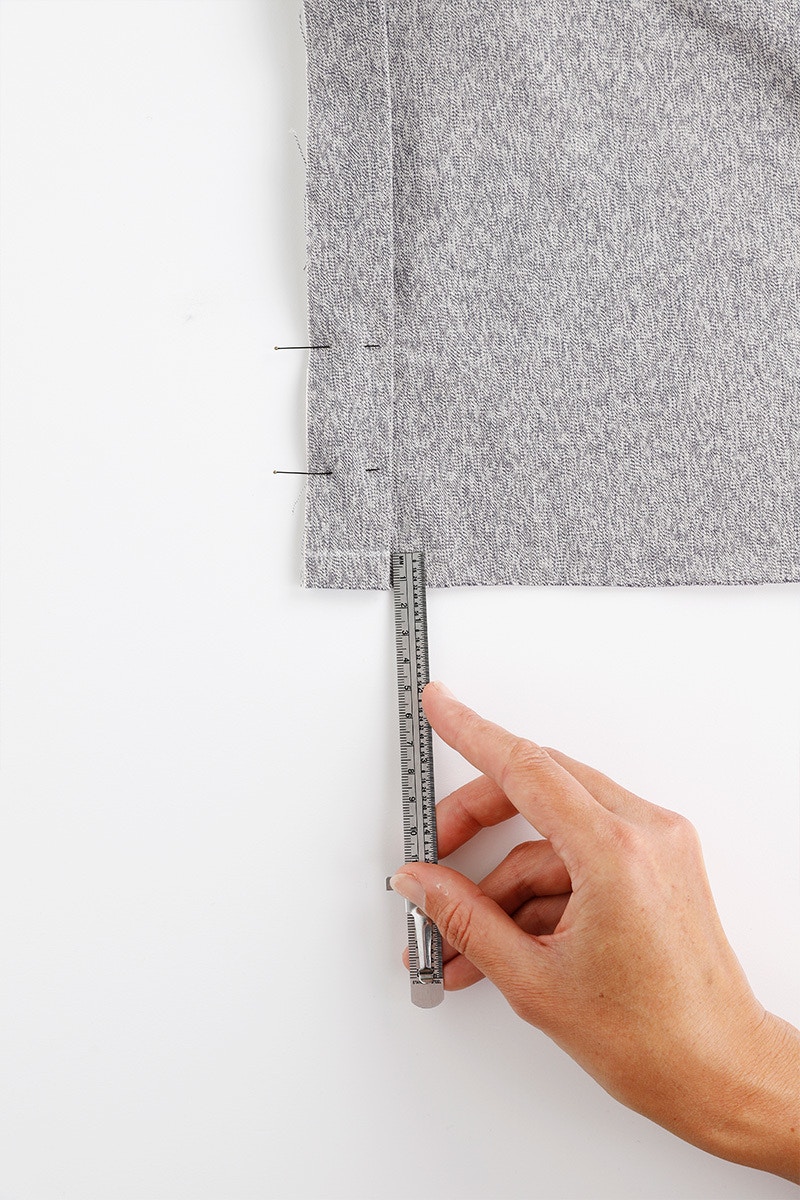
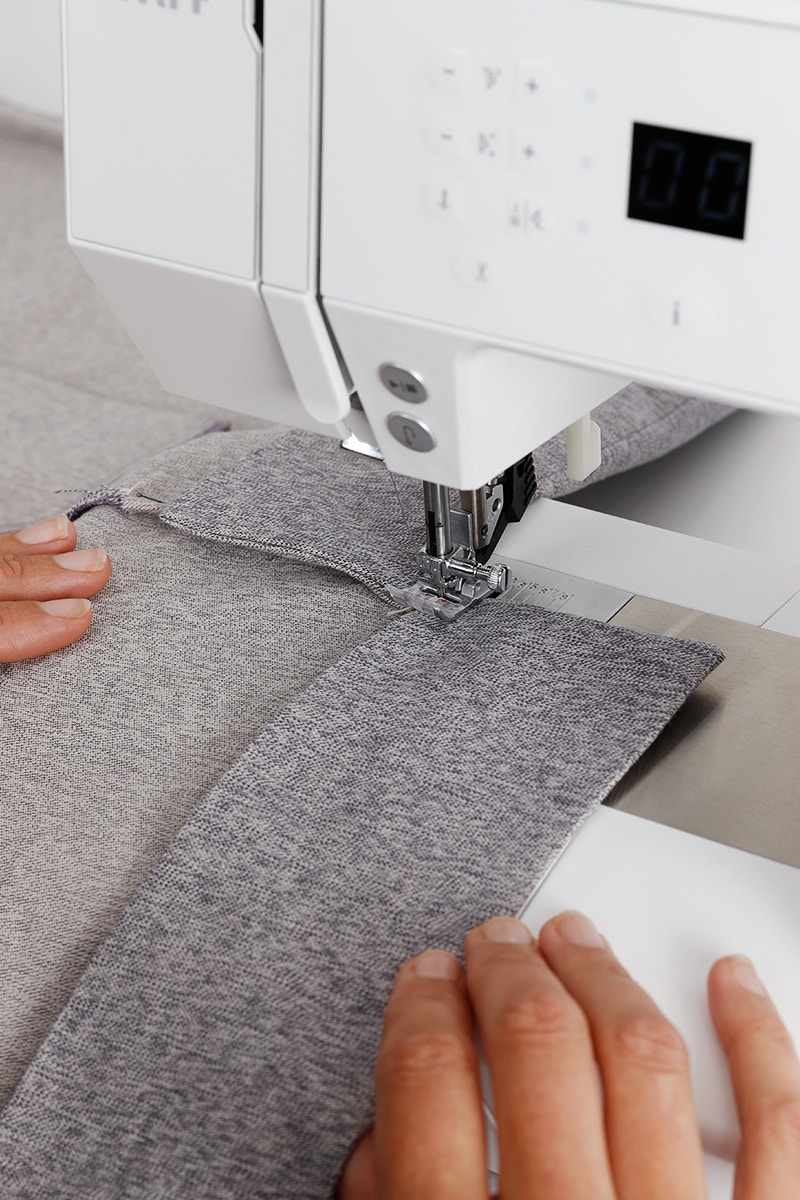
Now it is time to finish the side seams above the vent openings. The side seam allowance will go towards the back, and the vent will open towards the front. Transfer the top stitching markings from the pattern on to your garment with tailor's chalk or a fabric pen, and move your pins to the front so they are easy to remove when you are sewing. Make sure the vent extension is still wrapped around the side seam on the wrong side.
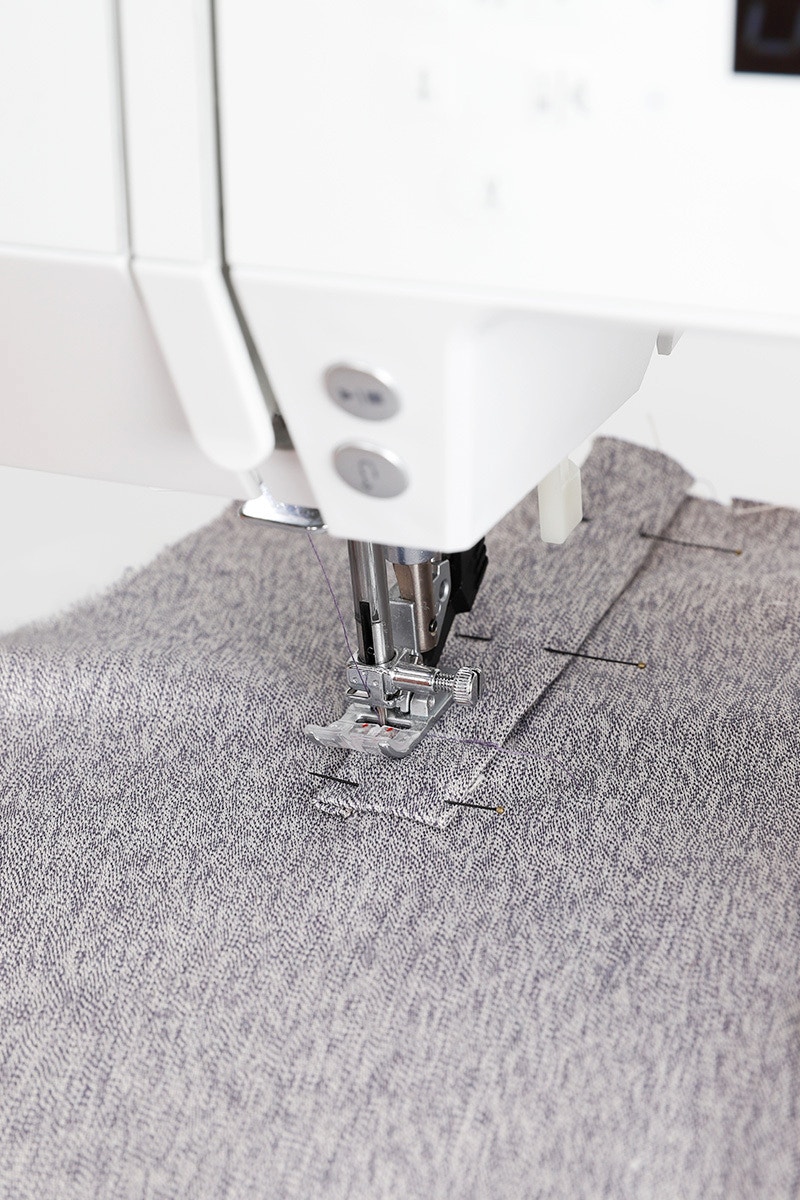
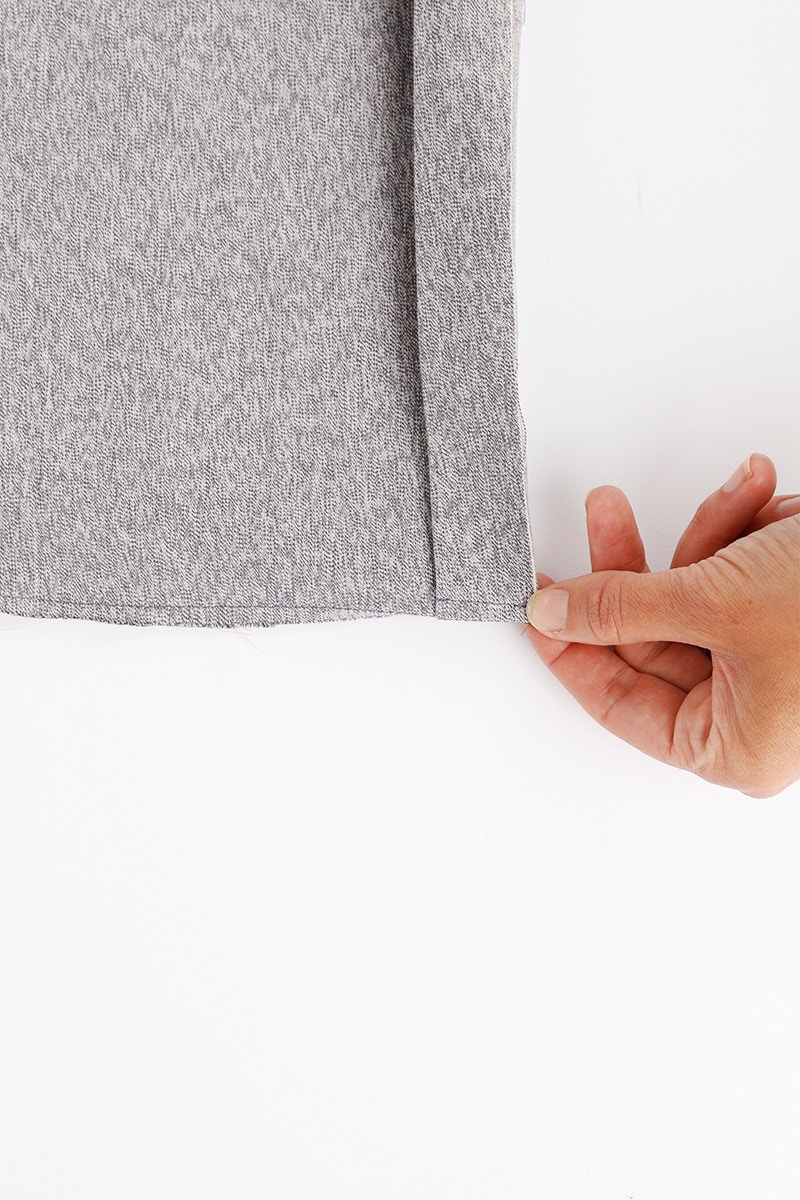
Working with the right side up, and starting at the top of the vent extension at the side seam, top stitch the vent extension in place. Run your stitching a couple of stitches past the hem seam to hold the vent in place.
Repeat for the other side then give your hem a press.
10 — Buttons, Buttonholes and Finishing!

Now it is time to sew your buttons and buttonholes.
First, mark your cuffs using the pattern piece as a guide. Sew your buttonhole according to your machine's manual. Then, sew the button opposite.


Now we will do the centre front buttons and buttonholes. The number of buttons will vary depending on which view you have made.
Mark your buttonhole placement on the right centre front, using the markings on the pattern as a guide. There are six buttons down the shirt front, and seven buttons down the dress front, excluding the collar stand. The first buttonhole sits 7.5cm from the bottom edge of the collar stand. Each buttonhole below this is spaced 10cm apart.

Sew your buttonholes according to your machine's manual and then sew on your buttons opposite.
If you prefer to garment to closure to wrap left over right, simply switch the buttons and buttonholes around.

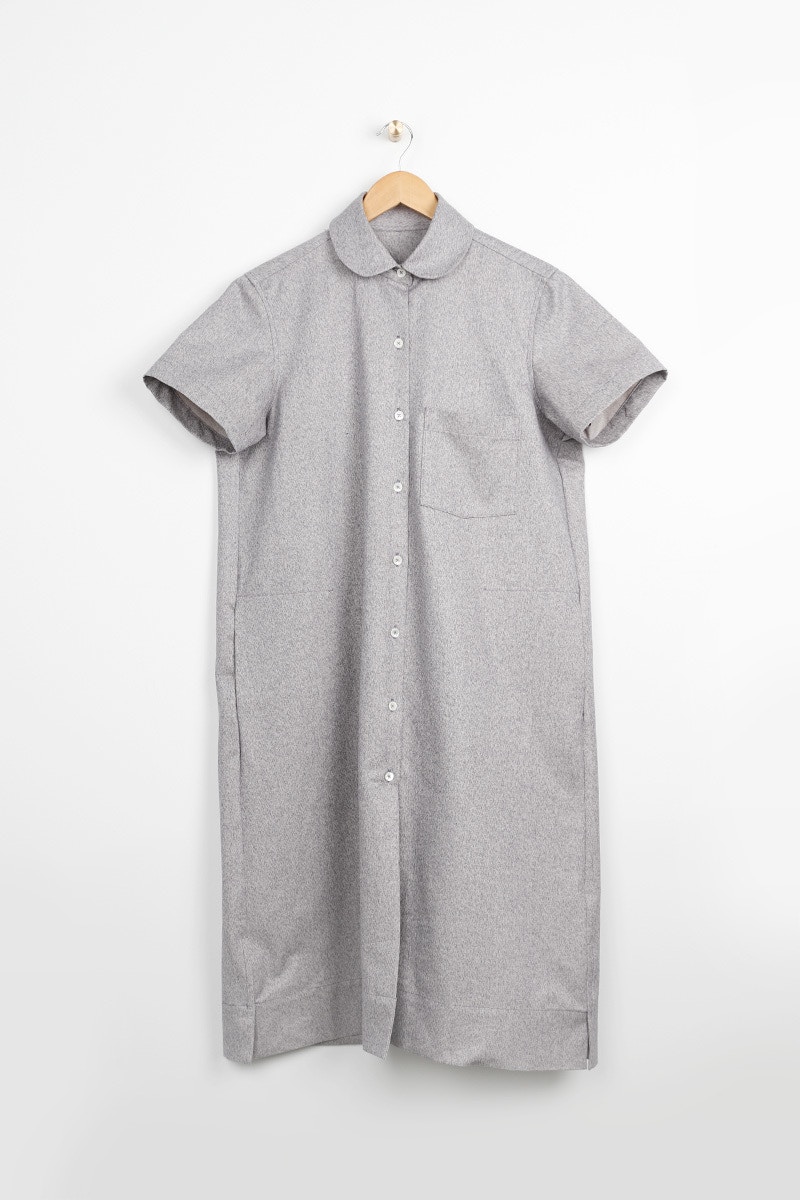
Clip any loose threads and give your garment a final press. Your Bloom Shirt or Dress is finished!
Don't forget you can always email us via patterns@thefabricstore.co.nz if you need advice!
Bloom makes from our wonderful community are also popping up over on Instagram, follow @makebytfs and use #TFSBloomShirt and #TFSBloomDress so others can check out your creations!